Sometimes, while typing on a computer keyboard, you may find yourself in a situation where you are constantly typing or clicking on the wrong key. It may be because of a change in the environment you’re used to working in, or simply because you’re out of practice. Clerical operations on a computer have advanced a lot and wasting needless time on repeated typing errors can be quite frustrating. In such scenarios, you may feel like disabling the function of that particular key/keys altogether, so that even when you accidentally click on them, it won’t affect your work. Today, we will teach you how you can disable a keyboard key of your choice in Windows 11/10.
While this may seem like a far-fetched idea to some of you, it really isn’t. All it requires for you to do is download Windows PowerToys, and the answer is just a couple of clicks from there.
Disable a specific keyboard key in Windows 11/10
Before we begin with the tutorial, it is important that you familiarize yourself with the tool you’re going to use. We will be using Keyboard Manager, which is a part of the Microsoft PowerToys bundle. PowerToys is a very useful system utility package developed by Microsoft to aid its users in various aspects of their Windows experience.
The process in place here is very simple. Here is what you need to do:
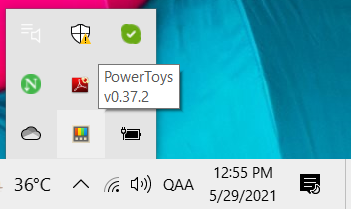
First things first, you have to download, install and launch the PowerKeys application on your computer. If you’re not able to locate its icon anywhere, you can launch it from the Taskbar too.

Upon opening the PowerToys window, click on the settings. This will take you to the main application interface.
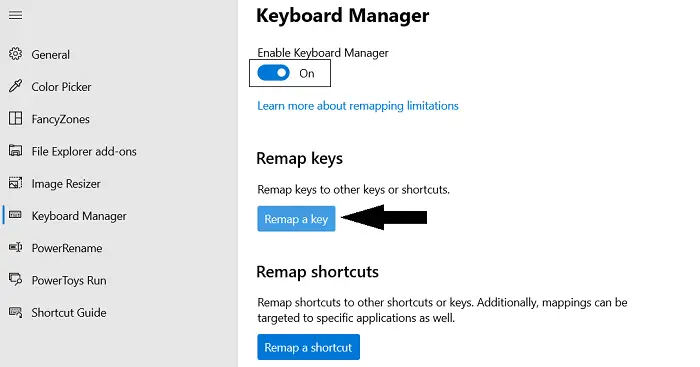
From the list of options available on the left, click on Keyboard Manager. Here, make sure that the Keyboard Manager is enabled. Under the Remap keyboard option, click on Remap a key.

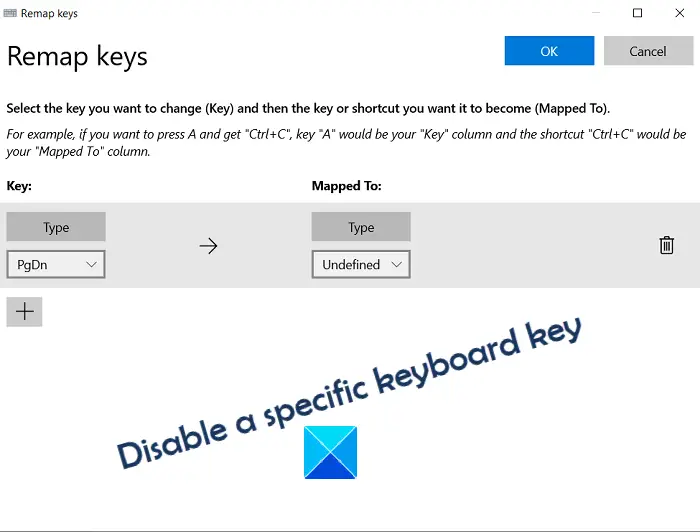
This will open a new window. In order to disable a key’s functioning, click on the ‘+’ icon. Since this utility is generally used to remap a key, you will now be provided with an option to select a key and the resultant output that you want that key’s functionality to remap to. In order to select a key, just type it on your keyboard.
In this case, we will disable the Pg Dn (Page Down) key. You have the option to restrict the operation of any key you like from here, be it an Alphabet, a number, or one of the desktop keyboard keys like Ctrl, alt, etc.)
Select the key that you want to disable (for us that is Page Down) and from the Mapped: dropdown, select Undefined. If you are having difficulties locating the option from the maze of possible keys, just type the letter ‘U’ and ‘N’ and it will appear.

Save these settings by pressing ‘Ok’ and confirm the warning message that pops up. You have now successfully disabled the functionality of a key of your choice. If you want to undo this move, just click on the Trash can icon and press Ok again.
You can use the ‘Remap a shortcut‘ option and follow the same steps as taken above to disable a Windows keyboard shortcut as well.
Using SharpKeys is another option

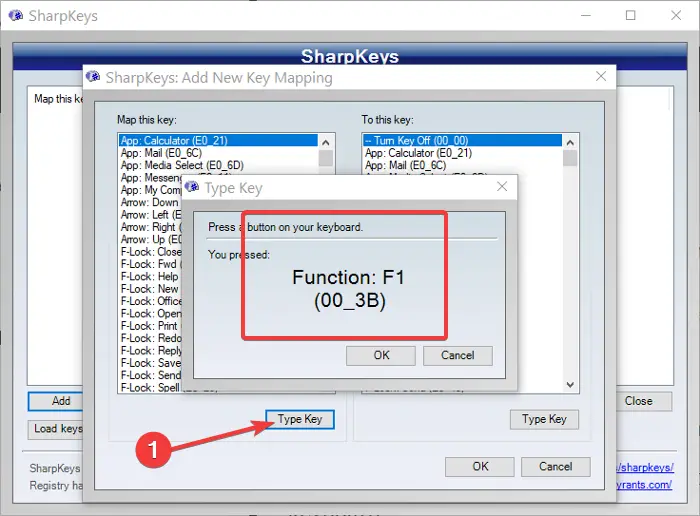
If you’re looking for a solution that works for all versions of Windows and not just Windows 11/10, you can try using SharpKeys. It offers the same service as PowerToys’ Keyboard Manager, but I feel it has a less interactive UI.
KeyTweak is another tool that can help you disable or remap keys.
I hope that you will now be able to disable a keyboard key or shortcut of your choice with ease. You can thus disable a stuck key, Home, Insert, Windows, F1 Help, or any other key in Windows 11/10.
Read next: How to reset Keyboard settings to default.