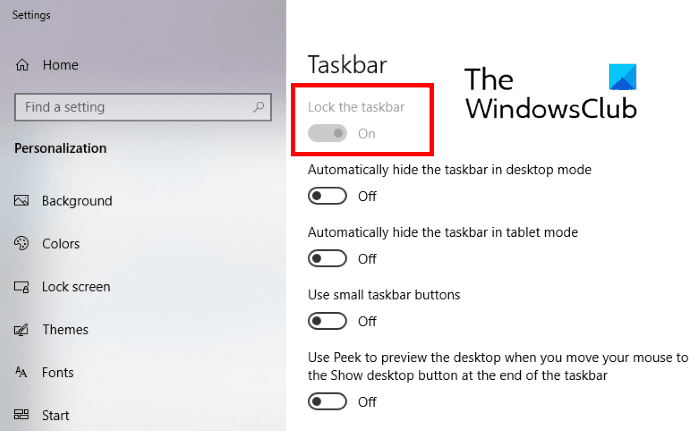
Lock the Taskbar setting prevents users from customizing the Taskbar, like changing its place, resizing it, etc. By turning this feature ON, you can prevent your Taskbar from moving or resizing accidentally. If you share your computer with another person, he can easily customize the Taskbar by toggling this feature.
If you disable this option permanently, no one can turn OFF Lock the Taskbar from settings. In this article, we will show you how to disable Lock the Taskbar option permanently in Windows 11/10.

Disable Lock the Taskbar option in Windows Settings
By disabling Lock the Taskbar option using Registry and Group Policy editors, you can prevent any other person from changing this setting. This post will also help you if you find that the Lock The Taskbar option is greyed out.
Using Local Group Policy Editor
Windows 11/10 Home Edition does not come with the Local Group Policy Editor. Hence, if you are a Windows 11/10 Home user, you can skip this method.

Follow the below-listed steps:
- Launch the Run dialog box, type
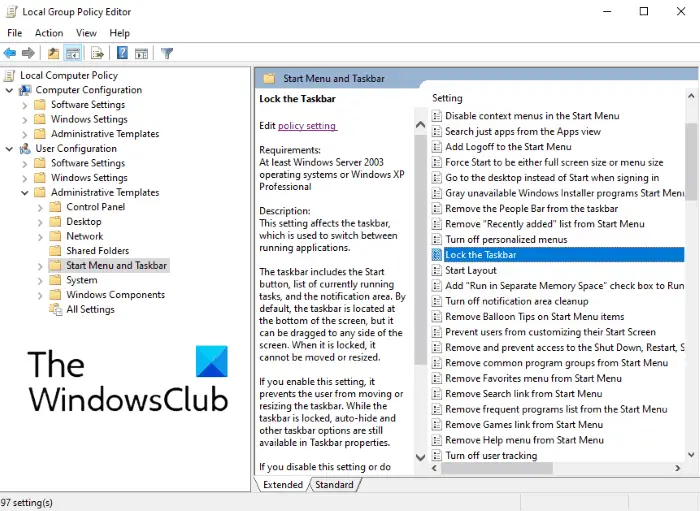
gpedit.mscin it and click OK. - Now, double-click on User Configuration to expand it, then expand Administrative Templates and select Start Menu and Taskbar.
- On the right side, you will find an option, Lock the Taskbar. Double-click on it and select Enabled.
- Click Apply, then click OK to save the settings.
After enabling this setting, the Lock the Taskbar option will be grayed out. If you do not see any changes on your computer, restart it.
To revert the changes, repeat the first four steps and select either Disabled or Not Configured.
Using the Registry Editor
You can use Windows Registry to modify the settings on your computer. Follow the steps listed here carefully, as any mistake can cause a serious error in your system. Before you proceed, it is suggested to create a backup of the registry so that you can recover it later if any problem occurs.

To disable the setting, go through the following instructions:
Launch the Run dialog box by pressing Win + R keys, type regedit, and click OK. Click Yes if the UAC window is prompted.
Copy the following path, paste it into the address bar of the Registry Editor, and press Enter.
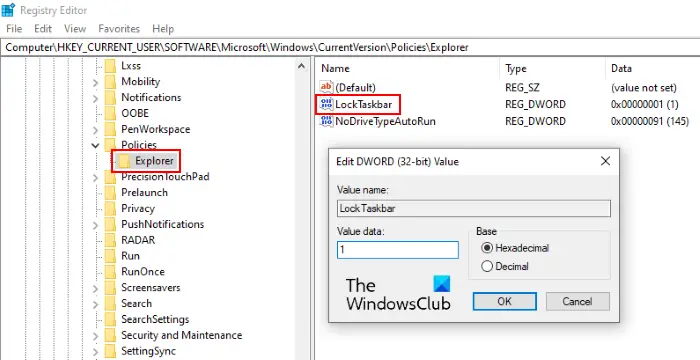
HKEY_CURRENT_USER\SOFTWARE\Microsoft\Windows\CurrentVersion\Policies\Explorer
Select Explorer key on the left side.
Right-click on the right side and select “New > DWORD (32-bit) Value.” Name this newly created value as LockTaskbar.
Double-click on LockTaskbar and set Value data to 1. When you are done, click OK to save the settings.
Close the Registry Editor and open the Taskbar settings. There, you will see that the Lock the Taskbar setting has been grayed out. If you do not see these changes, restart your computer.
To enable the Lock the Taskbar option, go back to step 7 and set Value data to zero. If this does not work, delete the LockTaskbar value from the registry.
That’s it. Let us know if you have any questions.
How do I unlock the Taskbar in Windows 11/10?
To unlock the Taskbar, in Windows 10, right-click on it and then uncheck the Lock the Taskbar option. In Windows 11, by default the taskbar will always be locked and you cannot adjust it.
Related posts:
Leave a Reply