Windows 11/10 notifies you of each unread notification sent by an app. However, if you do not want to get such things, you can disable notifications from apps and other senders using this tutorial. It is possible to turn off these notifications using the Windows Settings, Local Group Policy Editor, and Registry Editor.
Disable notifications from apps and other senders in Windows 11/10
Windows 11
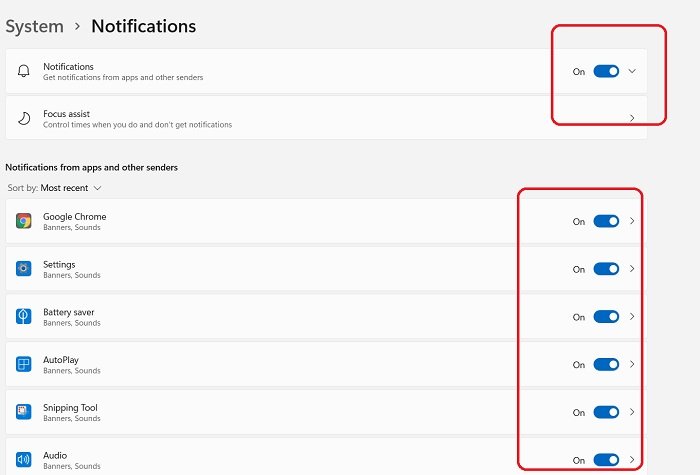
With Windows 11, the number of notifications has actually increased and this might be annoying to some. Well, thankfully we can turn the notifications off.
- Go to Settings from the Start Menu, alternatively, you can also press Win+I to open the Settings directly.
- Go to System and then click on Notifications.
- The Notifications are kept On by default but you can easily turn it Off if you want to.
- You can also adjust the notification settings for all the apps on your PC separately.
Windows 10
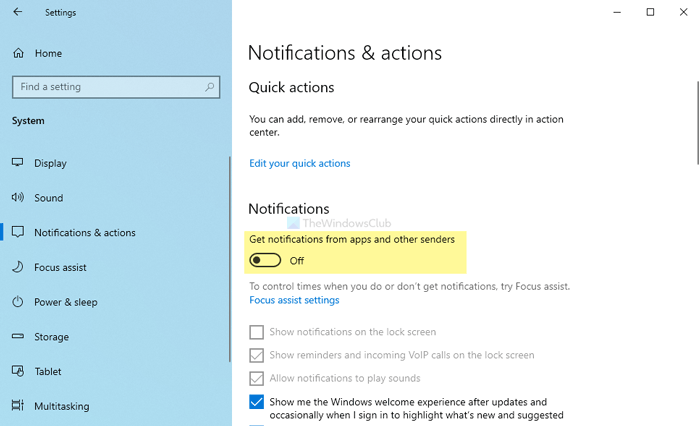
To enable or disable notifications from apps and other senders, follow these steps-
- Press Win+I to open the Windows Settings.
- Go to System > Notifications & actions.
- Toggle the Get notifications from apps and other senders button.
You have to open the Windows Settings panel on your computer. For that, press Win+I together. Once it is opened, go to System > Notifications & actions.
Here you can an option called Get notifications from apps and other senders. Toggle the respective button to disable notifications from apps and other senders.
Once you have completed the last step, you won’t receive any toast notifications in Action Center. In addition, the lock screen will not show notifications, reminders, or incoming VoIP calls, and it will not play notification sounds.
Read: Enable or Disable Toast Notifications for Network Usage, Lock Screen, Tiles in Windows.
Turn off notifications from apps and other senders using Group Policy
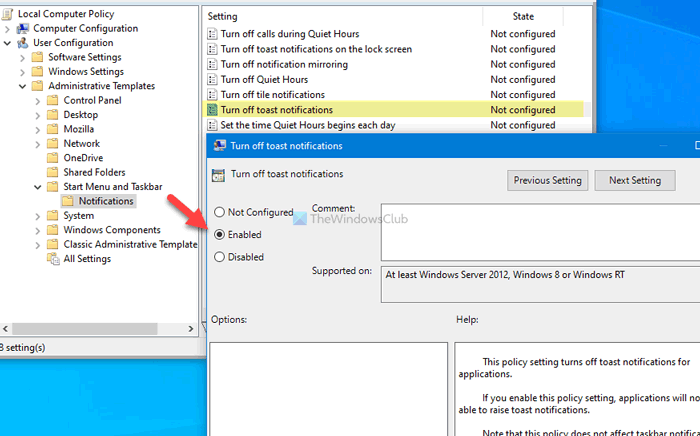
To turn off notifications from apps and other senders using Group Policy, follow these steps-
- Press Win+R to open the Run prompt.
- Type gpedit.msc and hit the Enter button.
- Go to Notifications in User Configuration.
- Double-click on the Turn off toast notifications setting.
- Select the Enabled option.
- Click the OK button.
Let’s find out more about these steps.
At first, you have to open the Local Group Policy Editor. For that, press Win+R, type gpedit.msc, and hit the Enter button. Once it is opened on your computer, navigate to the following path-
User Configuration > Administrative Templates > Start Menu and Taskbar > Notifications
Double-click on the Turn off toast notifications button on the right-hand side and select the Enabled option.
Click on the OK button to save the change.
As mentioned earlier, you can do the same using the Registry Editor. However, it is recommended to create a System Restore point before following the REGEDIT method.
Read: How to turn off App Notifications using Registry Editor.
Disable notifications from apps and other senders using Registry
To disable notifications from apps and other senders using Registry, follow these steps-
- Press Win+R to display the Run window.
- Write regedit and hit the Enter button.
- Click on the Yes option.
- Navigate to CurrentVersion in HKEY_CURRENT_USER.
- Right-click on CurrentVersion > New > Key.
- Name it as PushNotifications.
- Right-click on it > New > DWORD (32-bit) Value.
- Name it as NoToastApplicationNotification.
- Double-click on it to set the Value data as 1.
- Click the OK button.
To get started, you need to open Registry Editor on your PC. For doing that, press Win+R to display the Run window, type regedit, and hit the Enter button. If the UAC prompt appears, click on the Yes option.
Next, navigate to the following path-
HKEY_CURRENT_USER\SOFTWARE\Policies\Microsoft\Windows\CurrentVersion
Here you have to create a key. For that, right-click on CurrentVersion, select New > Key and name it as PushNotifications.

After that, right-click on the PushNotifications key, select New > DWORD (32-bit) Value, and name it as NoToastApplicationNotification.
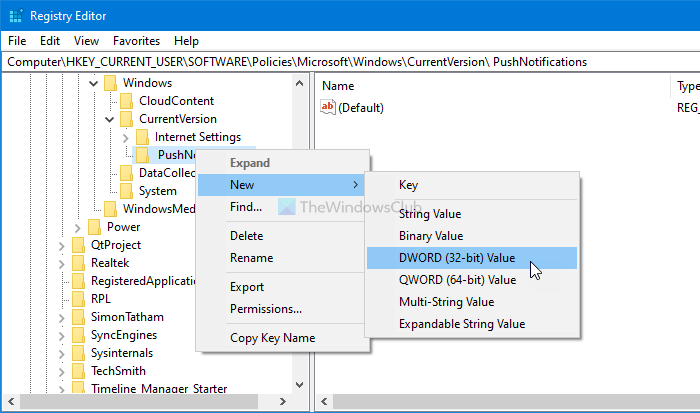
By default, it shows 0 as the Value data. However, you have to make it 1.
For that, double-click on the REG_DWORD value, enter 1 and click the OK button to save the change.
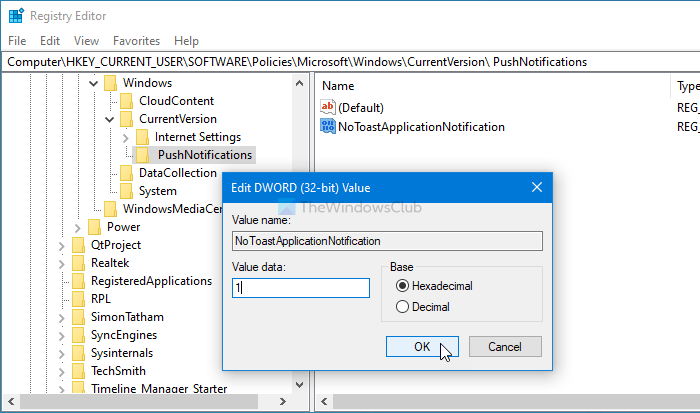
Once you are done with the last step, re-sign in to your system or restart your computer to get the change.
That’s all!
Read: How to View Old Notifications in Windows 11/10.
Turned off notifications but still getting them on PC
If notifications still show even after you have disabled them, you should check Individual App Settings, adjust Focus Assist Settings and turn Off Lock Screen Notifications as well. You should also disable Notifications in Settings > Privacy > Notifications > Allow apps to access your notifications. Also check if your computer is part of a corporate or school domain.
Leave a Reply