OneDrive displays a notification when the synchronization stops automatically. However, if you do not want it, you can turn off OneDrive auto-sync pause notifications on Windows 11/10 using this tutorial. Apart from using the in-built option, you can use the Registry Editor to do the same.
OneDrive runs and keeps synchronizing files in the background as long as it can pass through all the filters. Suppose you have suddenly moved to a metered connection, and OneDrive has stopped synchronizing your files. At such a moment, it shows a notification about the recent change. The same thing can happen when your PC gets into battery saver mode. If you do not like to get an additional notification, this tutorial can help you disable it.
Disable OneDrive Sync paused notification on Windows PC
To turn on or off OneDrive auto-sync pause notifications, follow these steps-
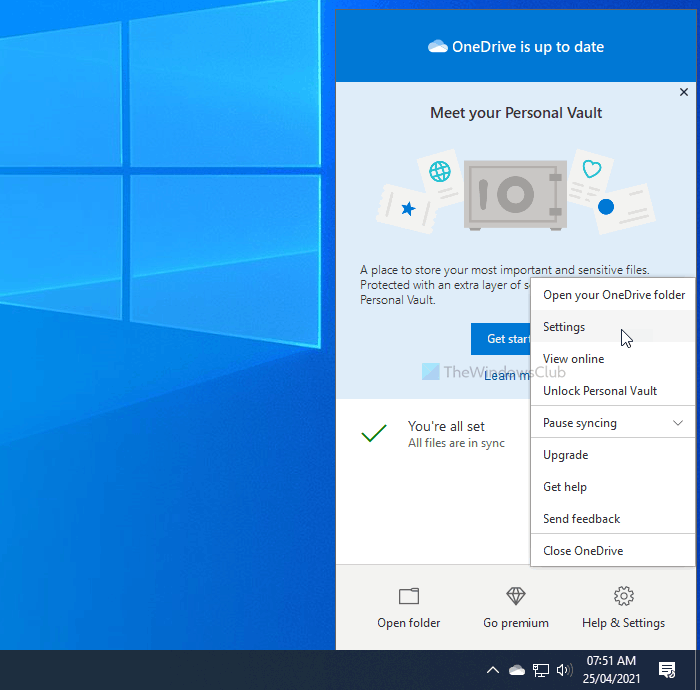
- Click on the OneDrive icon in the system tray.
- Select Help & Settings > Settings.
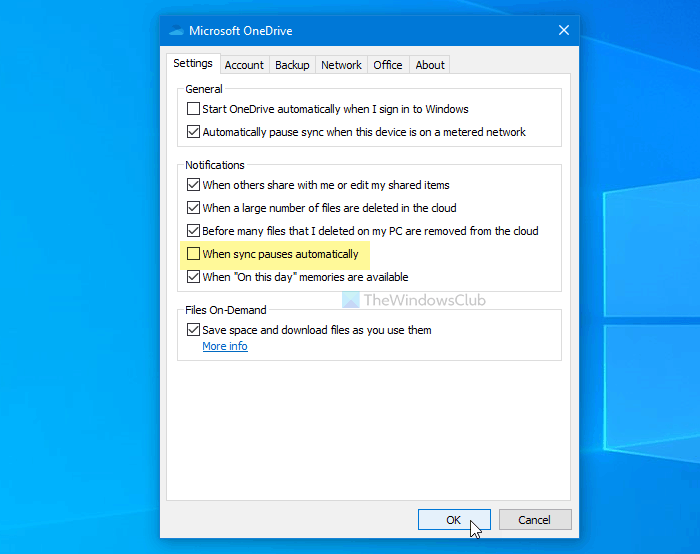
- Switch to the Settings tab.
- Remove the tick from the When sync pauses automatically checkbox.
- Click the OK button.
To get started, click on the OneDrive icon in the system tray. If you do not find it there, try opening the app on your computer first. After that, select Help & Settings > Settings.

Now, switch to the Settings tab and remove the tick from the When sync pauses automatically checkbox.

At last, click the OK button to save the change.
Read: Make OneDrive continue syncing when Battery Saver Mode is turned on.
Stop OneDrive from showing synchronization stopped notifications
To stop OneDrive from showing synchronization stopped notifications using Registry Editor, follow these steps-
- Press Win+R to open the Run prompt.
- Type regedit and hit the Enter button.
- Click on the Yes option.
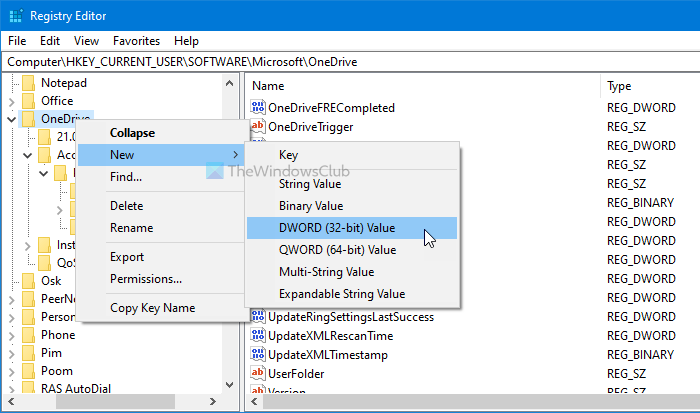
- Navigate to OneDrive in HKEY_CURRENT_USER.
- Right-click on OneDrive > New > DWORD (32-bit) Value.
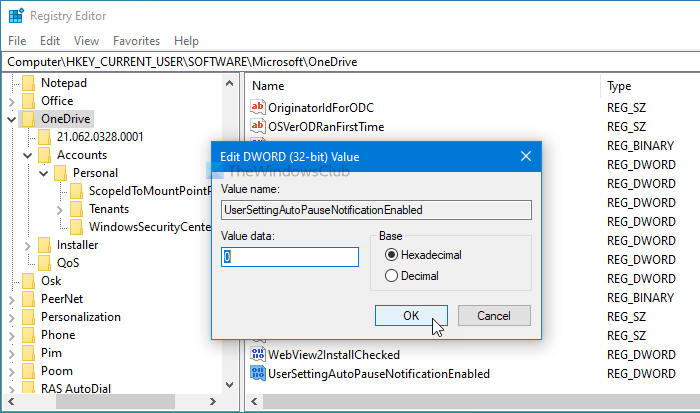
- Name it as UserSettingAutoPauseNotificationEnabled.
Let’s check out the detailed version of these steps.
At first, you have to open the Registry Editor. For that, press Win+R, type regedit, hit the Enter button, and click on the Yes option.
Right-click on the OneDrive key and select New > DWORD (32-bit) Value.

Name it as UserSettingAutoPauseNotificationEnabled.
By default, it comes with a value data of 0, and you have to keep it to disable this functionality.

In case you want to receive notifications, open this REG_DWORD value, and set the value data as 1.
At last, click the OK button to save the change.
That’s all! I hope this guide helped.
Read next: How to Turn off OneDrive On this day notification on Windows.