In Windows 11/10, there is a built-in spell checker that is embedded in your system. The spell checker and auto-correct features are supposed to work over different sections of Windows uniformly. In many scenarios, you might find the auto-correct feature productive, but if you think it is not working to your expectations, you may want to turn off this feature. You can manually turn off the auto-correct feature in the following way.
Turn off spell checker or Highlight misspelled words in Windows 11
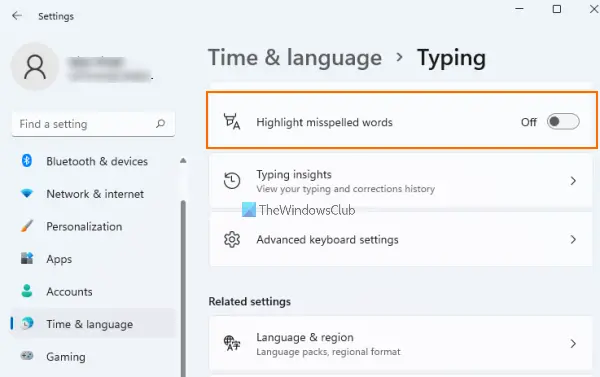
Windows 11 provides a built-in spell checker feature that automatically highlights misspelled words when you type something on supported applications. If that bothers you, simply turn off this feature. Here are the steps:
- Press Win+I This will open the Settings app of Windows 11
- Access Time & language category using the left section
- Go to the Typing page visible on the right part
- Turn off the Highlight misspelled words button.
This is it. Anytime you want to use this feature again, use the steps mentioned above, and turn on the same button available for the spell checker.
Turn off Autocorrect misspelled words in Windows 11
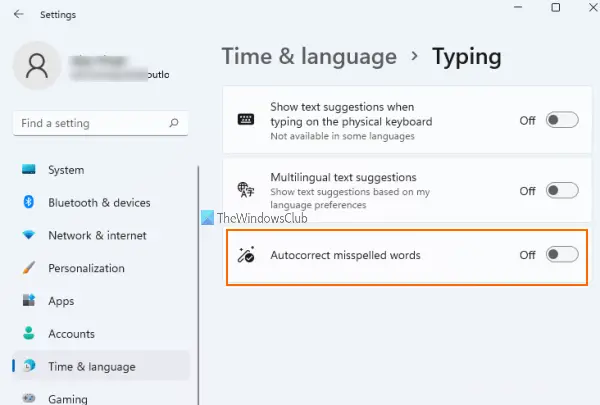
If you don’t want Windows 11 to automatically correct any misspelled word typed by you on applications (where this Autocorrect misspelled words feature is supported), then you can simply turn off this feature using these simple steps:
- Open Windows 11 Settings using Win+I hotkey
- Click on Time & language category
- Access Typing menu or page
- Turn off Autocorrect misspelled words button.
That’s it! Now Windows won’t bother you by automatically correcting wrong or misspelled words. In case you need this feature again, just follow the above steps, and turn on the button available for this feature.
Manually disable Spell Checker & Auto-Correct in Windows 10
In order to deactivate the auto-correct feature in Windows 10, you will find this setting at Settings > Devices > Typing.
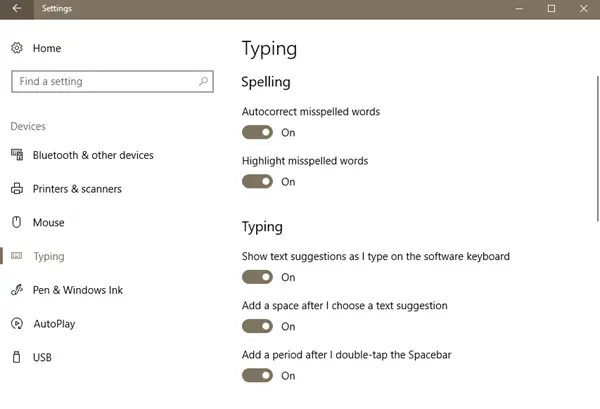
Toggle auto-correct on or off as you wish.
You can also try something different to get rid of the auto-correct feature. In this scheme, you need to add your regional language. Just navigate to Settings -> Time and language -> Region and language, in the right pane, click Add a language.
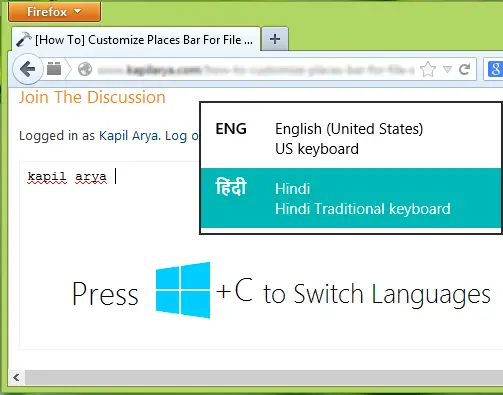
So far, I’ve added Hindi as the secondary language. Now, when you’re writing something, if the auto-correct feature is not working according to you, press Windows Key + C to switch to a secondary language. As after switching, you’d have fewer misspelled words. In this way, you can switch between languages instantly, just by pressing the two keys combination.
However, still, if you want to disable spell checker and auto-correct feature completely, try these steps:
Completely Disable Spell Checker & Auto-Correct in Windows 11/10
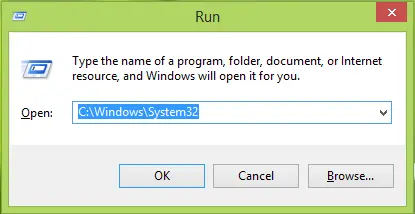
1. Press Windows Key + R and type the following and hit Enter:
C:\Windows\System32
2. In the System32 folder so opened, type MsSpell in the search box and hit Enter. This will result in up to four files as shown below. You need to Take Ownership of these four files.
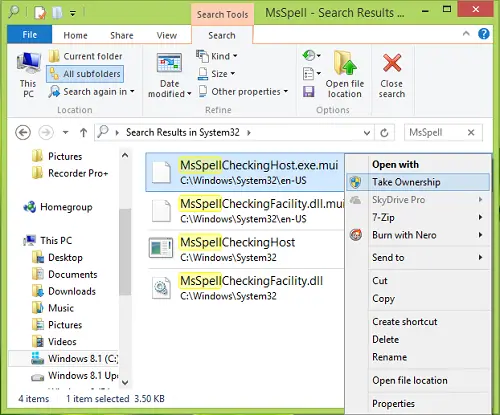
3. After taking ownership, rename these files to something that you can remember.
For example, rename MsSpellCheckingHost to MsSpellCheckingHost_old.
After renaming the four files, reboot the machine, you have now successfully disabled the spell check and auto-correct feature.
In the future, if you again want to restore or re-enable the auto-correct feature, just rename these files to their original name and turn on both the options in Windows Settings.
How do I permanently turn off autocorrect?
If you want to permanently turn off autocorrect in Windows 11/10, then there is a native option in Windows 11/10 that lets you turn off this feature. You need to open the Settings app of Windows 11/10 and then turn off the button available for this feature. This post has covered all the steps above for turning off the autocorrect feature in Windows 11 and Windows 10 separately.
What is the shortcut key for spell checker?
If you want to know about the hotkey or shortcut key for the spell checker of Windows 11/10, then there is no shortcut key for that. You need to open the Settings app of Windows 11/10 to access the spell checker option to turn it on/off. The steps covered above in this post will help you turn on/off the spell checker in Windows 11/10.
On the other hand, if you want to know about the shortcut key for spelling and grammar check feature for MS Word, then it is F7. Likewise, other similar tools (that support such a feature) might also have some hotkey for the same. You need to access the Settings of that particular tool to find out about that.
You can also disable Autocorrect and Highlight Misspelled Words settings using GPEDIT or REGEDIT.
Changing the language works with Windows Key + Space, not Windows Key + C – at least in Windows 8.1.
Thank you so much… One can not even speak basic Ebonics on Facebook with the default grammar policing in place…
You are a beautiful man Sir…
i i i i i reboot not necessary !!!
THANK YOU !!!