Disk Cleanup is an inbuilt utility tool in Windows 11/10 that enables you to erase useless and junk files from your PC. It is a handy tool that helps you clean up disk space and use the computer in a smooth and stable environment. However, some Windows 11/10 users have experienced issues with the Disk Cleanup tool not working properly on their computers. There have been various issues with the Disk Cleanup tool like Disk Cleanup gets stuck, it is unresponsive, it freezes, or it doesn’t remove files that it is supposed to delete.
Disk Cleanup does not remove files on Windows 11/10

Disk Cleanup not working properly in Windows 11/10
If Disk Cleanup is not working properly and does not remove Windows Update files, Temporary files, Windows.old folder, Internet files, etc. do this to fix the issue.
- Remove Temporary Files manually
- Run the System File Checker (SFC) Scan
- Try to fix it with the DISM tool
- Run Cloud Reset
- Use Storage Sense or alternative free junk cleaner software.
Now, let’s discuss these solutions in detail!
Disk Cleanup not deleting files
1] Remove Temporary Files manually
The first method to get Disk Cleanup working properly is to delete the Temporary files. You can do so by following the below steps:
- First, click Windows + R hokey to open up the Run dialog box.
- Now, type %temp% in the Open box and press the OK button.
- It will open up the Temp folder on your PC.
- Simply select all temporary files, right-click on them, and tap on the Delete option to remove all temporary files.
After removing temporary files from your PC, restart your computer and launch the Disk Cleanup app to see if it is working properly now.
2] Run the System File Checker (SFC) Scan
System File Checker (SFC) is an inbuilt utility tool in Windows 10 that checks for issues with system files and fixes them. You may consider running an SFC scan if Disk Cleanup is not working properly on your Windows 10 PC. To do so, follow below steps:
Go to the Windows search option, type command prompt in the search box, and open Command Prompt by clicking on the Run as administrator option.
Now, type the following command in the Command Prompt and then press the Enter button: sfc /scannow

When the command is completely processed, restart your PC and hopefully Disk Cleanup will start working fine for you.
3] Fix the issue with the DISM tool

You can try fixing the Disk Cleanup not working in Windows 10 issue with the DISM tool. It is an inbuilt tool in Windows 10 that repairs a corrupted Windows System Image. You can run it using the below steps:
Firstly, open Command Prompt with administrator privilege as mentioned in method (2).
Now, type the following command in CMD:
DISM /Online /Cleanup-Image /RestoreHealth
Next, press the Enter button to execute the command and wait until it is processed completely.
After that, restart the PC and launch the Disk Cleanup app to check whether it is running properly and is able to delete junk files from your computer.
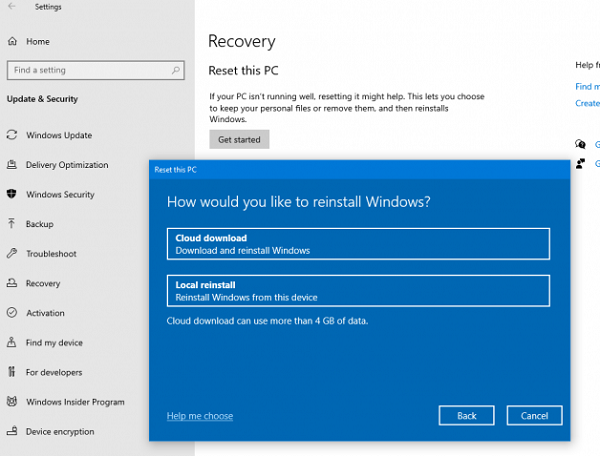
4] Use Cloud Reset

Cloud Reset lets you reinstall or reset Windows 10 via the Cloud download option. This suggestion is sure to help if everything else fails.
5] Use Storage Sense or alternative free junk cleaner software

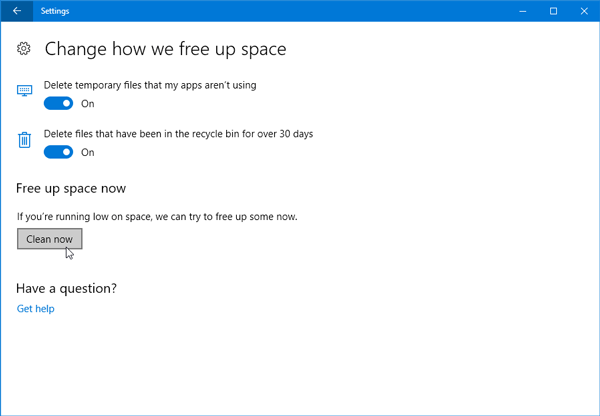
If the Disk Cleanup still doesn’t work properly even after trying the above methods, you can always use Storage Sense. Storage Sense finds out such temporary and junk files created by various apps and removes them permanently. It can clean your Recycle Bin after a predefined time interval. The best part is that Storage Sense does this all automatically in the background without needing your intervention. Once you set it up correctly, you can forget about it.
You could also use a third-party free junk file cleaner software or explore other ways to delete Temporary Files.
Related Read: Disk Cleanup button is missing.