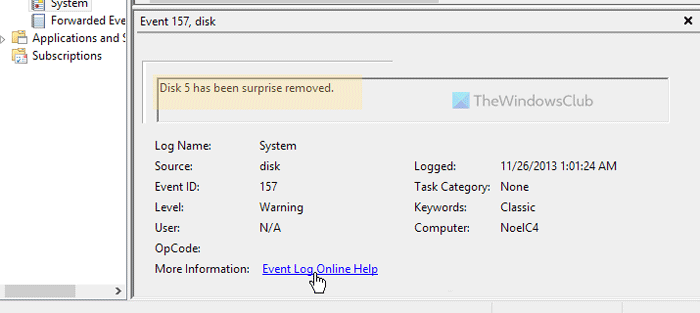
If the Event Viewer is showing an error message called Disk has been surprise removed with Event ID 157, this article will be useful for you. Here are some of the working solutions that will troubleshoot this issue on your computer. Whether it is showing Disk 0, Disk 1, Disk 2, or anything else, you can go through the same solutions.

Disk has been surprise removed, Event ID 157
To fix Disk has been surprise removed, Event ID 157 error, follow these steps:
- Check the hard disk physically
- Change drive letter
- Run CHKDSK
- Change Registry setting
- Format hard disk
To learn more about these steps, continue reading.
1] Check the hard disk physically
It is the first thing you need to do when you get the Disk has been surprise removed error on your computer. The main reason why you are getting this error is that the hard disk has been disconnected from your computer. There could be a loose port, cable, or faulty hard disk installed in your computer. If so, there is a high chance of getting this aforementioned error.
Therefore, it is highly recommended to check the hard disk connection physically. If you cannot do that on your own, you can take the help of a professional.
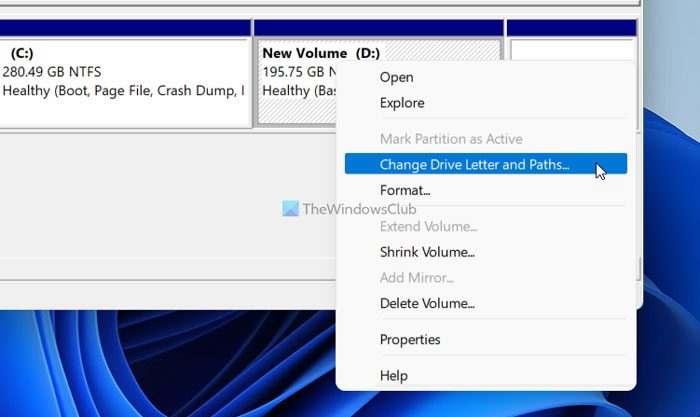
2] Change drive letter

If you have recently installed Windows 11 or Windows 10, and your second hard disk is showing this error, changing the drive letter might fix the issue. At times, your drive letter may lose drive letter after a clean installation. In such situations, you can troubleshoot the issue with the help of Disk Management panel.
3] Run CHKDSK
If your hard disk has some internal issues, the same problem might occur on your computer. In such situations, you can fix the problem by running the Disk Error Checking or CHKDSK utility. For your information, it is an in-built command-line tool that can be run on any partition or hard drive. Therefore, follow this guide to run CHKDSK in Windows 11/10 PC.
However, if the CHKDSK is stuck at 10% or 20% or 99%, you can follow that guide to get rid of the issue.
4] Change Registry setting

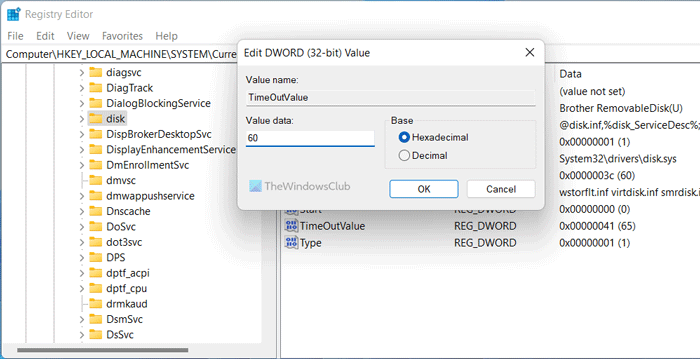
There is a Registry REG_DWORD value named TimeOutValue, which can cause this error. If you have changed it earlier, it is recommended to set the factory defaults. However, if you don’t know, you can simply set the Value data as 60. Here is how you can do that:
- Open Registry Editor.
- Navigate to this path:
HKEY_LOCAL_MACHINE\SYSTEM\CurrentControlSet\Services\disk - Double-click on the TimeOutValue REG_DWORD value.
- Set the Value data as 60.
- Click the OK button.
Finally, you need to restart your computer.
5] Format hard disk
It is the last thing you need to do when nothing else works for you. There are multiple ways to format a hard disk on your PC. For instance, you can use the Disk Management Tool, Diskpart, etc.
How do I fix Event Viewer errors?
Event Viewer displays various errors at times, and they define different things each time. In order to fix the Event Viewer errors, you need to find the exact error message and Event ID. They help you recognize the hardware or software that is causing the issue. Following that, you can go through some solutions to get rid of the Event Viewer error.
Read: Fix Service Control Manager Event ID 7001
What causes Event ID 7011?
Every service needs to be executed at a specific time period. When that doesn’t happen, your Windows computer logs it with an Event ID 7011. In other words, you need to find the service alongside the Event ID to troubleshoot the problem. Whether you use Windows 11 or Windows 10, the solutions are the same.
Leave a Reply