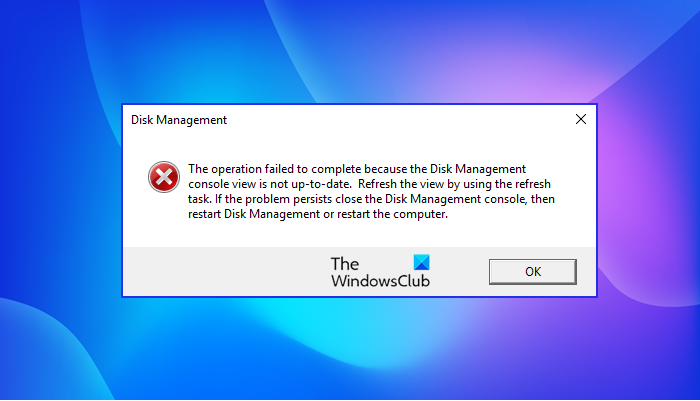
Disk Management is a built-in Windows program that is used to maintain partitions and drives on your system. Usually, carrying out any task in the utility is hassle-free as it is well optimized to work on Windows systems, however, a lot of users have complained that when they try to do the same, they see the following error message.
The operation failed to complete because the Disk Management console view is not up-to-date. Refresh the view by using the refresh task. If the problem persists close the Disk Management console, then restart Disk Management or restart the computer.

In this article, we are going to see what you need to do if your Disk Management Console View Is Not Up-to-date.
Many users have complained that the error message is stopping them from doing any task on a newly added drive. So, first and foremost, we need to the health of that drive into consideration. Usually, the hardware is not at the fault, but the driver is. We are going to see how to resolve that as well. We should also check the health of your computer and make sure that the OS files are not corrupted. There is a utility to fix that as well. However, we would recommend you to go through our solutions one by one and resolve the issue.
Fix Disk Management console view is not up-to-date
If you are seeing “The operation has failed because the Disk Management console view is not up-to-date” then check out the following solutions to resolve this issue.
- Restart Disk Management and/or computer
- Check if Automount is enabled
- Reinstall Disk Drivers
- Update Disk Drives
- Run SFC
Let us talk about them in detail.
1] Restart Disk Management and/or computer
First up, we need to do as the error box is guiding, we need to restart the Disk Management utility and see if that works. If the issue is because of some glitch, this should resolve it. In case restarting the app doesn’t work, try restarting the computer. This can stop any service and processes that could have interfered with your program. Do this and check if the issue persists.
Read: Disk Management not working, loading or responding in Windows
2] Check if Automount is enabled
![Windows not assigning Drive letters automatically [Fixed]](https://www.thewindowsclub.com/wp-content/uploads/2021/09/automount.jpg)
Automount is a service that works in order to mount every new disk. If it is disabled, you won’t be able to see the attached disk in the File Explorer (My Computer). And since you are seeing this issue, we are presuming that your system is failing to mount new drives.
We are going to use Command Prompt to check if the process is enabled and if it is not, we need to run a few commands. Open Command Prompt as an administrator from the Start Menu and execute the following commands.
diskpart
automount
If it is enabled for new volumes, you can move to the next solution. But if it’s disabled, execute the following command to enable Automount.
automount enable
Once, you have enabled the service, restart your computer and check if the issue persists. It will work, but it may not resolve the issue for you. So, what we would recommend you is reinstall the drivers. We have mentioned the guide in the next solution.
Read: Fix Disk Management errors on Windows.
3] Reinstall Disk Drivers

One of the reasons why you are seeing the error message in question is that your Disk Drivers got corrupted. We need to reinstall it and hopefully, it will get resolved.
- Unplug the device
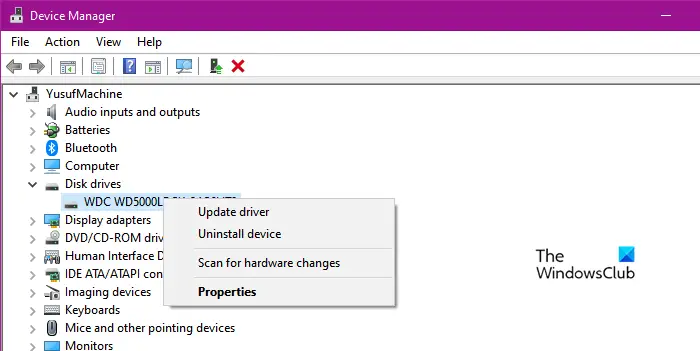
- Open Device Manager.
- Expand Disk Drives.
- Right-click on the driver and click Uninstall device.
- Click Uninstall to confirm.
- Plug the device back in. Or, right-click on Disk Drives and click Scan for hardware changes.
This way, the driver will be installed on your system. Restart your computer, and check if the issue persists.
4] Update Disk Drivers
If reinstalling doesn’t work, then we have to update those drivers. This will you in resolving the issue, especially, if it is occurring due to outdated drivers or a bug. What you need to do is go through the following methods, pick one for yourself, and update those drivers.
- Check for Windows Update and install if available. This will install the latest drivers as well.
- Download a free driver updater.
- Open Device Manager and update the disk drivers.
- Go to the manufacturer’s website and download the latest drivers.
One of them will do the job for you.
5] Run System File Checker

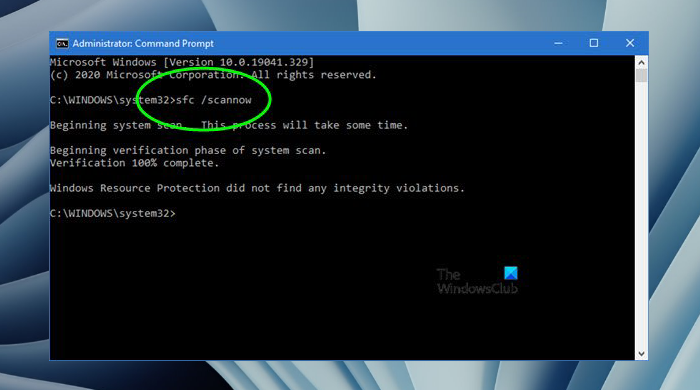
If nothing works, then maybe some of your system files are corrupted. We need to run a command in cmd and hopefully, it will resolve the issue for you. Open Command Prompt as an administrator and execute the following command.
sfc /scannow
It will take some time, so, wait for the process to complete.
Hopefully, these solutions have allowed you to use Disk Management again.
Read: Windows not assigning Drive letters automatically
How do I restart Disk Management?
To restart Disk Management click on the close button from its window, then open Task Manager, and in the Process tab, make sure that the app is not running. Then, reopen Disk Management by Win + X > Disk Management.
How do I view disk drives on Windows 11?
The easiest way to view disk drives on Windows 11 is to open File Explorer. By default, File Explorer opens to Home or Quick Access. Hence, to view your disk drives, you have to go to This PC. You can also make File Explorer always open to This PC. In addition to this, you can also view your disk drives in the Disk Management app.
That’s it!
Also Read: Couldn’t Mount File, The disk image isn’t initialized.