The Do Not Disturb feature naturally allows users to stay focused by avoiding distractions caused by notifications on their computers. However, it has become a serious challenge for many, as Do Not Disturb keeps turning on by itself in Windows 11/10, leading to users generally missing important emails, messages, and notifications. If you are experiencing this same problem and looking to get it fixed, you are on the right page of the internet.
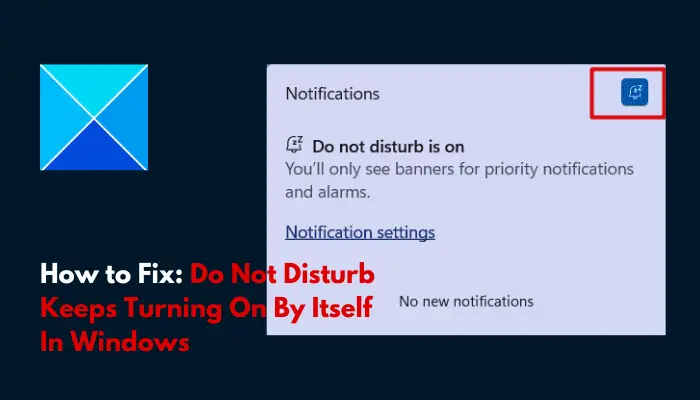
Why does Windows 11 turn on Do Not Disturb?
If the Do Not Disturb feature keeps turning on by itself in Windows even after you have disabled it, there is a likelihood that there is a schedule already set on your computer for the feature. Also, when the Focus session starts on your computer, the Do Not Disturb feature turns on by itself, and you may miss important notifications while it is on.
Other factors that could be responsible for this include the Windows Game Mode feature, which also blocks incoming notifications to avoid disruptions during gameplay. Third-party antivirus software can also hijack your computer notification settings, and compromise them according to its own preferences.
Fix Do Not Disturb keeps turning on by itself in Windows 11
To help you get out of this frustrating situation and get notifications in real-time on Windows, we discuss several proven fixes that you should implement to help you resolve the problem on your Windows computer. Check out the following:
- Disable Do Not Disturb on Windows
- Check Do Not Disturb Schedule
- Adjust Focus Session Settings
- Disable Windows Game Mode
- Uninstall Third-Party Antivirus Software
- Set Priority Notifications For Essentials
1] Disable Do Not Disturb on Windows
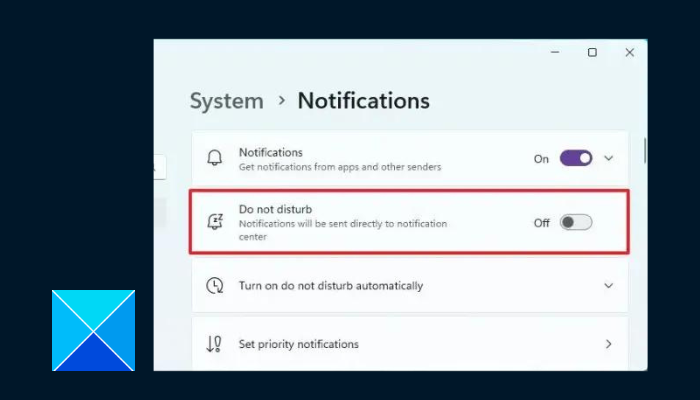
Firstly, we will guide you on how to turn off the Do Not Disturb feature on Windows. For those who notice that they miss important notifications on their computers, but do not know how to go about turning off the DND feature, follow the steps outlined below:
- Press the Windows key + I to open Settings, then navigate to System > Notifications.
- Turn off the “Do not disturb” toggle.
2] Check Do Not Disturb Schedule
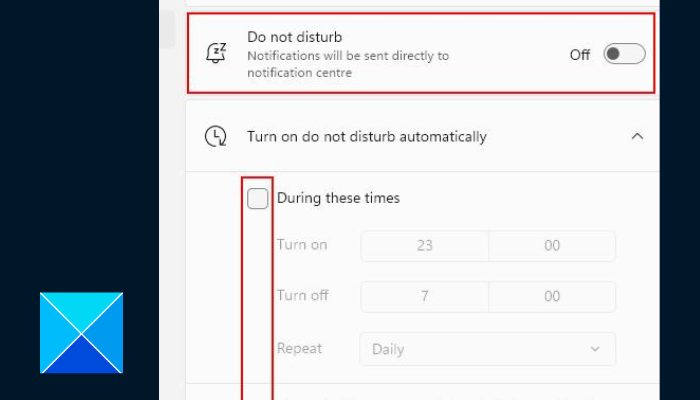
Do Not Disturb keeps turning on by itself in Windows when it meets up with some schedule settings. For instance, you might have noticed that when playing a game on your computer, it keeps turning on by itself, or even when using an application in full-screen mode. You have to adjust the schedule settings to avoid missing important notifications. Follow the steps outlined below:
- Press the Windows key + I to open Settings, then navigate to System > Notifications.
- Expand the “Turn on do not disturb automatically” option.
- You will see a list of different conditions that could be responsible for the feature to be turning on itself.
- Use the checkmark in front of each condition to either disable or enable such conditions for scheduling.
3] Adjust Focus Session Settings
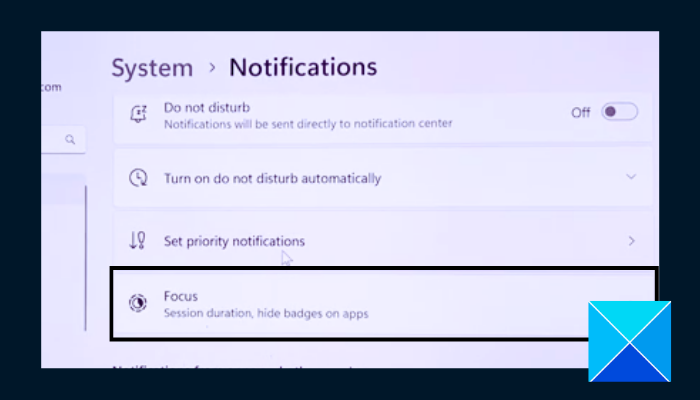
We also stated earlier that when the Focus session starts on your Windows computer, by default, Do Not Disturb keeps turning on by itself. You have to adjust the Focus session settings to exclude turning on Do Not Disturb, when the session starts. Follow the steps outlined below:
- Press the Windows key + I to open Settings, then navigate to System > Focus.
- Click on the Stop focus session.
- Expand the options under Focus, then disable the check-marked box in front of Turn on do not disturb.
4] Disable Windows Game Mode
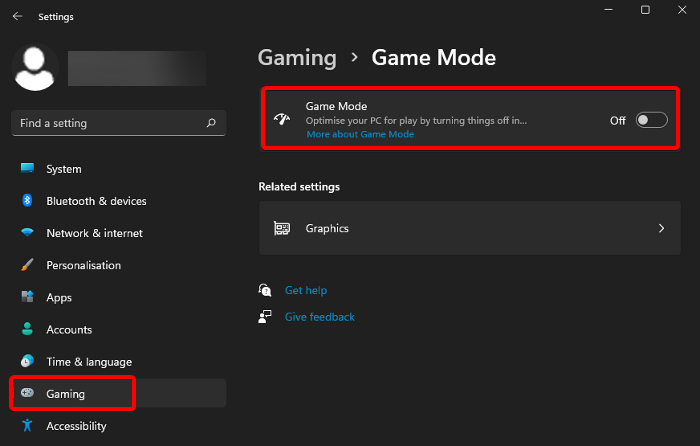
When Game Mode is enabled, the Do Not Disturb keeps turning on by itself, especially when playing a game on your Windows computer. Disable the Game Mode option to avoid missing important notifications. Follow the steps outlined below:
- Press the Windows key + I to open Settings, then navigate to Gaming.
- Click on Game Mode, and disable the toggle in front of the Windows gaming feature.
5] Uninstall Third-Party Antivirus Software
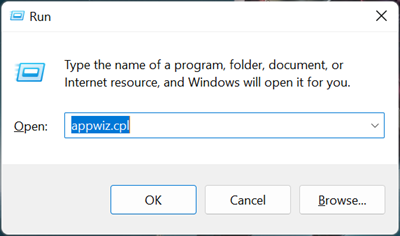
Third-party antivirus software can also hijack your notification settings, thereby preventing you from seeing some. Since you have the Windows Defender active on your computer, follow the steps outlined below to uninstall third-party antivirus software on your computer:
- Press the Windows key + R to open the Run dialog box.
- Type appwiz.cpl in the text field, and click on OK to open the list of installed programs on your computer.
- Find the third-party antivirus software and uninstall it.
6] Set Priority Notifications For Essentials
If the Do Not Disturb feature keeps turning on, or you continue to miss important notifications, you can set priority notifications for essential applications on your Windows computer. Follow the steps outlined below:
- Press the Windows key + I, then navigate to System > Notifications.
- Click on Set priority notifications.
- Click on Add apps, then select your preferred application to be prioritized.
In conclusion, we do hope that you are able to get help here, and that you are able to stop the Do Not Disturb feature from turning on by itself on your Windows computer. Good luck
Read: How to disable Notifications during Presentations or while playing Games
What are quiet hours in Windows 11?
Focus assist is also called quiet hours, it prevents distracting notifications when users need to stay focused on other important tasks.
Why does Windows 11 turn on Do Not Disturb?
Do not disturb is a Windows feature that helps avoid distraction due to notifications on a computer as mentioned earlier. Windows 11 automatically turns on this feature in some cases like when you are gaming, using an app in full-screen mode and other tasks to not ruin your experience during those tasks.
Leave a Reply