If you weren’t aware, it is possible to download all emails from within your Gmail account for free. This is a neat feature because there might come a time when some users might feel the need to download old emails for various reasons.

How to download Gmail emails
Maybe they have plans to delete their accounts, therefore, it would make a lot of sense to download all emails for future reference, especially if the inbox is filled with important emails that do not warrant deletion.
The big question is, can we download email data with ease, or will the process give us a hard time to complete? Well, we can say for certain that it does not take a long time to get done, and as expected, were going to discuss how to achieve it in just a few simple steps.
Before going forward, we should point out that all email data will be downloaded as a .MBOX file. An MBOX file is an email mailbox saved in a mail storage format used for organizing email messages in a single text file. . This which means, the user will have the option to export it to another email client that supports Mbox.
- Open your Gmail account
- Apply a label to all messages you want to download
- Download messages as Mbox
Let us talk about this in more detail for a better understanding.
1] Open your Gmail account
The first thing you will be required to do is to open your Gmail account. Visit this link, and from there, sign in with the Google username and password that is associated with your Gmail account.
2] Apply a label to all messages you want to download

For the purpose of downloading specific messages, you must first apply a label to all of them. To create a Label, please select Create a new Label from the left-pane. If you do not see the Create a new Label section, then maybe it is compact.
Click the section that says More, then scroll down until you come across what you want.
Now, after clicking on Create a new Label, you should now see the option to create a name. Type your preferred name, and from there, hit the section that says Create.
When it comes down to applying labels to your messages, go on ahead and select the required messages. When you’re done, navigate above and click on the label’s icon. Doing this should bring up a list of all the labels you’ve created. Simply select the one you’ve recently created, and finally, hit Apply.
Right away all the chosen messages should now be added to the label, so let us move on to the next step.
Read: How to save Gmail emails as an EML file to the desktop.
3] Export Gmail emails as MBOX

OK, so before we can begin, we must first visit this website: google.com/settings/takeout. Everything from this page, by default, should automatically be selected, so it is now up to you to deselect all of them at the same time by clicking the deselect button.
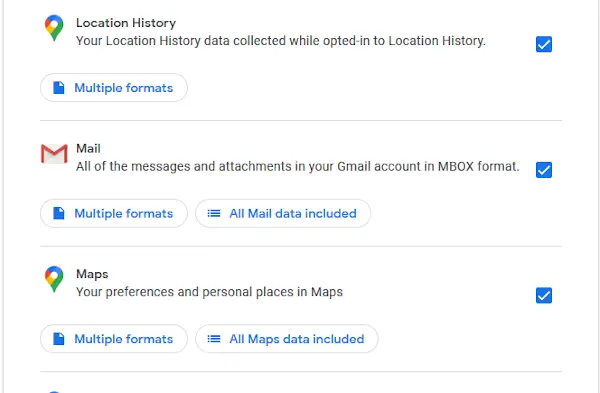
Once that is done, scroll down until you see Mail and a section that says All of the messages and attachments in your Gmail account in MBOX format.
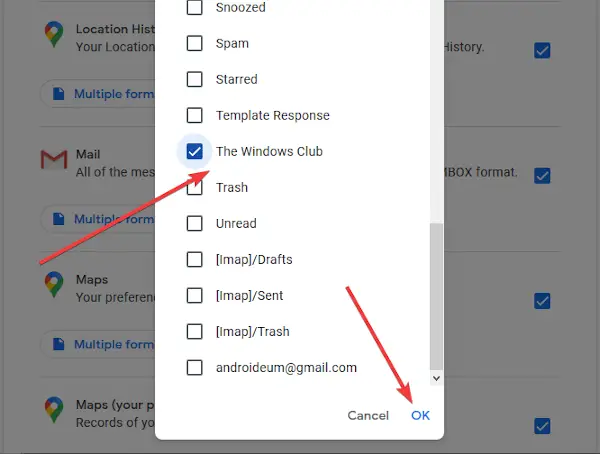
Tick the box then move on to the part that says All mail data included. Please select it, then find the previously created folder with all the emails attached, and choose it.

Hit the OK button to close the window, and from there, then, click MBOX Format. Finally, scroll below, click on Next Step, and from the newly created page, select your preferred delivery method, then tap Create export to complete the task.
You’re done!
Leave a Reply