Being the most popular photo sharing platform mainly for mobile and selfie addicted people, Instagram has several features to browse images from desktop and mobile. However, it doesn’t have any option to download or save images directly to any cloud storage like Dropbox, Google Drive or OneDrive. Sometime, we want to store the images those we like, but, due to unavailability of features, most of the people cannot do so.
This solution makes saving Instagram photographs easier, since it will done using IFTTT, which refers to “If This Then That“. It is an automated service that can do various tasks on demand.
We have already seen how to automatically upload Instagram photos to SkyDrive using IIFTTT. Now let us see how to download Liked Instagram Photos to Dropbox or Google Drive.
Download Liked Instagram Photos
These following steps will help you to download likes Instagram photos to Dropbox. But, you can use these same steps to save them to other cloud storage i.e. Google Drive or OneDrive.
As mentioned before, this tutorial is all about using IFTTT to get things done. You can certainly get ready-made IFTTT recipe for this purpose. But, this is not recommended to depend on others’ recipe. It takes a maximum of 1 minute to create a recipe for this job.
To create an IFTTT recipe to download like Instagram photos to Dropbox, do following these steps.
Step 1: Go to the IFTTT website and create an account, if you do not have any account.
Step 2: Go to My Recipes.
Step 3: Click on Create Recipe.
Step 4: You will get ifthisthenthat text. Just click on this link text.

Step 5: Now you have to create a trigger channel. It means, you have to create the course from where IFTTT will fetch the content. Type Instagram in the search box and select that.
Step 6: Authorize your Instagram account.
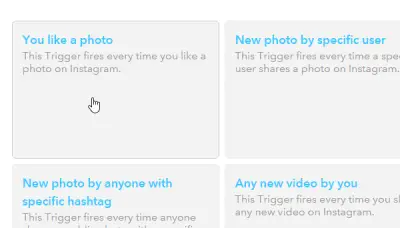
Step 7: On the next step, select You like a photo.

Step 8: Now, click on Create Trigger button.
Step 9: After that, you have to click on that link text.
Step 10: It will let you create the Action Channel. In this case, you will have to choose Dropbox. [Here, we are using Dropbox. If you want to save images to Google Drive or OneDrive, you can select that.]
Step 11: After selecting Dropbox and authorizing your account, choose Add file from URL.
Step 12: Now, you can edit File URL, File Name, Dropbox folder path etc. At last, click on Create Action button.
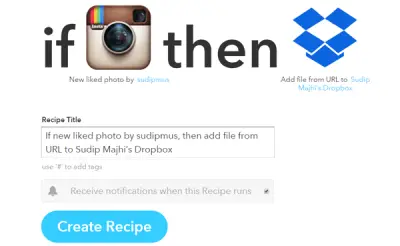
Step 13: In the last step, you can enter a suitable title before clicking on Create Recipe button.
That’s it! You are all done.
Now, whenever you will like an image on Instagram, it will be saved in your selected cloud storage.

Leave a Reply