If you have been a Windows for a long time, you might know that Windows 7 had the custom theme functionality that helped people to customize the desktop or the whole computer according to their requirements. Although Microsoft removed that feature from Windows 8 and Windows 8.1, they have now included the same option in Windows 11 and Windows 10.
Users can now create, save, delete, remove, and use themes in Windows 11/10. The best part is that you can download themes from the Microsoft Store – and Microsoft itself is developing lots of themes. If you think the default desktop background and the theme is getting boring and want to customize your PC’s look you can download and use themes from the Windows Store.
Changing wallpaper is not that big a deal on Windows. Also, changing the color is very easy as well. However, combining color and wallpaper is quite difficult. But things become easy now.
Create, save, use Themes in Windows 11
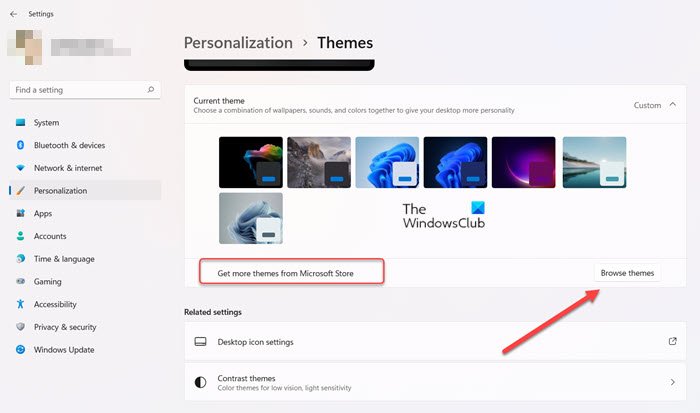
If you would like to get additional themes for your Desktop or a PC, click the Browse themes button, next to the Get more themes from the Microsoft Store description.
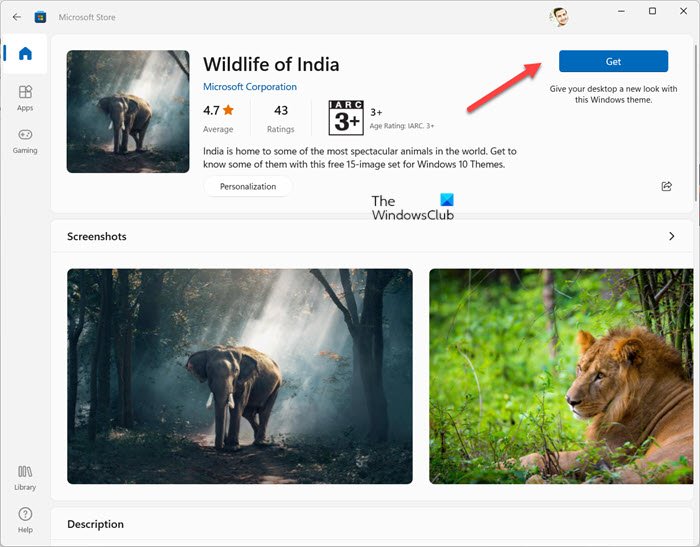
Select a theme of your choice and hit the Get button as shown in the image above.
Allow the download to finish. Once done, click the Open button.
Instantly, you’ll be directed to your Personalization screen.
Locate your newly added theme and click it.
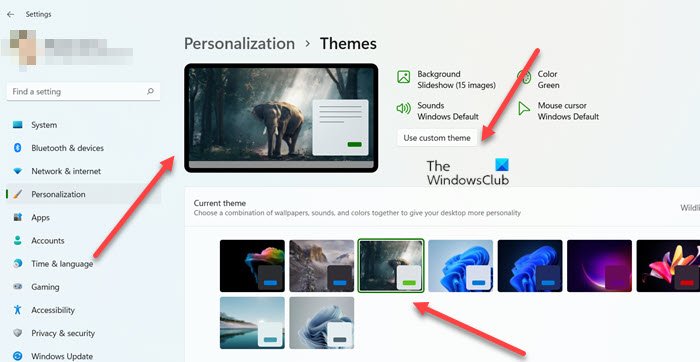
Hit the Use custom theme button and then, select the Save option to confirm the changes.
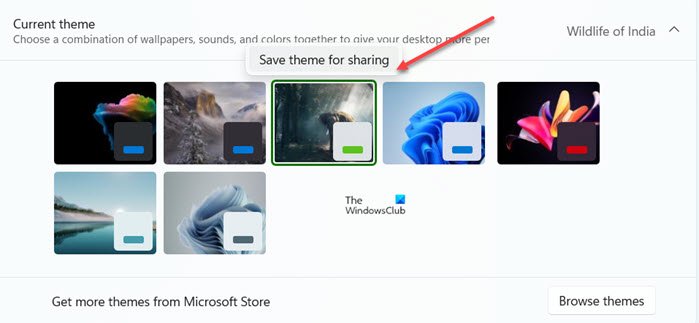
Alternatively, if you would like to keep it for sharing with some other users, click the theme thumbnail and choose the save theme for sharing option.
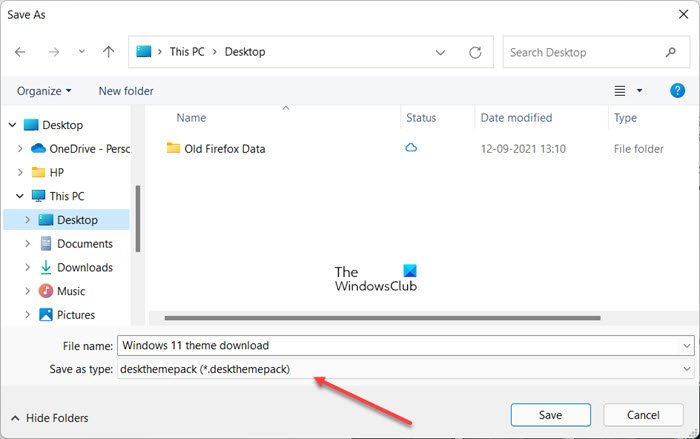
It will be saved to your local disk with a .deskthemepack extension.
This post will show you in detail how to create a new custom Theme in Windows 11/10.
Delete a Theme in Windows 11
Removing the unused themes can free up some space on your computer disk. Besides, the cleaning exercise can make your screen space look fresh and uncluttered.
To get started, head back to Settings, select Personalization from the side panel and expand the Themes heading.
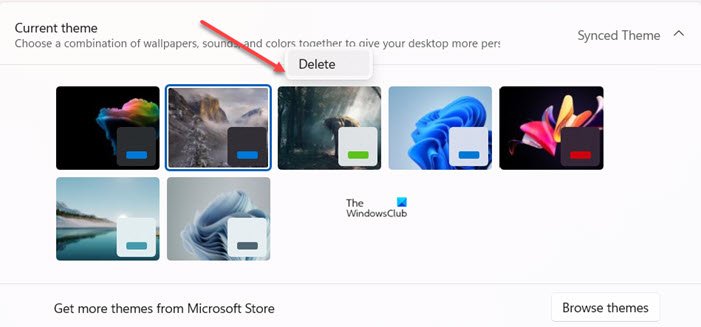
Then, right-click on the theme you would like to remove and select the Delete option.
Repeat the same exercise for other unwanted themes in Windows 11.
TIP: Download Windows 11 wallpapers for your PC.
Create, save, use Themes in Windows 10
In versions prior to Windows 10, users need to navigate to Control Panel > Appearance and Personalization > Personalization. However, now that setting is included in the Settings Panel.
To activate a theme on Windows 10 PC, you need to navigate to Settings > Personalization > Themes.
By default, you will find three different themes along with a synchronized theme. To apply a particular theme, click on the theme icon. That’s all you need to do. However, as said before, you can download themes from Microsoft Store.
However, as I said before, you can download themes from Windows Store. To do so, click on the button that says Get more themes in the Store. It will lead you to the theme section in the Microsoft Store.
Choose and download a theme. After downloading, you will find a Launch button right on the Windows Store. If you want to activate the theme, hit the Launch button.
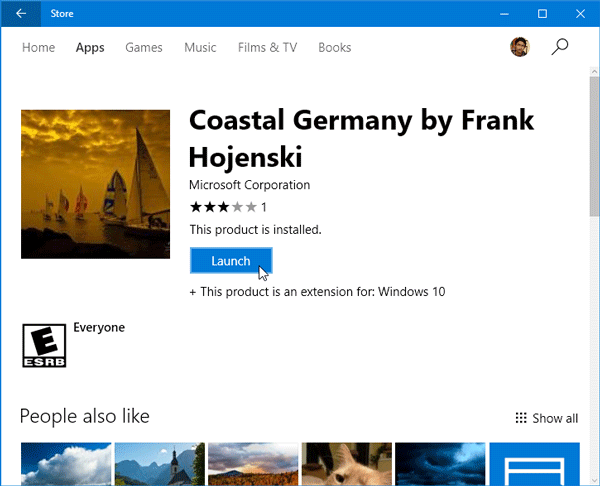
The other way is to come back to the Themes section in the Settings Panel. Here, you will find the same theme that you have installed. To activate the theme, click on it.
Many people don’t want to synchronize settings across multiple Windows 10 devices, but they want to use the same theme. If you are one of them, you can save the theme and use it on another Windows 10 device.
Create a new theme in Windows 10
If you like the current configuration and want to save it, click on the Save theme button, name it, and select Save.
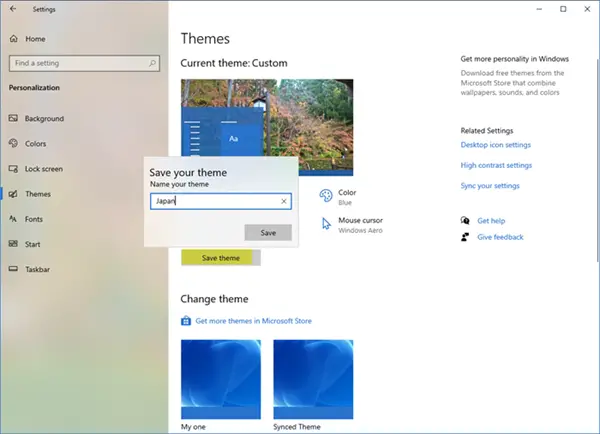
If you want to be able to share the theme, right-click on the theme, and choose Save theme for sharing.
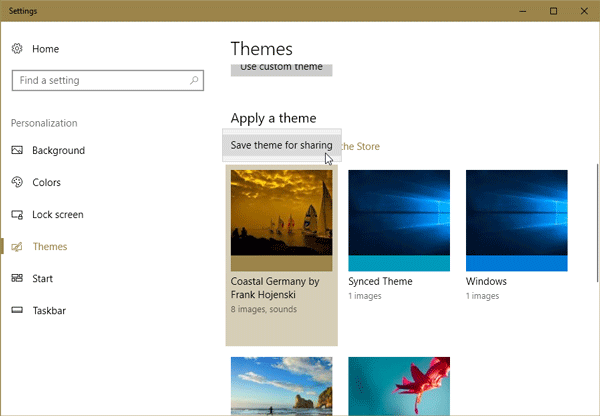
You will be able to save the theme on your local machine with a .deskthemepack extension.
To install that theme on another machine running Windows 10, move the theme to that computer, and double-click on it.
If you want to use that theme, but do not like the wallpaper or color combination, you can go to Background or Colors section in Settings > Personalization to change them.
Delete or uninstall Theme in Windows 10
In case you have installed a lot of themes, and want to delete some of them, you can do that as well. You have to go to Settings > Personalization > Themes section, right-click on a particular theme, and select the Delete option.
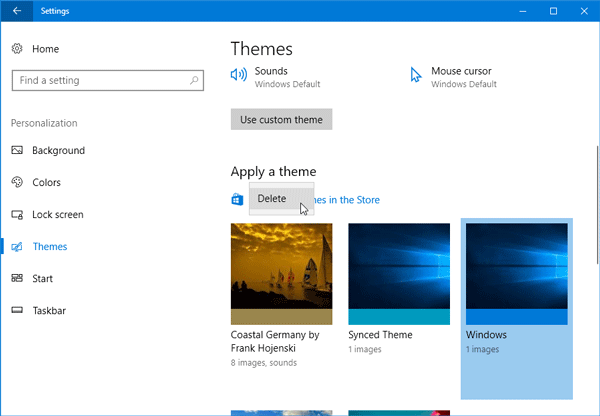
The theme will be deleted immediately.
TIP: You will find the Windows Themes saved here.
I hope you like the new customization options in Windows 11/10.
How do I change the theme in Windows 11?
Simply head back to the Personalization screen in Settings. Then, under the Current theme list, select any one of the synced themes. You can also combine colors and sounds to add some spark to your Desktop personality.
How do I get a Dark theme in Windows 11?
It’s simple. Open Windows 11 Settings (Windows key + I shortcut), choose System > Personalization. Choose Contrast themes and select Night Sky. Then hit the Apply button to confirm the changes. You can use more distinct colors to make text and apps easier to see.
Leave a Reply