The Draw Tab is a feature in Microsoft Office that can help you to add notes, create shapes, edit text, and much more. The Draw Tab is available in Microsoft Word, Excel, and PowerPoint.
How to draw in Word using the Draw Tab tools
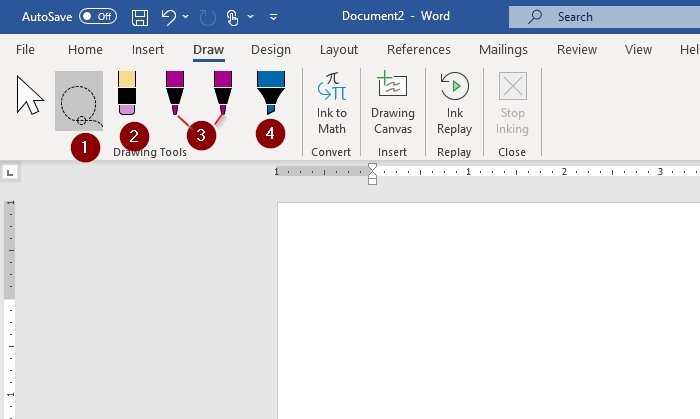
On the Draw Tab default menu, there are four sections. These sections are Drawing Tools, Convert, Insert, Replay, and Close.
- The Drawing Tools section contains tools such as Lasso Select, Eraser, Pen, and Highlighter, which is used to erase, edit, decorate your images, and highlight text using ink.
- The Convert section consists of Ink to Math.
- The Insert section contains the Drawing Canvas.
- The Replay section includes Ink Replay.
- The Close section has Stop Inking, which allows you to exit the tools in the Drawing Tools section.
This article will explain what these tools are and how to use them in Word.
Let us talk about the following Draw Tab features:
- How to use Lasso Select
- How to use the Eraser
- How to use the Pen
- How to Highlight
- How to use the Ink to Math
- How to use Drawing Canvas
- How to use Drawing Canvas.
1] How to use Lasso Select

The Lasso Select tool is used to select ink by drawing around it. All ink strokes in the figure will be selected. When selected, you can delete and move the ink. The steps in using Lasso Select are below.
On the Drawing Tool, select Lasso select.
A cross symbol will appear; use your mouse pen or finger and drag it across the image or word (written or drawn in ink) you want to select; a faded dash selection region will appear around it; this will lasso the portion you choose.
Press the escape button (Esc) or Stop Inking to remove the cross symbol, now you can delete and move.
2] How to use the Eraser
The Eraser is used to remove the ink that has been drawn on the page.
On the Drawing Tool, select an image that looks like a pencil with an eraser.
Then Erase your ink image or word.
3] How to use the Pen
The pen is used when the user wants to use ink to draw or write on the document sheet, and the user can also change the thickness and color of the ink.
On the Drawing Tool, there are two Pens. Select either the 5mm and 3.5 mm.
To change the color or thickness on Pen, click the down arrow and select the desired one.
4] How to Highlight
The Highlighter allows the user to highlight the text on the page. The user also has the option to change the thickness and color.
Click on the Highlighter on the Drawing Tools.
Change the thickness and color by clicking on the down arrow on a list will pop up, select what you need.
5] How to use the Ink to Math

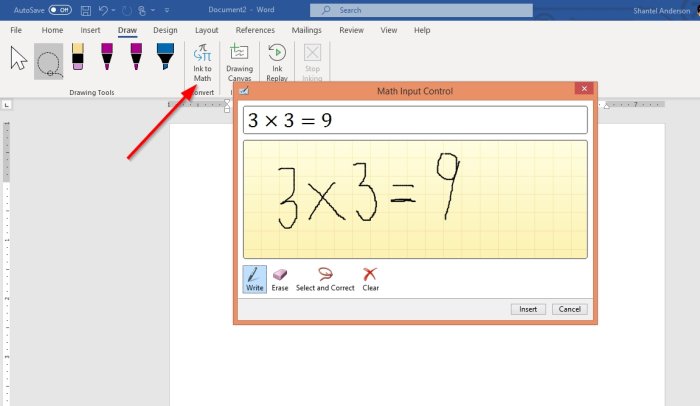
The Ink to Math tool is used to convert handwritten mathematical expression to text. Look at the example in the photo above and how to used these tools below.
Click on the Draw Tab and select Ink to Math. There are four options:
- Write
- Erase
- Select and Correct
- Clear
Select Write in order to write on the spot that displays Write math here.
Select and correct is used to correct whatever math you wrote; right-click on the selected number and arithmetic, then choose your correction. Click Insert.
6] How to use Drawing Canvas

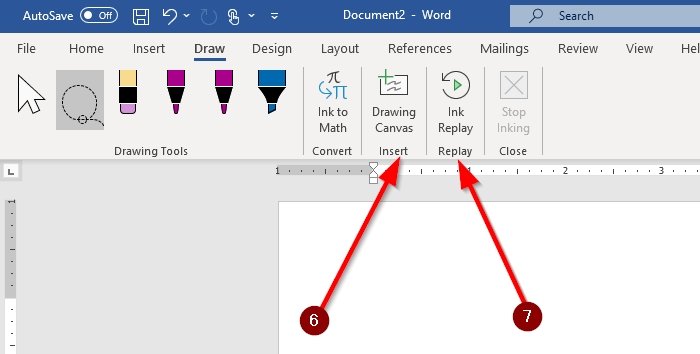
In Microsoft Word, there is the Insert category on the Drawing Tab, which includes the Drawing Canvas. The Drawing Canvas inserts a drawing canvas to create space to draw in. it is only featured on the Draw Tab in word.
On Draw Tab, select Drawing Canvas. A square box will appear in your document. That is where you will perform some magic.
Read: How to insert same text to multiple locations in Word
7] How to use Ink Replay
The Ink Replay automatically replays the creation of visible ink strokes.
Select Ink Replay. Draw an image or word. Then select Ink Replay again; it will automatically recreate the image you have just created.
Let us know in the comments if you have any problems, and we will get back to you.
Related: How to Add the missing Draw Tool Tab to Ribbon in Microsoft Office.