BitLocker is a hard drive encryption feature available in Windows Pro and Enterprise editions. After locking your hard drive partition with BitLocker, you can unlock it using the BitLocker key. In this article, we will discuss some working fixes for the message “The drive protected by BitLocker is already unlocked” in File Explorer.
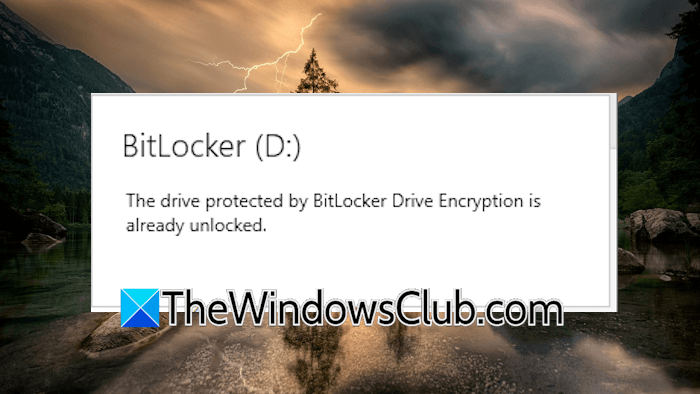
According to reports, this error message prevents users from accessing the hard drive. However, the hard drive is already unlocked. Some users can open the hard drive by selecting the Open option in the right-click context menu.
The drive protected by BitLocker is already unlocked
If you get the “The drive protected by BitLocker is already unlocked” message in the File Explorer of Windows 11/10 for the hard drive partition that is already unlocked, use these fixes.
- Restart your computer or Windows Explorer
- Toggle the BitLocker auto-unlock feature
- Disable and re-enable BitLocker
- Repair your system image files
- Clear File Explorer cache
- Check for Windows Update
- Change File Explorer options
All these fixes are explained in detail below:
1] Restart your computer or Windows Explorer
The first step is to restart your computer or Windows Explorer. To restart the Windows Explorer, follow these steps:
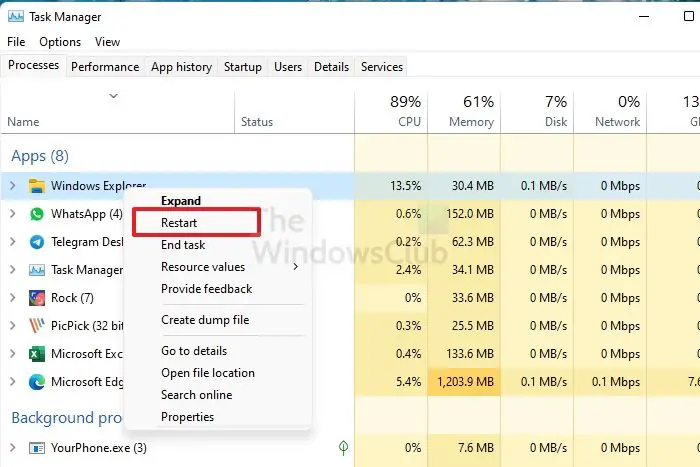
- Open the Task Manager.
- Locate Windows Explorer under the Processes tab.
- Right-click on Windows Explorer and select Restart.
Now, check if the problem persists.
2] Toggle the BitLocker auto-unlock feature
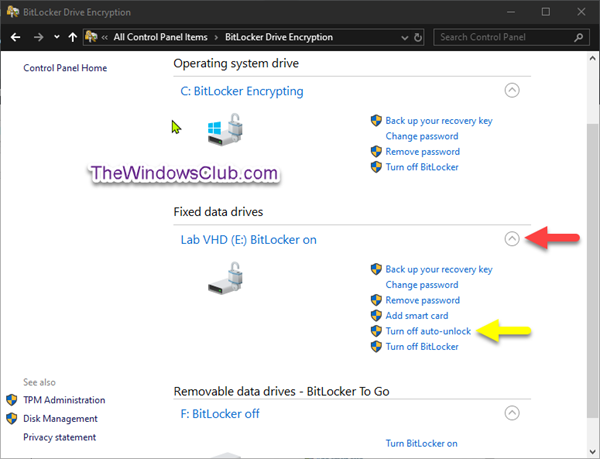
You can try disabling and re-enabling the BitLocker auto-unlock feature. Go to the BitLocker Drive Encryption page in the Control Panel and click the Turn off auto-unlock link. Now, restart your system and re-enable this feature again.
3] Disable and re-enable BitLocker
If the problem persists, try disabling and re-enabling the BitLocker. You can disable and enable BitLocker through the Control Panel or Command Prompt.
4] Repair your system image files
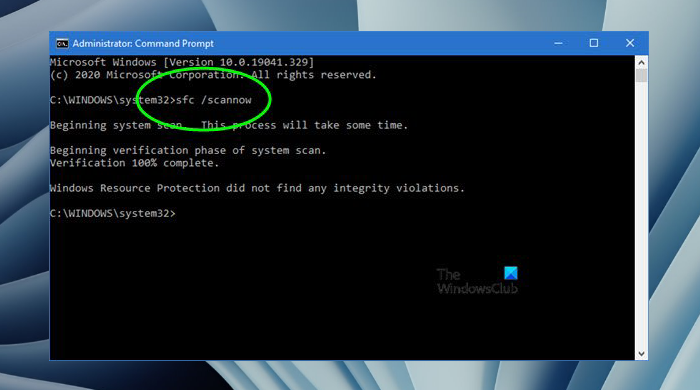
Corrupt system image files can be one possible cause of this problem. Use Windows 11 built-in tools, System File Checker, and DISM to scan and repair your system image files.
5] Clear File Explorer cache
The next fix is to clear the File Explorer cache. The steps to do this are as follows:
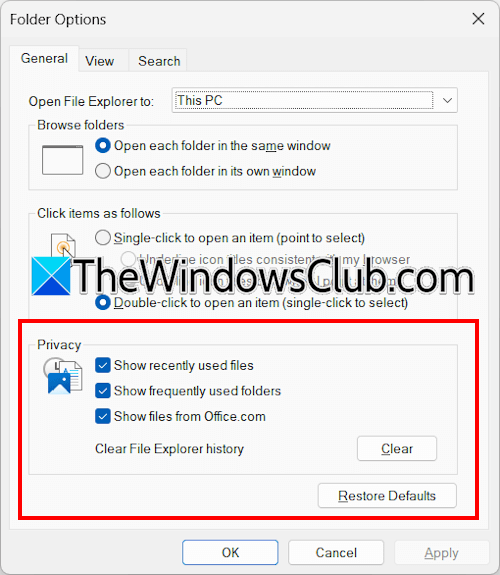
- Open File Explorer.
- Click on the three dots on the ribbon and select Options.
- The Folder Options window will appear. Under the General tab, select all checkboxes in the Privacy section.
- Click Clear.
6] Check for Windows Update
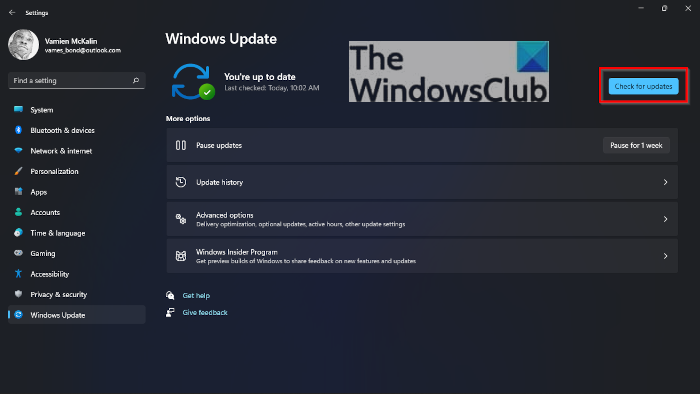
Check for Windows Update manually. Installing the latest Windows Update also fixes bugs in the operating system. Open Windows 11 Settings and select the Windows Update category on the left side. Now, click on the Check for updates button. If an update is available, download and install it.
7] Change File Explorer options
If the issue still persists, launch File Explorer and check if the “Launch Folder Windows in a Separate Process” option is enabled. If yes, disable it. The following instructions will guide you on this:
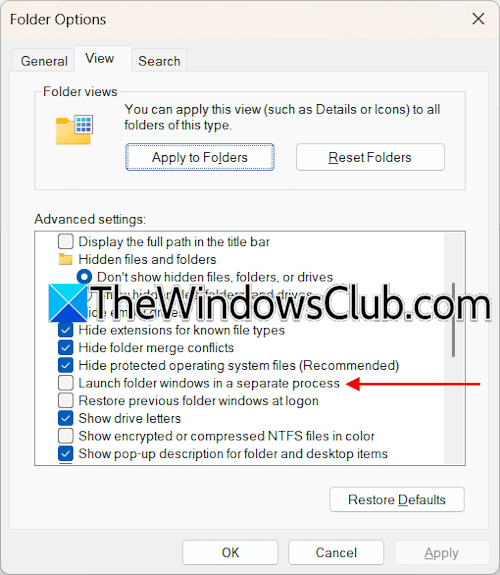
- Open File Explorer.
- Click on the three dots on the ribbon and select Options.
- Go to the View tab, scroll down, and uncheck the “Launch Folder Windows in a Separate Process” checkbox.
That’s it. I hope this helps.
How do I turn off BitLocker?
You can turn off BitLocker for your hard drives through the Control Panel or the Command Prompt. Open the Control Panel and go to System and Security > BitLocker Drive Encryption. Select the Turn off BitLocker option. This process will decrypt your hard drives. Hence, it will take time.
How to check if BitLocker is unlocked?
You can check the status of BitLocker on your system through the Command Prompt. Open the elevated Command Prompt and type manage-bde -status. After that, press Enter.
Read next: Windows cannot be installed, BitLocker drive encryption is enabled.
Leave a Reply