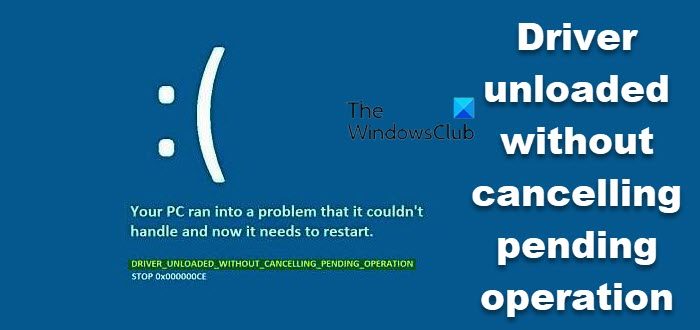
The DRIVER UNLOADED WITHOUT CANCELLING PENDING OPERATION bug check error has an error value of 0x000000CE. This means that a driver failed to cancel pending operations before unloading. Some of the driver files that may be giving rise to this error include intelppm.sys, intcdaud.sys, tmxpflt.sys, asusptpfilter.sys, and mrxsmb.sys.
These all files are related to drivers so fixing them should not be a much off-of a complex task. We will be carrying out a number of potential fixes for this error and try to fix this error.
Driver unloaded without cancelling pending operation, Error 0x000000CE
The DRIVER UNLOADED WITHOUT CANCELLING PENDING OPERATION bug check has a value of 0x000000CE. This indicates that a driver failed to cancel pending operations before unloading. This happens because the driver failed to cancel lookaside lists, DPCs, worker threads, or other such items before unload. If the driver responsible for the error can be identified, its name is printed on the blue screen and stored in memory at the location (PUNICODE_STRING) KiBugCheckDriver.
The following potential fixes will be carried out to fix DRIVER UNLOADED WITHOUT CANCELLING PENDING OPERATION error on Windows 11/10,
- Update, Rollback, or Disable Drivers.
- Check Hard Disk for errors
- Run Memory Diagnostics.
- Analyze Memory Dump files.
- Disable BIOS Memory Options.
- Check Registry settings.
- Miscellaneous Fixes.
If you tend to create a System Restore point usually, you can try to undo any modifications on your computer, by performing System Restore. In case, you do not have a habit of creating a System Restore point; I suggest you start doing so because it is a very strong feature that will let you fix your computer in a number of scenarios.
Secondly, it is recommended that you carry out these tasks mentioned below in Safe Mode only. This post will show you how to boot Windows in Safe Mode.
1] Update, Rollback or Disable Drivers
The incompatibility between the Operating System and the Driver might also give rise to issues like this. So, you can try to Uninstall, Update, or Rollback any of the conflicting drivers with our guide. And you can also try to update your copy of Windows installed. This will help you fix any bad sectors created by any intendedly or unintendedly executed task on the computer. Hence, keeping Windows 10 up to date always is highly recommended as it fixes the possibility of a whole lot of errors.
In particular, you can also try to uninstall your Graphics Driver and reinstall it again and see if it helps.
2] Check Hard Disk for errors
Start by opening This PC. Right-click on your Windows Partition for Windows. Click on Properties.
Now, navigate to the tab labeled as Tools. Under the section for Error Checking, click on Check.
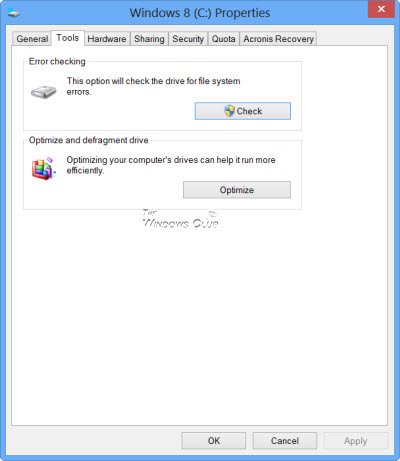
A new mini window will now pop up. Click on Scan drive. Let it scan your disk drive partition and after the Reboot your computer for the changes to take effect.
3] Run Memory Diagnostics
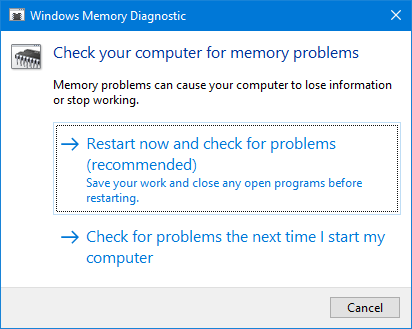
Run the Memory Check on your computer. Start by hitting the WINKEY + R button combination to launch the Run utility. Then type in, mdsched.exe and then hit Enter. It will launch the Windows Memory Diagnostic Tool and will give out two options-
- Restart now and check for problems (Recommended)
- Check for problems the next time I start my computer
Now, according to the option selected by you, the computer will restart and check for memory-based problems. If you get any issues there, it will fix it automatically else if no issues are detected, this is probably not the cause of the issue.
4] Analyze Memory Dump Files
You can find the root cause of this error in the dump files that Windows creates on your computer locally. You can learn more here about how to configure Windows to Create Dump Files on Blue Screen.
5] Disable BIOS Memory Options
To fix this error, you might need to disable BIOS Memory Options viz. Caching or Shadowing.
To do this, you will have to enter your system’s BIOS, open the Advanced page, and you will see the options there. While in the BIOS, you will have to use the Arrow and the Enter keys to select your choices.
If you can’t find it, look for specific instructions from your OEM, or in case you have a custom-built computer, look out for instructions from the maker of your motherboard.
6] Check Registry settings
You can also try to disable the concerned driver file if you see its name in the Stop Error screen.
For instance, if it is the intelppm.sys driver file, then you need to do this. This file is found to be the highest culprit out of all.
For this, hit the WINKEY + R button combination to launch the Run utility, type in regedit and hit Enter. Once Registry Editor opens, navigate to the following key-
HKEY_LOCAL_MACHINE\SYSTEM\CurrentControlSet\Services\Processor
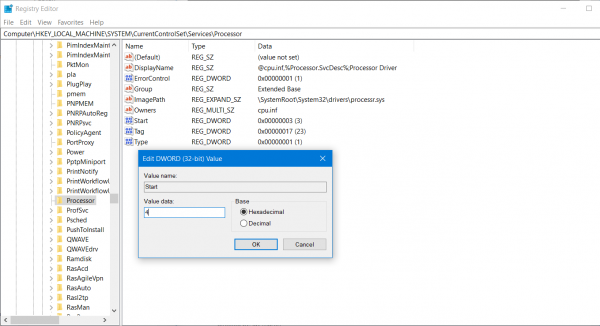
Now, double click on Start on the right-side panel and change its value to 4.
Then similarly, navigate to,
HKEY_LOCAL_MACHINE\SYSTEM\CurrentControlSet\Services\Intelppm
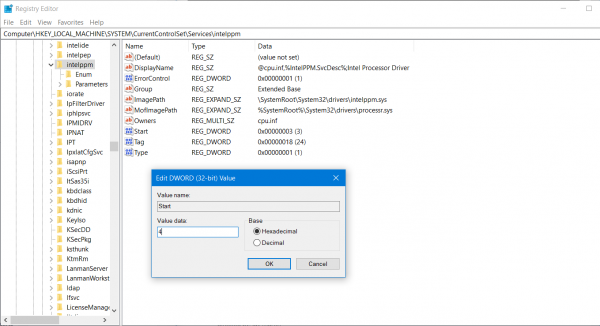
Now, double click on Start on the right-side panel and change its value to 4.
Reboot your computer for the changes to take effect.
7] Miscellaneous Fixes
- You can also try to disable your antivirus protection and check if that fixes that error; because there is a good chance that your antivirus might be blocking the program from execution due to its some suspicious behavior.
- You may also run the Blue Screen Troubleshooter. The built-in Troubleshooter is easy to run and fixes BSODs automatically. The online Blue Screen Troubleshooter from Microsoft is a wizard that is meant to help novice users fix their Stop Errors. It offers helpful links along the way.
Hope something helps!