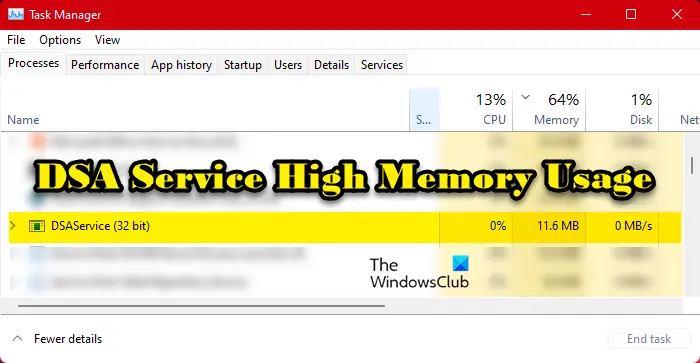
For some users, DSA Service is consuming a lot of CPU or Memory. When users expanded DSA Service, they saw Intel(R) Driver & Support Assistant. So, it is clear that the service is genuine and related to Intel. Then why is it taking so much of your memory, well, that’s what we will unravel in this article. We will see why DSA Service shows high Memory usage and what you need to do to fix this. We will also discuss two other processes with similar names – one related to Deep Security Agent (DSA) and Directory System Agent (DSA).

What is the Intel DSA service?
DSA is an abbreviation of Driver and Support Assistant. This is related to Intel(R) Driver & Support Assistant, which is a program that allows the user to scan the computing device for the latest version of Intel drivers. This is a great way to keep your drivers up to date.
However, this doesn’t mean that you won’t be able to update your drivers if you don’t have this service enabled. Options such as Driver and Optional Update will still work. Also, you can update your drivers from the manufacturer’s website.

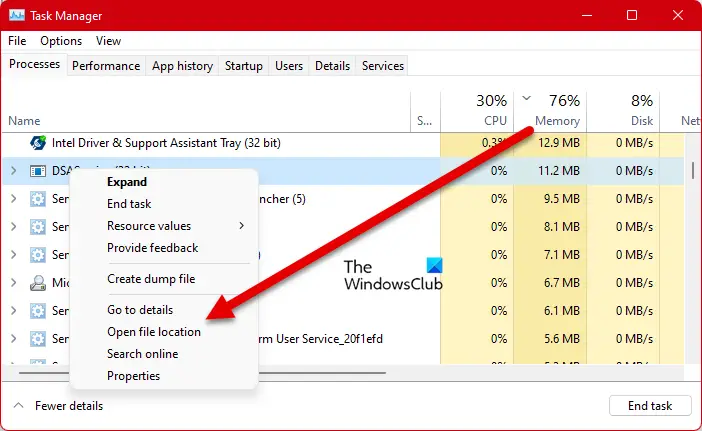
Now, the question is, can it be a virus? Maybe the one running on your computer is not actually the Intel DSA Service but malware! To know that the service consuming your memory is genuine, right-click on it, select Open file location, and make sure that you are redirected to the following location.
C:\Program Files (x86)\Intel\Driver and Support Assistant
If you conclude that DSA on your system is a virus, use your antivirus to scan and remove the malicious files.
Fix DSA Service High Memory or CPU Usage
If DSA Service is causing high memory usage, check for updates. having done that, follow these suggestions:
- End DSA Service and restart the computer
- Update Intel Intel Driver & Support Assistant
- Disable DSA Service
- Uninstall Intel Driver and Support Assistant
Let us talk about them in detail.
1] End DSA Service and restart the computer
First up, we need to kill the process and see if that works. So, open Task Manager, right-click on DSA Service and select End Task.
If that does not help, restart the computer and see if things normalize. The issue could be nothing more than a glitch.
2] Update Intel Intel Driver & Support Assistant
If this is not a glitch then you should go to intel.com and download the latest version of the Intel Driver & Support Assistant software.
Once you install it, your issue should be resolved. If there are no new program versions, move to the next solution.
3] Disable DSA Service
If ending the task doesn’t work for you, and there is no update available, disable Intel DSA Service until an update is available that you can download and fix the issue. Here are the steps to disable DSA Service for Intel(R) Driver & Support Assistant:
- Open Services from the Start Menu.
- Look for Intel(R) Driver & Support Assistant.
- Right-click on it and select Stop.
- Change its Startup type to Disabled.
Now, restart the computer, and the service will not be running; hence, it will not take up your computer’s memory.
Keep checking for updates, once it is available, install it, and your issue will be resolved.
4] Uninstall Intel Driver and Support Assistant

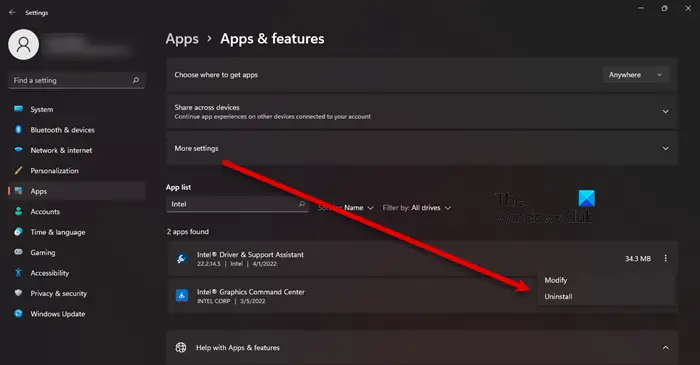
If stopping the service didn’t work for you, try removing Intel DSA from your computer. Keep in mind that you will still be able to update the Intel drivers with the conventional method. To uninstall the app, follow the prescribed steps.
- Fire up Settings by Win + I.
- Navigate to Apps > Apps & Features.
- Search for Intel(R) Driver & Support Assistant.
- For Windows 11: Click on the three vertical dots and select Uninstall.
- For Windows 10: Click on the app and select Uninstall.
- Click Uninstall again to confirm your actions.
After the uninstallation, you need to download a fresh copy of the software and install it on your computer. To download the app, visit Intel.com and click on the Download button. Once the app is downloaded, go to your Download directory, double-click on the executable file, accept all the terms and conditions, and install. Hopefully, this will do the job for you.
Read: Intel Driver and Support Assistant not working
Is DSA Service important?
No, Intel DSA Service is not important for your computer. If you have an Intel driver and want to check if it is outdated, DSA is what you need. However, other methods such as the Device Manager will still work. So, if you feel like you don’t need the service, it’s not essential or causing issues like the one we are talking about here, uninstall it.
NOTE: The DSA process is also related to Deep Security Agent or Directory Service Agent and so we are touching upon these two too:
Deep Security Agent (DSA) and high CPU usage
Deep Security Agent is a security tool deployed on computers to secure them from malware, intrusion from apps, and other threats. If it shows high CPU usage, then we are going to see how to resolve this issue. For the most part, the issue occurs when the cleanup of Integrity Monitoring baselines is happening. For that process, the CPU is being used, sometimes, even a lot. However, once the process completes, CPU usage should go back to normal. If it continues consuming the resources, we need to control the CPU usage, so, follow the given steps to do the same.
- Open the app and go to Integrity Monitoring > Advanced.
- Go to CPU Usage and set it to Low.
- Close the app and restart the system.
Directory Service Agent (DSA) and high CPU Usage
The Directory System Agent (DSA) is a collection of services and processes that run on each domain controller and provides access to the data store. The data store is the physical store of directory data located on a hard disk.
If it is causing high CPU usage, your first solution should be to right-click on the process and click End Task. If it reappears after some time, check your Hard Disk and make sure it is fine. To check the health of the disk, run the following command in the elevated mode of Command Prompt – chkdsk.
You can also use WMIC to check the health of your Hard Disk. In case, the hard disk was not the reason, try troubleshooting in Clean Boot to find out if a third-party application is interfering with the process.
Read: Intel Driver and Support Assistant Scan Failure error
How do I fix high CPU and Memory usage Windows 11?
High CPU and/or memory usage can be caused by applications with heavy system resource consumption. It could be a browser like Google Chrome, some GPU-intensive game, a photo editor application, etc. Some malware or virus and other factors can also cause this issue. So, if you face this problem, then you should run SFC and DISM scan, perform an antivirus scan, uninstall any unwanted applications, update your device drivers, etc., to fix high CPU and memory usage on your Windows 11 computer.
Also Read: 10 free Microsoft Active Directory alternative software.