In Windows 11/10, you may see two similar account names on your Login, Sign-in screen, or Lockscreen. This happens when you enable the automatic login feature but then change the computer’s password or name. In this article, we are going to fix the Duplicate username issue.
Duplicate username at Login or Sign In screen
These are the things you can do to fix the Duplicate username problem in Windows 11/10:
- Change Sign-In Options
- Manually Remove duplicate Username
- Disable auto-login
Let us talk about them in detail.
1] Change Sign-In Options

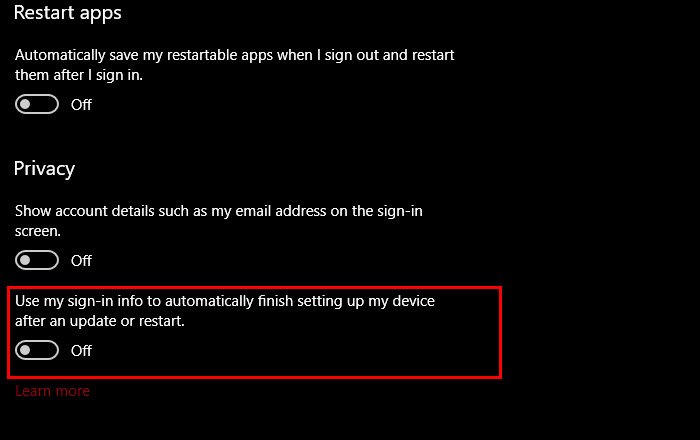
The first method to fix the issue is via changing the Sing-In Options from the Settings app. This will disable the Auto Sign-in feature. To do that, follow the given steps.
- Launch Settings by Win + I.
- Click Account > Sign-In Options.
- Use the toggle to disable “Use my sign-in info to automatically finish setting up my device after an update or restart”.
Now, restart your computer and you won’t see a duplicate username.
2] Manually Remove duplicate Username
If you don’t want to change Sign-in Options, you can easily remove a duplicate username to fix the issue. So, let us see how to do the same.
Launch Run by Win + R, type “netplwiz” and hit Enter.
If you see two usernames, select one, and click Remove.
Finally, restart your computer and hopefully, you won’t see a duplicate username.
3] Disable auto-login

If the above two methods didn’t fix the issue, unlikely, you can bypass the login screen to fix the issue.
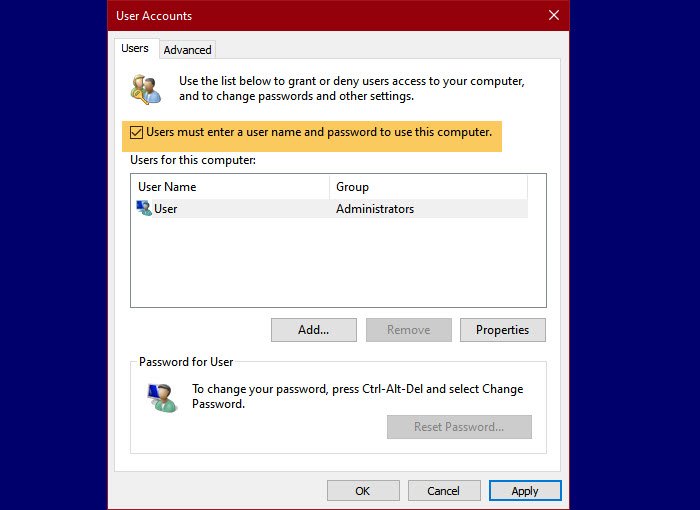
To do that, launch Run by Win + R, type “netplwiz” and hit Enter. Now, check the “Users must enter a user name and password to use this computer” box to turn off auto-login.
If you want to re-enable auto-login, uncheck the option and use the correct password.
These were the three methods to fix the issue.
Why do I have two user accounts in Windows?
Seeing two user accounts in Windows often results from the auto-sign-in feature being enabled after an update, causing duplicate user names on the login screen. To resolve this, disable the auto-sign-in option. This effectively reduces confusion and streamlines the login process by ensuring only one user account appears.
How do I change the name on the Windows login screen?
To change the name on the Windows login screen, open the Control Panel, select “User Accounts,” and then choose “Change your account name.” Enter the new name and click “Change Name” to update. This will alter the name displayed on the login screen and in other user-related areas. This post will show you change Microsoft Account User Name in Windows.
Read Next:
Leave a Reply