Here is a tutorial for you to edit frames of an animated GIF using GIMP in Windows 11/ 10. GIF frames are individual image frames that combine together to create an animation. We have already discussed how to extract GIF frames. Now, if you want to edit individual frames of an animated GIF, how to do that? Well, in this post, we are going to show you step by step procedure to edit frames of an animated GIF.
To do so, we will be using GIMP – GNU Image Manipulation Program. It is a dedicated and feature-rich free and open-source image editing software that can be used to modify GIF frames in Windows 11/10. Apart from scalar and vector images, it can also handle GIF animations and lets you create an animated GIF. It also lets you import existing GIFs and allows you to edit separate GIF frames. You can crop, resize, or rotate frames, insert text to a frame, enhance its look and feel, etc. Let’s check out how you can do that!
How to Edit Frames of an Animated GIF using GIMP
Here are the basic steps to edit frames of an animated GIF in GIMP on your Windows 11/10 PC:
- Download and install the GIMP application.
- Launch GIMP.
- Open an animated GIF.
- Select a GIF frame from the Layers panel.
- Edit the frame using available tools.
- Playback and export the edited animated GIF.
Let us discuss these steps in detail now!
Firstly, you need to have GIMP installed on your Windows 11/ 10 PC. Simply download GIMP from its official website and then install it on your PC using the on-screen installation guide. After that, just launch the GIMP application to start using it.
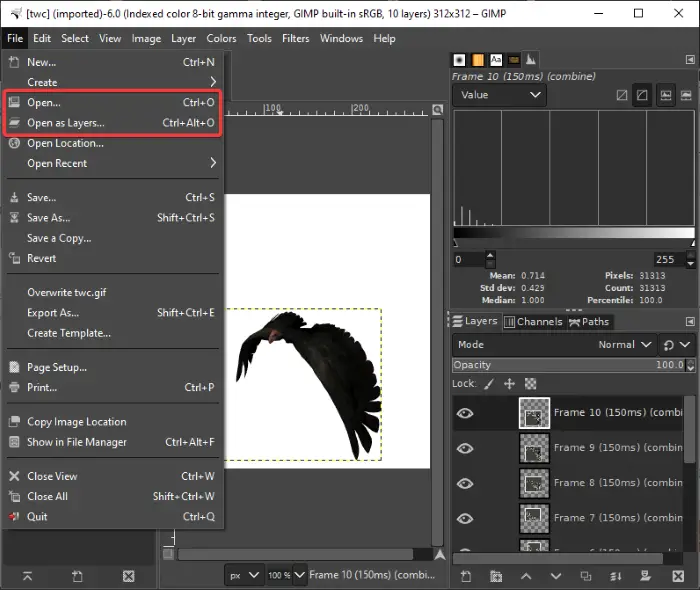
Now, go to the File menu and click on the Open or Open as layers option to browse and import an animated GIF.
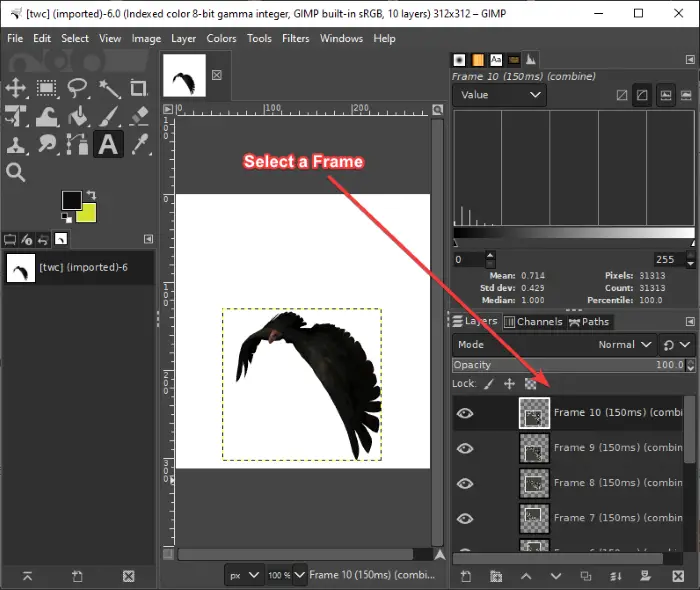
As you import an animated GIF, you will be able to view individual frames of GIF in its Layers dockable window on the right-hand side. From here, just select the frame that you want to edit.
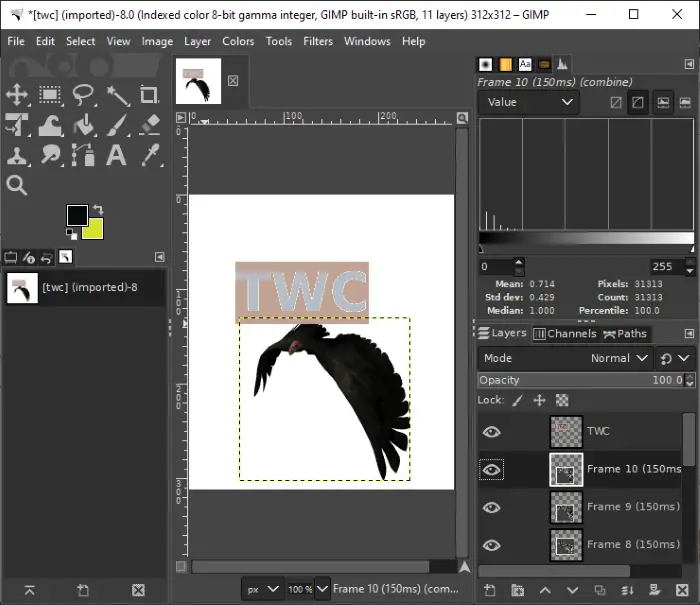
Next, you can use the available editing tools to modify the frame such as add text to the GIF frame, create drawings using painting tools, apply various effects and filters, resize, rotate, crop, adjust color levels, blur a frame, and do more.
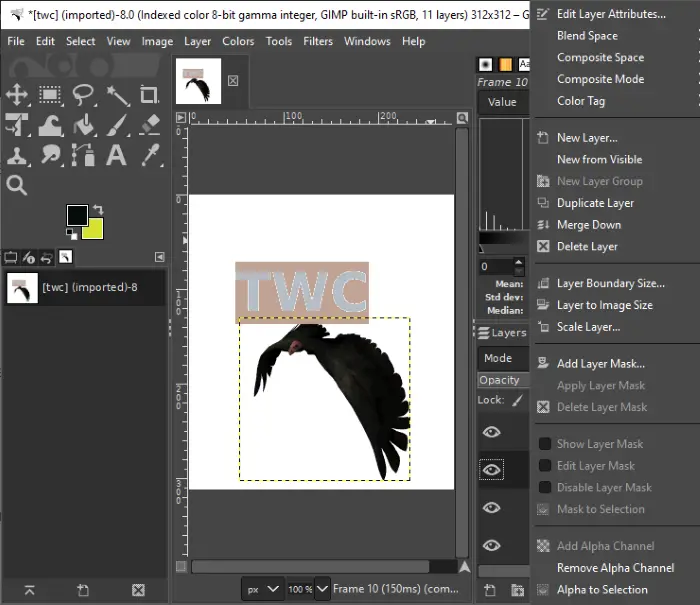
Additionally, you can reorder frames, delete a specific frame, and add a completely new frame from the Layers window. Right-click on a frame and you will be able to use various options like edit layer attributes, color tag, composite space/ mode, add a layer mask, and more. Also, you can add an external image to a frame of GIF animation.
See: How to add a Neon Glow effect to Text in GIMP.
When you are done editing individual frames of an animated GIF, you can preview the edited GIF by going to the Filters menu and clicking on the Animation > Playback option.
You can also optimize/unoptimize GIF and add Blend, Burn-in, Rippling, Spinning Globe, and Waves effects to the GIF from the Animation options.
Read: How to outline text or add a border to text in GIMP.
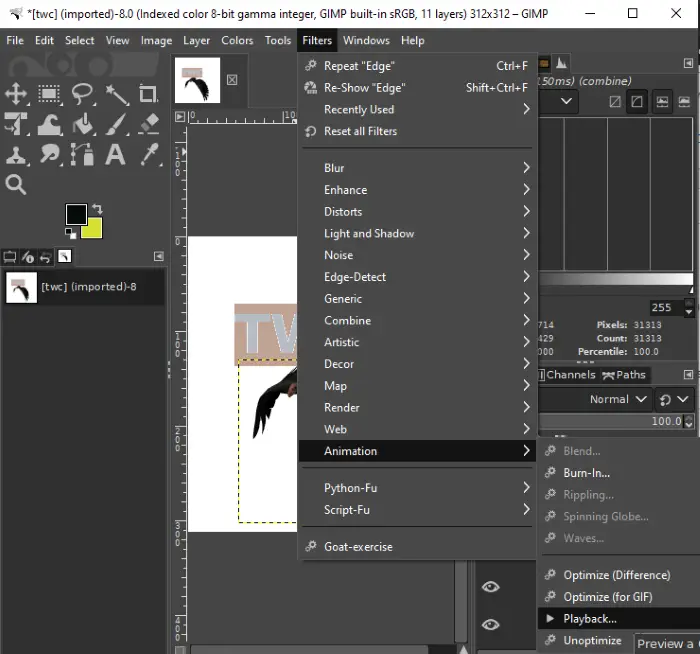
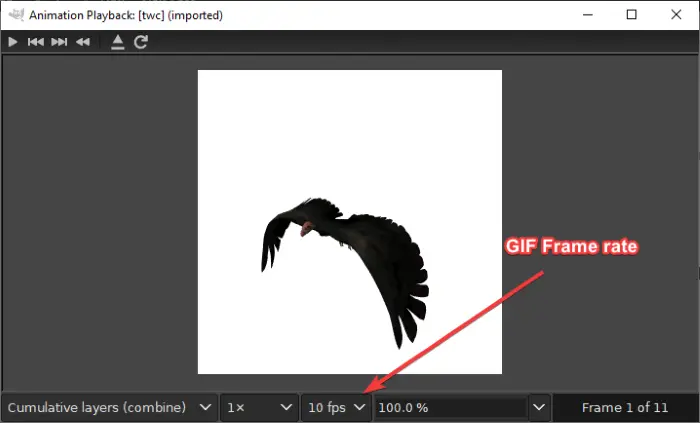
From the Animation Playback dialog window, click on the Play button to preview the edited GIF. Furthermore, you can adjust the frame rate of output GIF by clicking the highlighted drop-down option in the below screenshot. After setting up all output options, exit the Animation Playback window.
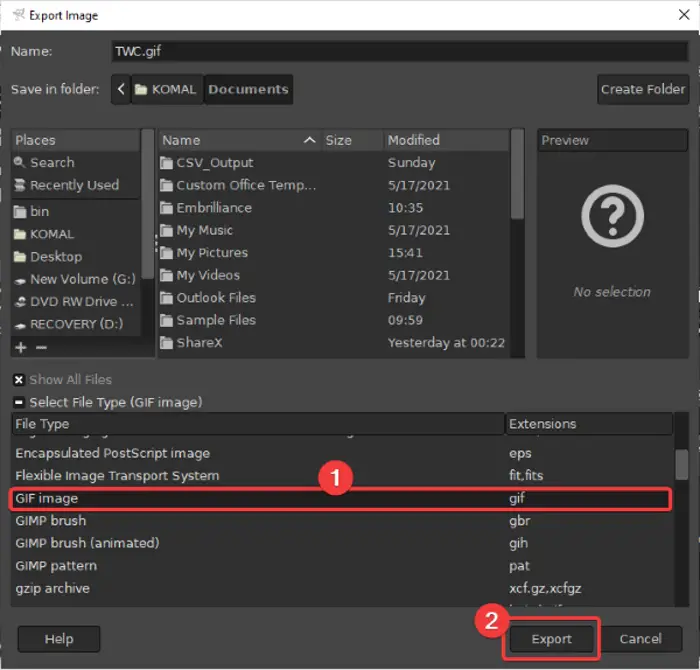
Now, you need to export the animated GIF with edited frames.
To do so, go to the File menu and click on the Export as option. Then, select GIF as the output file type in the output dialog and press the Export button.
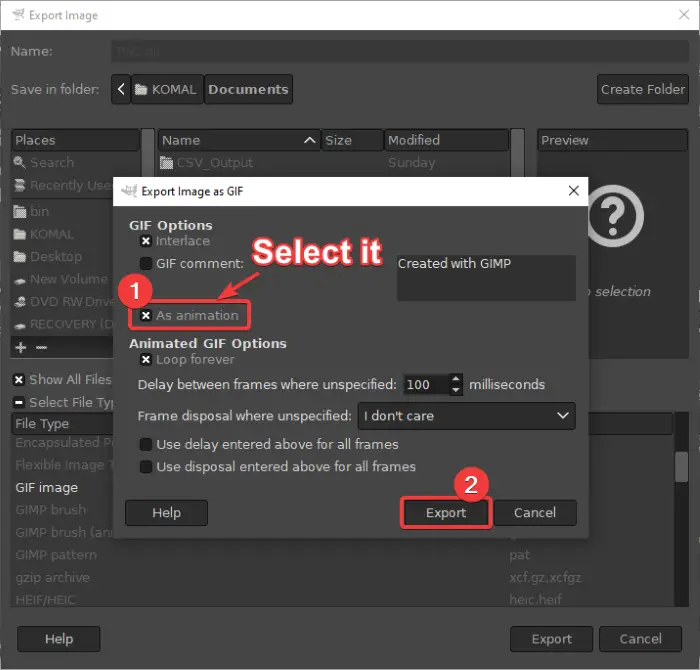
You will now see an Export Image as GIF dialog box. Here, enable the As animation option (a cross mark will appear) and set up various other GIF configurations including loop forever, the delay between frames, etc. After doing so, tap on the Export button to save edited GIF.
Hope this article helps you!
Now read: Best free Video to GIF maker software.