Live captions is a new feature in Windows 11 that lets you convert the audio played on your PC into text form and shows it on screen, so users will be able to understand the content more easily. The audio will be easier to understand for users with hearing disabilities and users who find it challenging to comprehend the audio flow. Currently, Live captions are only available in English (United States), meaning English audio will be converted into English captions. If you have the latest Windows build and want to enable and customize Live captions, this post will help you.
What are Live Captions?
Live captions are an accessibility feature that turns audio playing on your system into an accessible text format. The device can be used when watching videos online, and the microphone can even be connected for in-person chats.
How to Enable Live Captions on Windows 11
If you want to enable Live captions on your Windows 11 computer system, follow the below suggestions:
- Open the Settings app.
- In the Settings window, choose Accessibility from the left panel.
- Select the Captions option under the Hearing section.
- Turn on the toggle for Live captions
For more detailed explanations, see the steps below:
To get it started, open the Settings menu first. This can be done by pressing the Windows key and the keyboard’s I key. You can also right-click the Start menu and select Settings from the menu list.
From the left sidebar, select the Accessibility tab.

Now go to the Hearing section on the right panel and click on Captions.

Then turn on the toggle switch for the new Live captions tab so you can see them on your PC.
Alternately, you can turn on Live captions using the Win logo key + Ctrl + L keyboard shortcut on your Windows 11 keyboard.
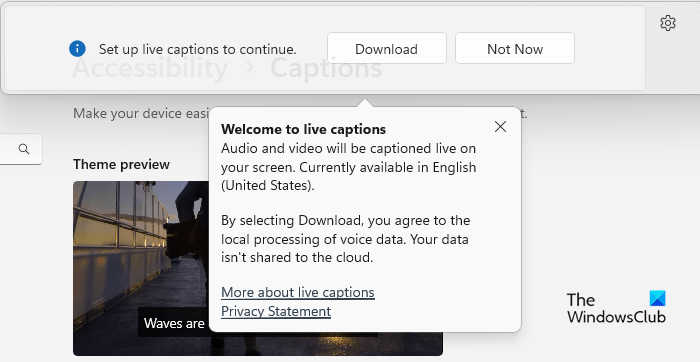
When you see the pop-up window, click on the Download button to agree to the local processing of your voice data. According to Microsoft, your data won’t be stored in the cloud.
How to Customize Live Captions on Windows 11
After you have enabled the Live Captions on your Windows 11 PC, you can now customize its appearance. These are to position the caption box, apply a profanity filter, enable microphone audio, and change caption style. Let’s take a look.
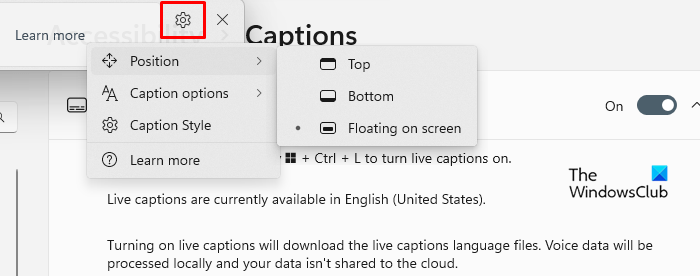
At first, go to the top-right corner of the captions box and click on the gear icon (Settings).
From here, you can choose different options. As you can see on the screen, the first option is Position. It lets you place the caption box anywhere you want, at the top of the screen or at the bottom of the screen.
The Caption options can be found just below the Position option. This section provides you with the option of filtering profanity and adding the audio from your microphone to the captions.
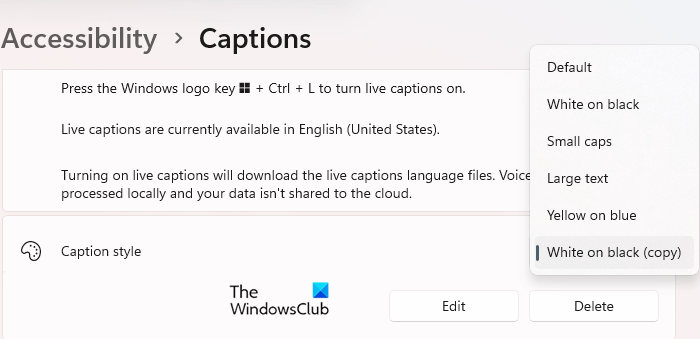
The next option is to adjust the caption style. You can choose from a few options, such as white on black, small caps, large text, and yellow on blue. Moreover, you can customize the text, background, and caption windows according to their color and opacity. A preview window in the theme preview window shows how caption styles appear.
Read: Enable or disable Live Captions Profanity Filter in Windows 11
How to access Live Captions from the Quick Settings flyout?
Furthermore, you can add the Live captions Shortcut to the Quick Settings so that you can access this setting directly from the Quick Settings flyout. To do this, you can use the below steps:
- First of all, press the Windows logo + A to open the Quick Settings window.
- Now click on the pencil icon to edit the quick settings menu.
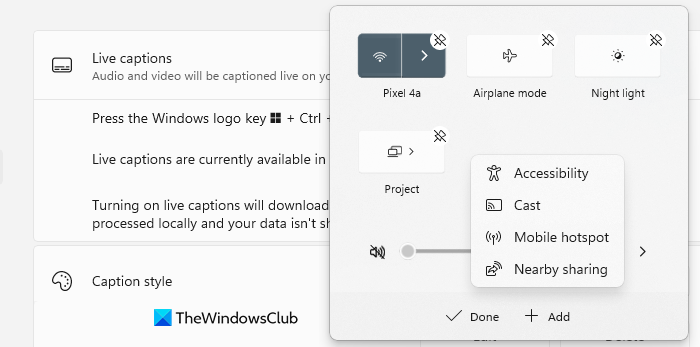
- Click on the Add button and select Accessibility from the menu list.
- Then click on the Done button to save the changes.
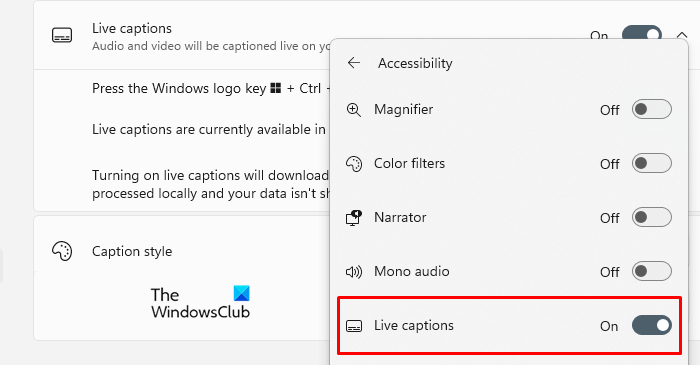
- Open the Accessibility menu and turn on the toggle for Live captions.
Related: How to enable the Live Caption feature for Audio or Video on Google Chrome.