TPM Diagnostics Tool or TpmDiagnostics.exe is an optional feature that lets you find out all the Trusted Platform Module chip information using Command Prompt. This command-line tool needs to be installed in Windows 11 so that you can retrieve details about the TPM chip, which is required for installing Windows 11. Here is how you can enable and use the TPM Diagnostics tool in Windows 11 using some of the useful commands.
TPM Diagnostics is an optional feature, meaning you can install it, but it is not mandatory. However, some commands might let you change various settings in your TPM chip. You should be careful about and change anything only if you know what you are doing.
How to enable and use TPM Diagnostics Tool in Windows 11
To enable and use the TPM Diagnostics tool in Windows 11, follow these steps:
- Press Win+I to open Windows Settings.
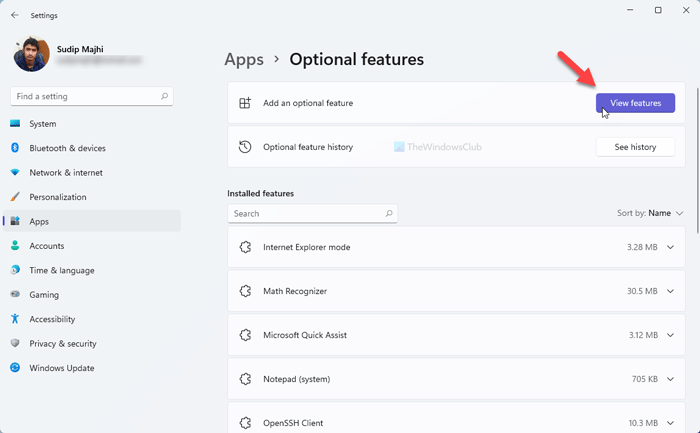
- Go to Apps > Options features and click on the View features button.
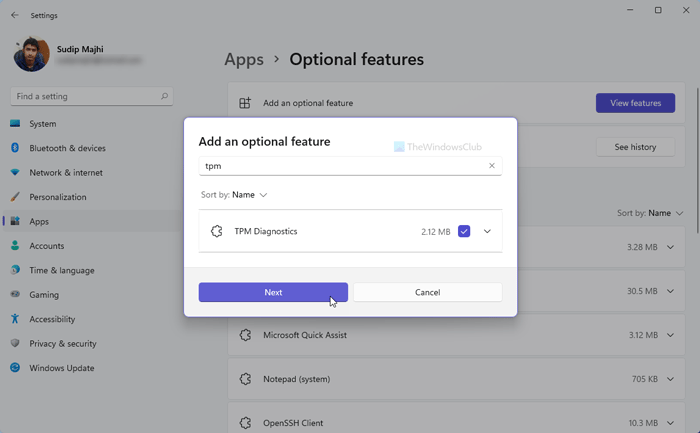
- You can search for “tpm diagnostics” or find out the TPM Diagnostics feature.
- Tick the checkbox and click the Next button.
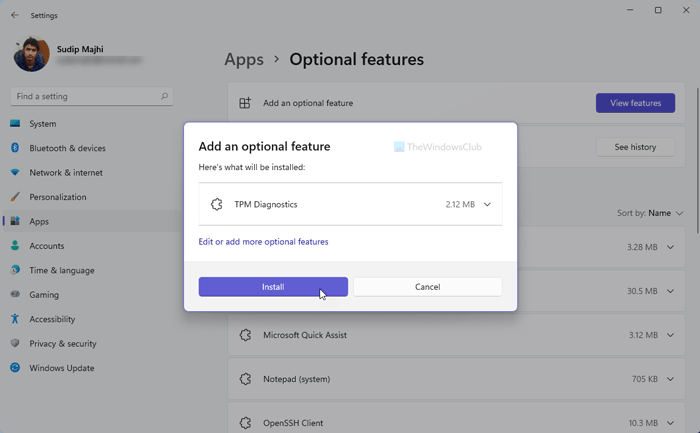
- Click the Install button to start the installation process.
- Search for the command prompt and select Run as administrator.
- Click the Yes button.
- Enter tpmdiagnostics.exe /? to get all the commands.
To get started, press Win+I to open Windows 11 Settings panel. Then, go to the Apps tab and click on the Optional features section.
You can find a button called View features, and you have to click on it to see all the available Optional features.
Now, you can either search for “tpm diganostics” or scroll down to find that out. Once you get the feature, tick the corresponding checkbox and click on the Next button.
Then, click on the Install button to start the installation process.
Once the installation process is done, you can use TpmDiagnostics.exe using Command Prompt. For that, click on the Taskbar search box and search for the command prompt. Click on the Run as administrator button and select the Yes option to run Command Prompt as administrator.
Now, you can enter the following command:
tpmdiagnostics.exe /?
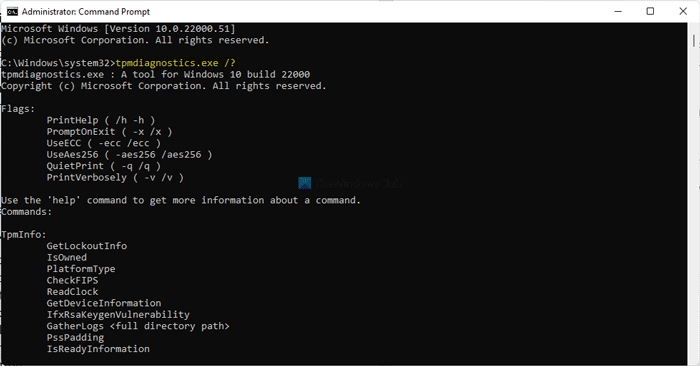
It displays all the commands you can run. Let’s say you want to know everything about the TPM chip you have. For that, execute the following command:
tpmdiagnostics.exe getdeviceinformation
It shows TPM availability, version, manufacturer ID, and so on. It is possible to enter any other command using the following pattern:
tpmdiagnostics.exe [your-keyword]
Different commands show/do different things, and you should be aware of what you are going to change.
Does Windows 11 require TPM?
Yes, Windows 11 requires TPM or Trusted Platform Module. If you do not have the TPM chip, you will get This PC can’t run Windows 11 error.
However, it is possible to bypass the TPM requirement and install Windows 11.
Do I have TPM on my computer?
If you are already running Windows 11, chances are you have the TPM chip – unless you have bypassed the TPM requirement. TPM is a hardware component intended for increasing the overall security of your computer. There are multiple ways to check if you have TPM support or not. For instance, you can check your BIOS setting, contact your hardware manufacturer, or use the TPM Management tool. Follow this detailed tutorial to find if you have TPM on your computer or not.
How to uninstall TPM Diagnostics Tool in Windows 11
To uninstall TPM Diagnostics Tool in Windows 11, follow these steps:
- Press Win+I to open Windows Settings.
- Go to Apps > Optional features.
- Find out TPM Diagnostics under Installed features.
- Click on the Uninstall button.
At first, you have to open Windows Settings by pressing Win+I. Then, navigate to Apps > Optional features and find out the Installed features section. Here you can find TPM Diagnostics.
Select it and click on the Uninstall button.
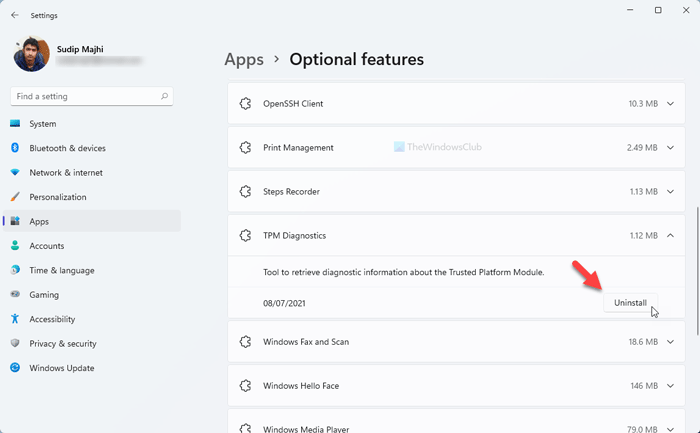
The uninstallation process starts immediately without further confirmation and shows the progress on the same window.
Uninstalling or Installing the TPM Diagnostics tool in Windows 11 is as simple as that!