If you are not getting a confirmation dialog box to acknowledge every time you delete an image in the Photos app, you have disabled the confirmation box. In this post, we will see how to disable or enable Delete confirmation dialog box for the Photos app.
The Photos app is one of the best image viewers for Windows 11/10. Whether you have a PNG or JPG image or a video file, you can use this app to view the content on your computer. However, it has a problem which users encounter while deleting files from the Photos app.
When you delete a file via the Photos app on Windows 11/10, you may or may not see a dialog box requesting your permission to do so. This warning box is essential for some people who are prone to accidentally deleting files.
If you accidentally click on the Delete button on your keyboard, it removes the opened file instantly. Although you can get it back from the Recycle Bin, it might irritate you. The same happens if you click the trash can icon on the top menu bar. Or let’s assume that you had the delete confirmation dialog, but you checked the Don’t show this warning again box. If you want to turn on the delete confirmation dialog or box for the Photos app on Windows 11/10, here is what you have to do.
For those who regularly delete images via the Photos app, the dialog box popping up each time is quite annoying, we understand.
How to enable Delete confirmation dialog for Photos app

To enable or disable the delete confirmation dialog for the Photos app, follow these steps-
Windows 11:
- Open Photos.
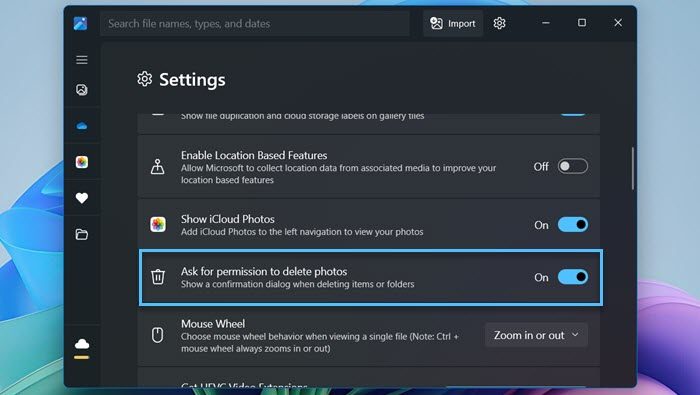
- Now, click on the cog icon to open its Settings.
- Scroll down and look for Ask for permission to delete Photos.
- Toggle it on to enable the delete confirmation dialog box.
Windows 10:
- Open the Photos app on your computer.
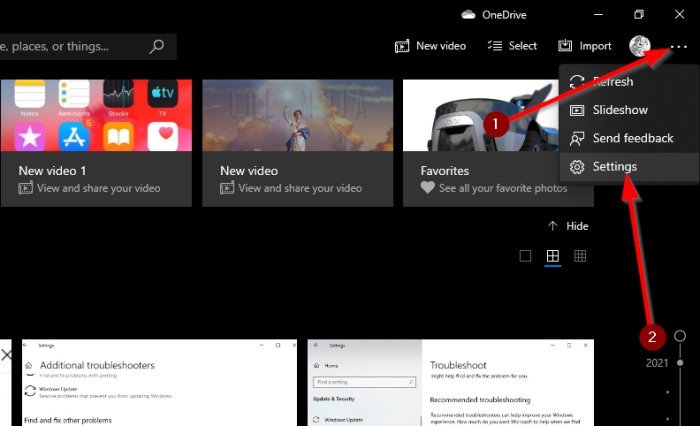
- Click on the three-dotted icon in the top-right corner.
- Select Settings from the menu.
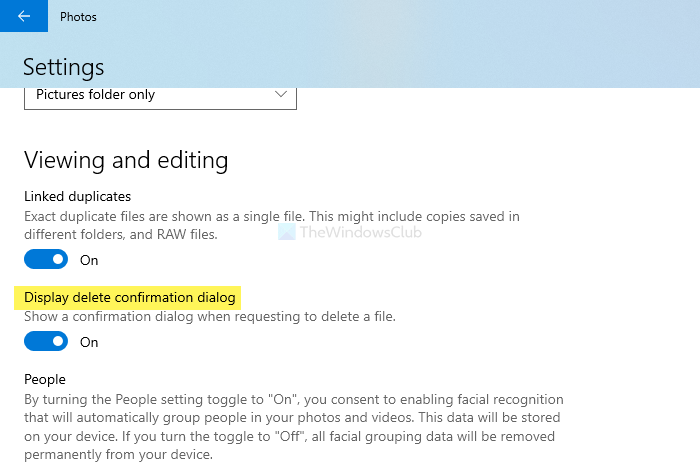
- Find out the Display delete confirmation dialog heading.
- Toggle the corresponding button to turn it on.
To get started, open the Photos app on your computer. You can open an image with this app or search for it in the Taskbar search box.
Alternatively, one could open the Run dialog box by clicking on the Win+R, then type ms-photos: followed by hitting the Enter key.
After opening the Photos app, click on the three-dotted icon visible in the top-right corner. You can find it next to your profile picture, and it says See more. After that, select Settings from the menu.

Now, find the heading called Display delete confirmation dialog and toggle the switch to turn it on.

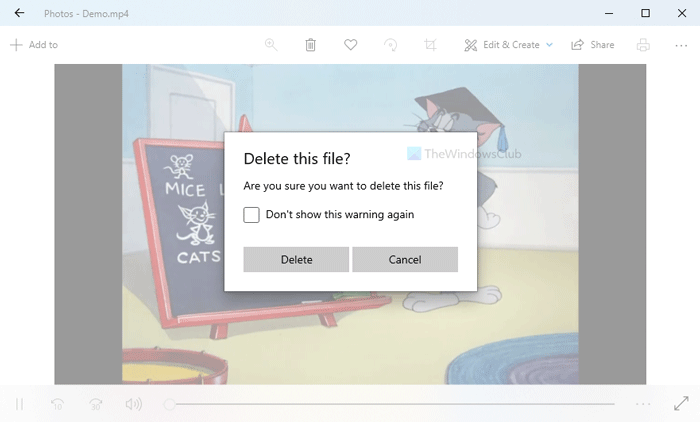
After enabling the delete confirmation warning, the message appears. If you see the dialog box whenever you attempt to delete files, then that means the feature is turned On.

You can also stop it in its tracks without having to navigate to the Settings section of the app. From the dialog box, tick Don’t show this warning again, and that should do it.
If you want to disable it, you can also navigate to the same path in the Photos app and toggle the same Display delete confirmation dialog button.
That’s all! I hope it helps.
Read: Cannot delete items from Recycle Bin in Windows
How do I enable Delete confirmation dialog in Windows 11?
To enable the delete confirmation dialog box in Windows 11, we need to configure the properties of the Recycle Bin. So, right-click on the Recycle Bin icon and click on Properties. Now, tick the Display delete configuration box and click on Apple > Ok.
Also Read: Disable or Enable Sticky Notes Delete Confirmation Prompt.
Leave a Reply