Most modern PCs and Desktops these days come with Location Sensing feature built directly into the hardware, which is capable of identifying your geographical location. It’s not just your Smartphone that comes equipped with technology capable of location sensing – but your computer too.
The Windows Sensor and Location platform simplifies the integration and use of sensors. The platform consists of a driver component and a client component. In Windows 8, the platform includes many new features for hardware engineers and driver developers. The location sensing service in Windows 8 utilizes WiFi and IP triangulation to provide accurate location data. The feature works best with a Wi-Fi-enabled PC or laptop but also works over any IP connection too.
Many Windows apps make use of your location to give you the best experience – but the feature is turned off by default. In this post, we will see the process of enabling or disabling location sensing in Windows 8.
Enable Windows Location Platform in Windows 8.1
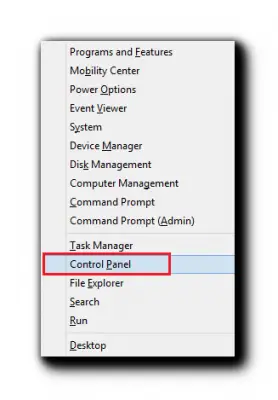
To begin, first, open ‘Control Panel’. The shortest possible way of accessing ‘Control Panel’ in Windows 8 is via ‘Power Task Menu’. Press Win+X in combination to bring up the Power Task Menu and from it choose ‘ Control Panel’.

Next, in the Control Panel search box, type ‘Sensor’. Then, choose the option ‘Change Location Settings’.
Here, in the Settings, you can either choose to Let user turn on location sensing for individual apps (administrator privileges required for this setting) or disable it completely. Check Turn on the Windows Location Platform.
When you are done, hit the ‘Apply’ button to save the final changes.
This is how you can enable or disable location sensing in Windows 8.
Change Location
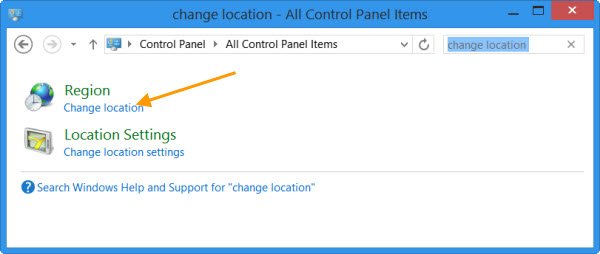
If you wish to change your Location, open the Control Panel and type ‘change location’ in the search bar. Under Region, select Change Location.

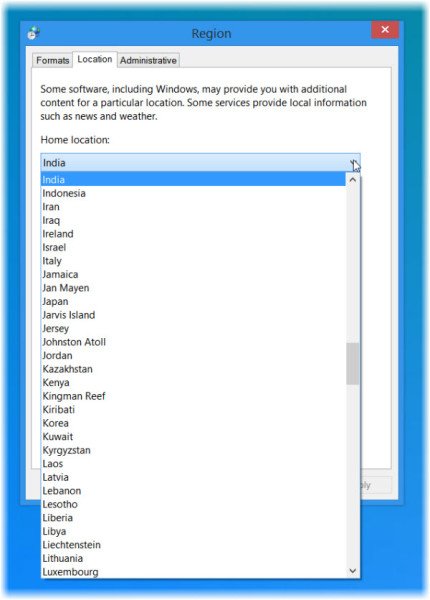
The following Location tab of Region settings will open.

From the drop-down menu, select your country or location, click Apply and Exit.
That’s it!
My tablet has the wrong location how do I change it?
I have updated the post. Hope it helps.