The Windows File Explorer is pretty responsive and carries a lot of features. It allows a ton of customizations either by changing Settings or changing the value of a Registry key or Group Policy modification. Today, we are going to show you how to enable or disable Status Bar in File Explorer on Windows 11/10.
What does the File Explorer Status Bar display
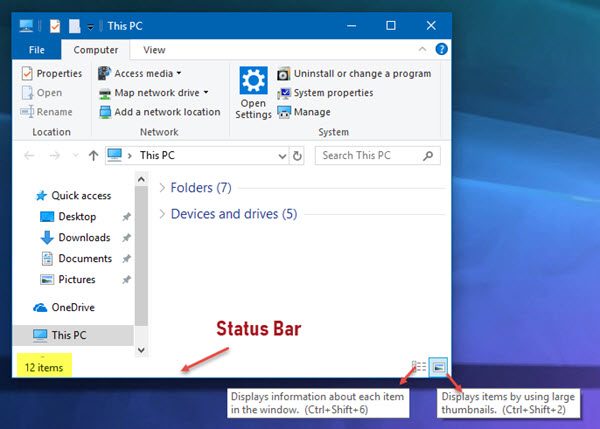
The Status Bar rests at the bottom of the Explorer. It shows you how many items are there in the folder and how many items you have selected. It also displays information about each item and can display items using large thumbnails with a click.
Disable Status Bar in Explorer in Windows 11/10

We will be covering the following methods to enable or disable the Status Bar in File Explorer on Windows 10:
- Using Folder Options.
- Using the Registry Editor.
- Using Ultimate Windows Tweaker.
1] Using Folder Options
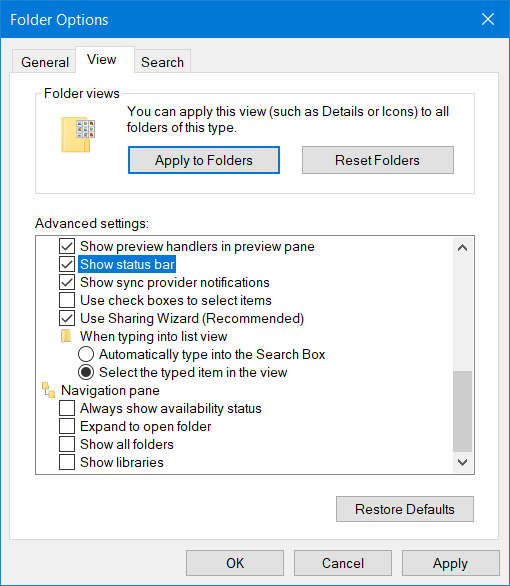
Start by opening the File Explorer. Then hit the ALT+F button combination on your keyboard. Now click on Options.
Make sure that you are on the tab labeled as View. In the list that gets populated, look out for Show Status Bar.

It is enabled by default. If you uncheck it, you will have the Status Bar disabled.
Finally, click on Apply and then on OK.
2] Using the Registry Editor
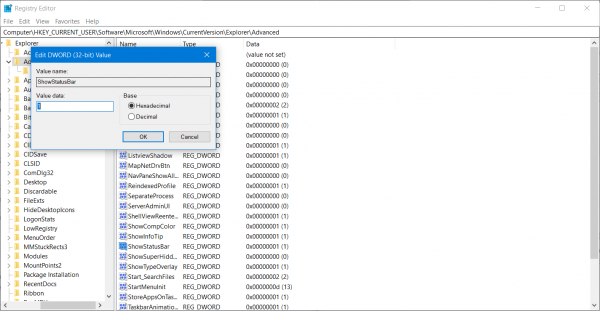
Hit the WINKEY + R button combination to launch the Run utility, type in regedit and hit Enter. Once Registry Editor opens, navigate to the following key-
HKEY_CURRENT_USER\Software\Microsoft\Windows\CurrentVersion\Explorer\Advanced
Now, right click on Advanced and select New > DWORD (32-bit) Value.

Name this newly created DWORD as ShowStatusBar. Double click on it and change its Value to 0 to disable it. To enable it, you need to set its value to 1.
If the DWORD already exists, you need to modify it.
Reboot your computer for the changes to take effect.
3] Using Ultimate Windows Tweaker
Our Ultimate Windows Tweaker lets you do this with the click of your mouse. You will find its setting under Customization > File Explorer.
More Windows File Explorer tips here.
Leave a Reply