A Guest Account in Windows 11/10 lets users use the Windows PC without any account. This is very helpful when you want someone to use your PC, and you do not want them to have all the permissions. For instance, the user with a guest account does not have permission to create a new account, change the password or change any system settings. You may have already read our post highlighting the difference between the Admin, Standard, Guest, etc. Accounts.

Enabling and disabling the Guest Account in previous versions of Windows is very simple, and it can be done from User Accounts in Control Panel. But the process to enable a Guest account in Windows 11/10 is a bit tricky. In this article, I will let you know how to enable Guest Account in Windows 11/10 using Command Prompt.
UPDATE: Things appear to have changed in recent Windows 10 versions. Windows 10, v1607 introduced Shared or Guest PC Mode. This sets up Windows 10 Pro, Pro Education, Education, and Enterprise for limited use in certain scenarios. As a result, the following procedure may not work in Windows 10 v1607, v1703, and later now.
Enable Guest Account in Windows 11/10
The guest account can be used only to browse files that are already present and carry out regular web surfing. Users on the guest account cannot install and uninstall software, access and modify local files, and more.

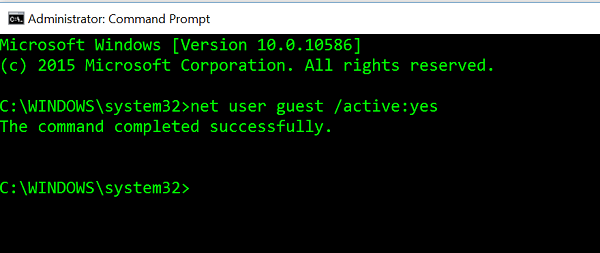
Before you begin, create a system restore point first. Next, you need to open WinX Menu and select Command Prompt (Admin). In the Command Prompt window, type the following command and hit enter.
net user guest /active:yes
It will show you the message “The command completed successfully”. This means that the Guest Account has been enabled in Windows 11/10.
If you want to disable the Guest Account in Windows 11/10, use the following command in Command Prompt:
net user guest /active:no
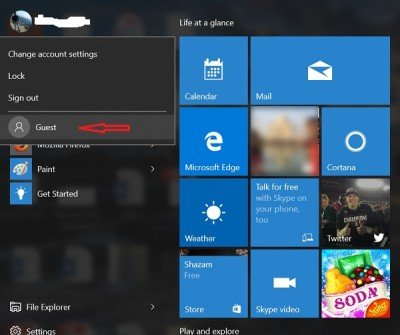
To see the “Guest” account, open the Start Menu and click on your user account name. You will be able to see the Guest Account.

But you may notice one issue. If you click on Guest, then, on the Login screen, you may not be offered the Guest account to sign in. You may simply be offered your account.
So do try out this method and let us know if this worked for you or not. See this post if you want to learn how to create a Guest Account in Windows 11/10.
How do I create a guest account on Windows 11?
You can do it from Windows Settings. Open it using Win + I, and then navigate to Accounts > Family and other users. Click on Add account, and then create a standard user account. You can then allow others to use this account as guest users. Make sure not to use the name GUEST as a user account, as it is reserved by the System.
How to check users using cmd?
You can view the list of user accounts using cmd by executing the following command:
net user
Open the Command Prompt as an administrator and type the above command in it. After that, press Enter. You will see a list of all user accounts in th Command Prompt.
That’s it. I hope this helps.
Leave a Reply