Windows 11/10 offers lots of customization options. For example, you can configure different settings for your mouse, like – changing the color of the pointer or enabling mouse pointer trails. We have already seen how to change the color of the mouse pointer. So, today, we’ll acquaint you with the method of enabling Mouse Pointer Trails in Windows 11/10.
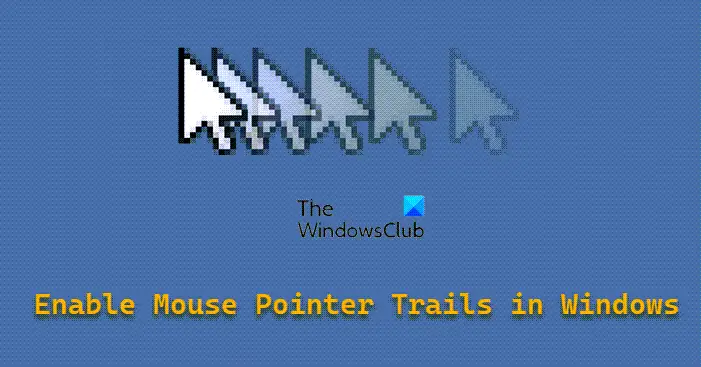
Pointer trails were originally meant for LCD monitors with slow response times. It is no longer necessary for modern LCD screens. This feature, however, still has its use if you have visual difficulties.
Turn On Mouse Pointer Trails in Windows 11/10
A mouse trail is a path of any shape that follows the mouse pointer around the screen. It is usually used as an accessibility feature that makes it easier for users with impaired vision to see the mouse pointer and track its movement. Sometimes, it can also be used in presentations for fun, decoration, and detail.
There are two methods to enable mouse pointer trails in Windows 11/10-
- Enable Mouse Pointer trails via Mouse Properties
- Enable Mouse Pointer Trails via a Registry tweak
Let’s cover the above methods in a bit of detail.
1] How to display Mouse trails in Windows 11/10 via Mouse Properties
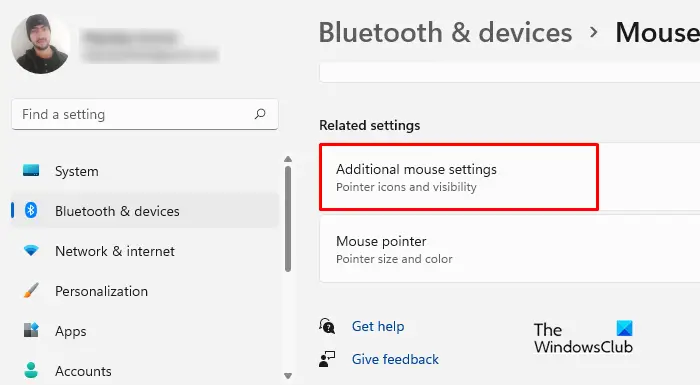
To display Mouse trails in Windows 11/10:
- Right-click on Start and select Settings.
- In the Settings menu, select Bluetooth & devices.
- Now go to the right pane, and click on Mouse > Additional mouse settings.
- Switch to the Pointer Options tab.
- Check the box next to Display Pointer trails.
- Click Apply > OK.
Click on ‘Start’, choose ‘Settings’, and select ‘Devices’.
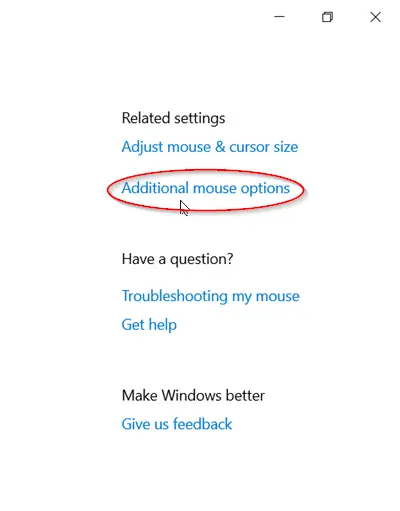
Next, Under the ‘Related Settings’ section, look for the ‘Additional Mouse Options’ link.
When found, click it to open the ‘Mouse Properties’ window.
Now, switch to the ‘Pointer options’ tab and scroll down to the ‘Visibility’ section.
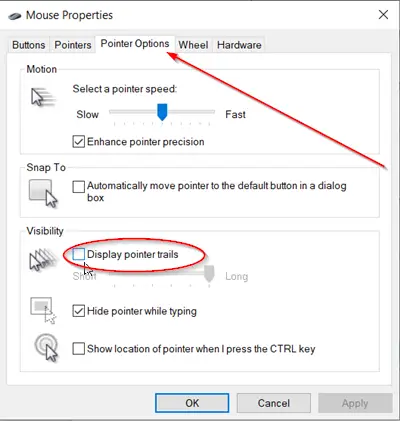
Check the Display pointer trails box and move the slider to adjust the length.
2] Enable Mouse Pointer Trails via a Registry tweak
Open the Registry Editor by pressing Win+R in combination, typing regedit.exe in its empty field, and pressing ‘Enter’.
Then, navigate to the following path address –
HKEY_CURRENT_USER\Control Panel\Mouse
On the right, look for the entry MouseTrails. If there’s no such entry, create one by name – MouseTrails.
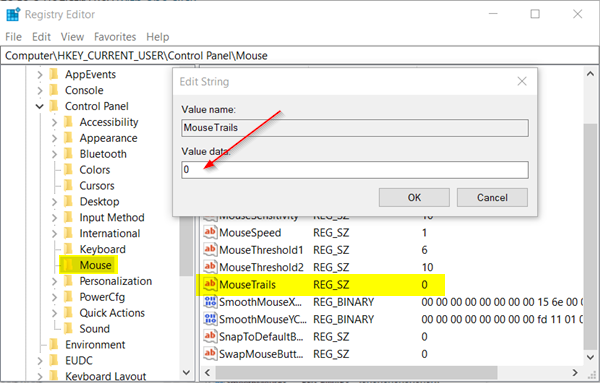
Double-click on the entry to change its value data to a number between the ones below for mouse pointer trail length.
- 2 (short)
- 7 (long)
To disable the feature, set the MouseTrails value to 0.
When done, close the Registry Editor, exit, and restart your computer to allow the changes to take effect.
That’s it!
How do I make my cursor drag?
To move a file or folder, position your cursor next to it, press and hold down the left mouse button, and then move the cursor while keeping the left mouse button pressed. Once you have dragged the file or folder to the desired location, release the left mouse button to finalize the move. For best results, keep the cursor close to the object you are moving for more precise control. If you have multiple objects, you will need to start from a position so all of them can be selected and moved.
How do I unlock drag and drop?
If you cannot release the selected item to the desired location, and all you see is a bunch of files selected, then you need to press the Esc key to quit the selection. At times, the selection gets stuck, and no matter how you move your mouse or click, it keeps selecting files wherever you take the cursor. In this scenario, you must press the Esc key to release the lock. If this doesn’t work, restart file explorer by killing it from the Task manager.
Leave a Reply