If your computer is waking up from Sleep automatically, there is a chance that the Allow wake timers option is enabled. If you want to disable or turn off Allow wake timers on Windows 11 or Windows 10, here is a step-by-step guide that will be helpful.
Even if you put your computer on Sleep mode, it may wake up to perform a scheduled task that you set earlier. Similarly, if an update was set to be installed at a predefined time, the Allow wake timers functionality could wake your system up automatically. This functionality is included in the Power Options, and you can turn it on or off according to your requirements.

What is Allow wake timers in Windows 11 or Windows 10
Sometimes, we schedule a task to be performed at a predefined time, or Windows automatically sets a particular time to install pending updates. Let’s say that a task is set to be performed at 6 PM, but you put your computer on Sleep mode at 5:55 PM. Your Windows PC will wake itself up automatically at 6 PM to perform the task in that situation. It happens because of the Allow wake timers feature.
Read: How to find Wake Timers in Windows?
However, if you do not want your Windows PC to utilize the Allow Wake Timers option, here is how you can stop it. Before heading to the steps, you should know that you must change the same setting twice in two different locations if you are using a laptop computer. As laptop computers have two main modes (plugged in and on battery), it is required to change the settings twice.
How to disable Allow Wake Timers on Windows 11/10
To enable or disable Allow wake timers on Windows 11 or Windows 10, follow these steps-
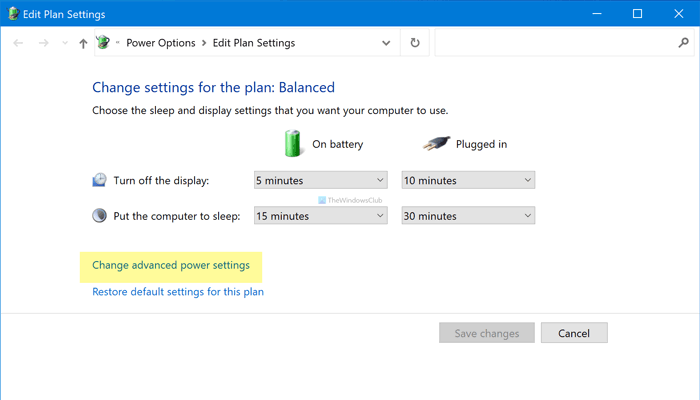
- Search for edit power plan in the Taskbar search box.
- Click on the individual result.
- Click on the Change advanced power settings option.
- Choose a power plan that you are using.
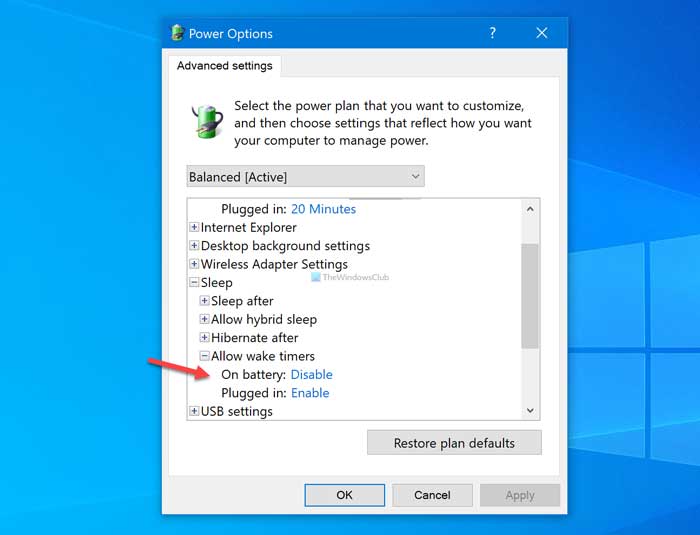
- Expand the Sleep settings.
- Expand Allow wake timers option.
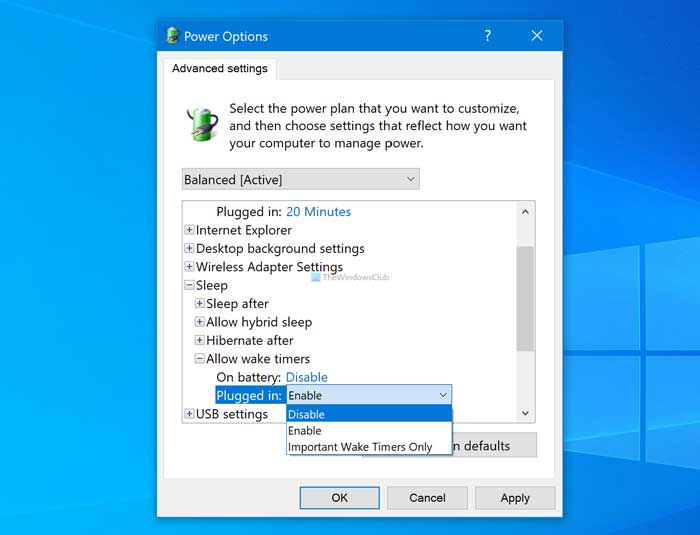
- Click on Enable option for On battery and Plugged in.
- Select the Disable option.
- Click the OK button.
Search for the “edit power plan” in the Taskbar search box and click on the individual result. It opens the Edit Plan Settings window on your screen. After that, click on the Change advanced power settings option and choose the power plan you are using from the drop-down list.
Now, expand the Sleep menu and click on the Allow wake timers option. If you are using a laptop computer, you can find two options – On battery and Plugged in; if you are using a desktop computer, you can find Settings.
Either way, click on the corresponding Enable option and choose the Disable option to turn on Allow wake timers.
As mentioned earlier, you must do the same for On battery and Plugged in if you are using a Windows laptop.
Finally, click the OK button to save the change.
Hope this guide helped.
How do I allow Wake Timers in Intune?
To allow wake timers in Intune, navigate to the Intune management console. Under Configuration Profiles, create or edit a Power Management profile. Set the “Allow wake timers” policy to Enabled. Assign this profile to the appropriate device group. This configuration ensures devices can wake from sleep as needed for scheduled tasks.
How do I allow Wake computer options in Device Manager?
To allow wake computer options in Device Manager, open it and navigate to your ethernet connection properties. Click on the Power Management tab. Check “Allow this device to wake the computer” to enable, or uncheck it to disable. Press OK to save changes, and you can then exit the Device Manager.
Related:
