Microsoft has added a new feature to Windows 11, Automatic Super Resolution. This feature uses AI to make supported games run more smoothly, boosting users’ gaming experience. In this article, we will see how to enable and disable Automatic Super Resolution (ASR) in Windows 11.

Automatic Super Resolution uses AI to make supported games play with enhanced details and better resolution. The feature upscales low-resolution graphics to higher resolution.
The Automatic Super Resolution is currently in the testing phase. Hence, it is available in the Insider build. You should have Windows 11 build 26052 or higher. To check your Windows 11 build, use the following steps:
- Open the Run command box.
- Type winver and click OK.
- You will see your Windows 11 build there.
Enable or disable Automatic Super Resolution (ASR) in Windows 11
To turn Automatic Super Resolution (ASR) On or Off in Windows 11:
- Open Windows Settings
- Navigate to System settings and click on Display in the right panel
- Select Graphics
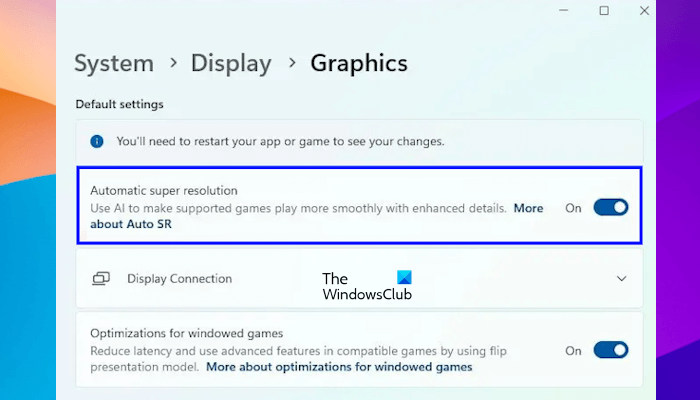
- Here, you will see the setting Automatic Super Resolution
- Toggle the setting On or Off as per your requirement.
We will also show you the Registry method to enable and disable Automatic Super Resolution (ASR) in Windows 11.
You can enable Automatic Super Resolution if your system has Windows 11 build 26052 or higher using Registry as well. We recommend you create a system restore point and backup your Registry before proceeding so you can revert the changes if any problem occurs after Registry modification. Do note that if you restore your system, the changes you made in Registry will also be reverted.
Open the Run command box (Win + R). Type regedit and click OK. Click Yes in the UAC prompt. This will open the Registry Editor.
Now, navigate to the following path:
HKEY_CURRENT_USER\Software\Microsoft\DirectX\UserGpuPreferences
The easiest way to go to the above path is to copy it and paste it into the address bar of the Registry Editor. After that, hit Enter. Make sure that the UserGpuPreferences key is selected on the left side.
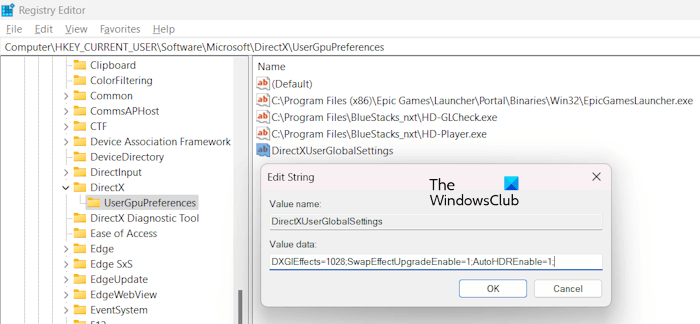
Now, select the DirectXUserGlobalSettings entry on the right side. If the DirectXUserGlobalSettings entry is unavailable on the right side, you have to create it manually.
For this, right-click in the empty space on the right side and go to “New > String Value.” Give the name to this newly created value as DirectXUserGlobalSettings.

Right-click on the DirectXUserGlobalSettings value and select Modify. Change the DXGIEffects value to 1028. and click OK. If you have created the DirectXUserGlobalSettings entry manually, you will find its Value data empty. In this case, enter the following value in the Value data field.
DXGIEffects=1028;SwapEffectUpgradeEnable=1;AutoHDREnable=1;
Now, click OK to save the changes. Close the Registry Editor and restart your computer.
The above process will enable the Automatic Super Resolution (ASR) in Windows 11. If you want to disable it, change the DXGIEffects value to 1024 of the DirectXUserGlobalSettings entry. This will disable the ASR feature in Windows 11.
That’s it. I hope this helps.
Now: Find out if your PC has Neural Processing Unit (NPU)
How do I use auto HDR in Windows 11?
By enabling Auto HDR on a Windows 11 computer, you can make your gaming experience better, provided the video game supports the HDR technology. To enable Auto HDR in Windows 11, open Settings > System > Display. Select your HDR-capable display and turn on Use HDR. Now, expand the More options tab, and turn on Auto HDR.
How do I enable or disable Windows Security in Windows 11?

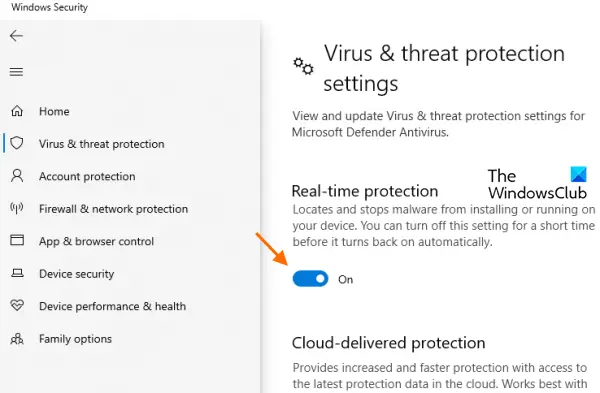
You can disable Microsoft Defender in Windows Security on Windows 11. To do so, open Windows 11 Settings and go to Privacy & security > Windows Security > Open Windows Security. Now, open Virus & threat protection and turn off the Real-time protection.
Read next: How to check if HDR is supported on a Windows PC.
Leave a Reply