Handsfree Telephony is a feature on Windows computers that allows users to make and receive phone calls by connecting a Bluetooth audio device to their computers. To use this feature, the Bluetooth audio device should support the Handsfree feature. This feature is useful when you are traveling. It is enabled for Bluetooth headphones by default. But if for some reason you want to disable it, you can also do that. We will show you how to enable or disable Handsfree telephony in Windows 11.

Enable or disable Handsfree Telephony in Windows 11
To enable or disable Handsfree Telephony in Windows 11 for your Bluetooth speaker or headphones, first connect it to your Windows 11 computer. After doing that, follow the steps provided below:
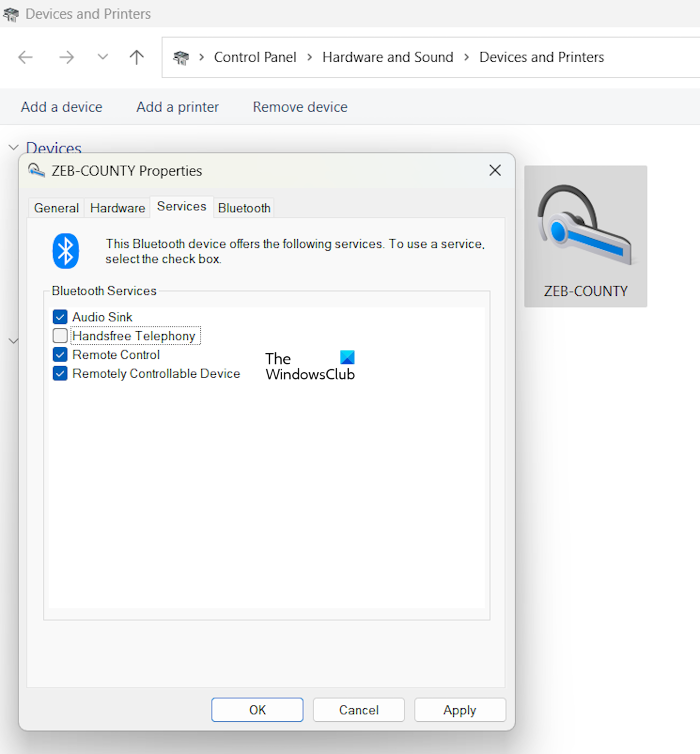
- Open Windows 11 Settings.
- Select the Bluetooth & devices category from the left side.
- Now, click Devices.
- Scroll down and click on the More devices and printers settings. This will open the Devices and Printers page in the Control Panel.
- Right-click on your Bluetooth device and select Properties.
- Go to the Services tab.
- If the Handsfree Telephony checkbox is already selected, the option is enabled. To disable it, uncheck the checkbox.
- Click Apply and then click OK.
To enable the handsfree telephony again, enable the above-mentioned checkbox again.
What happens after disabling Handsfree Telephony?
After disabling the Handsfree Telephony, you can still make and receive phone calls on your Windows 11 computer but you will not hear any voice from your Bluetooth device during the call.
How does this work? If your Bluetooth audio device supports the hands-free feature, Windows installs its separate driver when you connect it to your system. You can view it in the Device Manager. Make sure that your Bluetooth device is still connected to your system. Now, follow the steps provided below:
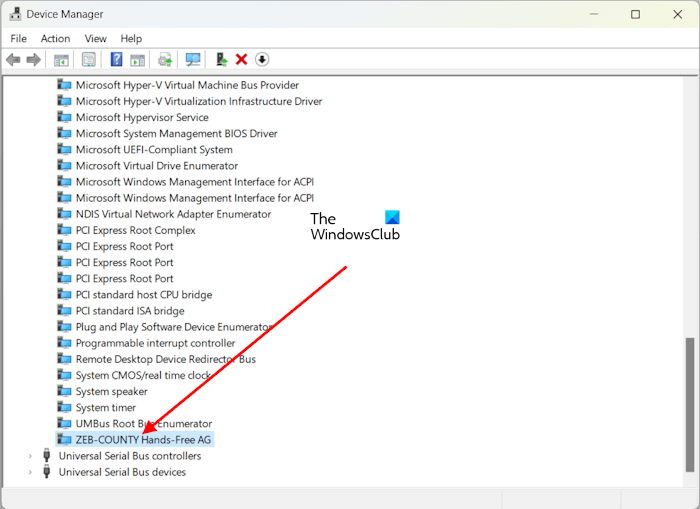
- Open the Device Manager.
- Expand the System Devices branch.
- You will see the Handsfree driver of your Bluetooth audio device there (if the Handsfree Telephony feature is enabled).
When you disable the Handsfree Telephony feature for your Bluetooth device, Windows automatically will uninstall the Handsfree driver of your Bluetooth device and you will not find the driver in the Device Manager. That’s why the Handsfree feature of the Bluetooth audio device stops working after disabling this feature. Other audio output functionality of your Bluetooth audio device remains unaffected.
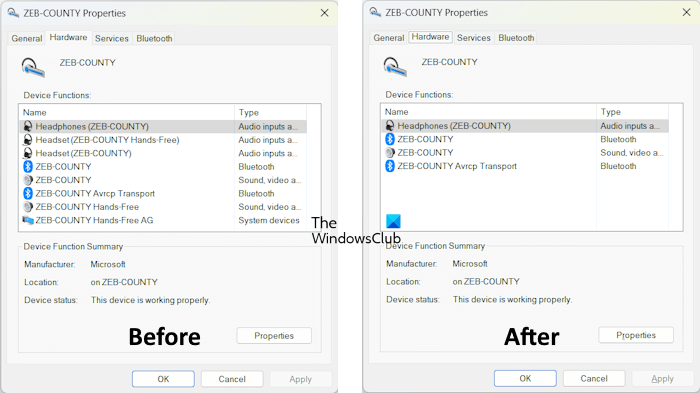
Also, when you go to the Hardware tab in your Bluetooth device properties window, you will not see any Hands-Free driver for your Bluetooth device. The above screenshot shows that Windows removes all the Hands-Free drivers of the Bluetooth audio device after disabling the hands-free telephony feature for that particular Bluetooth audio device.
Cannot enable Handsfree Telephony on Windows
Some users reported that after disabling the Handsfree Telephony feature for their Bluetooth audio device, their audio device also stopped delivering the audio output. When they tried to enable the Handfree Telephony feature again, they were not able to do that. Doing so displayed the following error message:
The parameter is incorect.
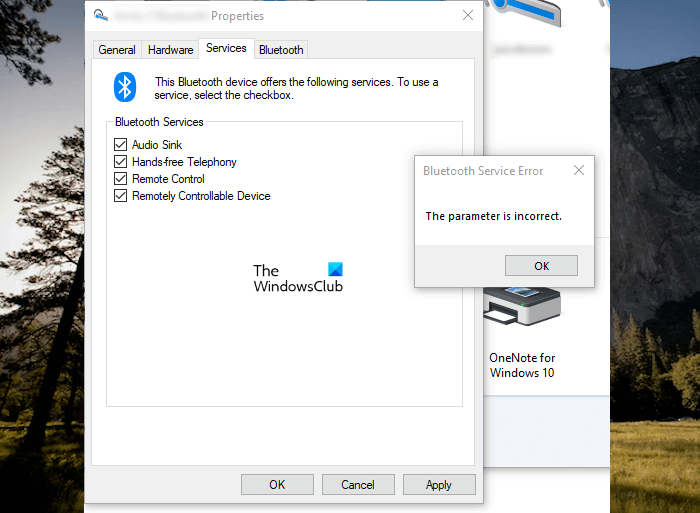
Handsfree Telephony parameter is incorrect
If you are not able to turn on the Handsfree Telephony feature for your Bluetooth audio device due to the above-mentioned error message or if your Bluetooth audio device stopped working after disabling this feature, the solutions provided below will help you:
- Uninstall and reinstall the Bluetooth device driver
- Uninstall and reinstall the sound driver
- Run the Audio Troubleshooter
- Check the sound settings
- Remove and add your Bluetooth audio device
Let’s see all these fixes in detail.
1] Uninstall and reinstall your Bluetooth device driver
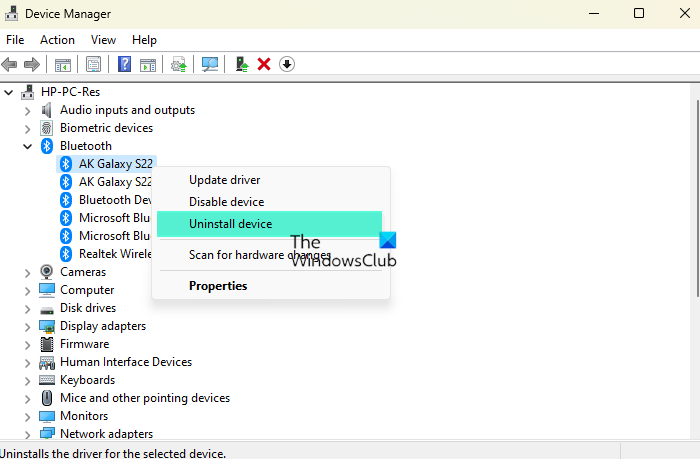
Open the Device Manager and expand the Bluetooth branch. Now, uninstall your Bluetooth audio device driver and then restart your computer. Windows will automatically install the missing driver on restart. Now, check if you can enable the Handsfree Telephony option or not.
2] Uninstall and reinstall the sound driver
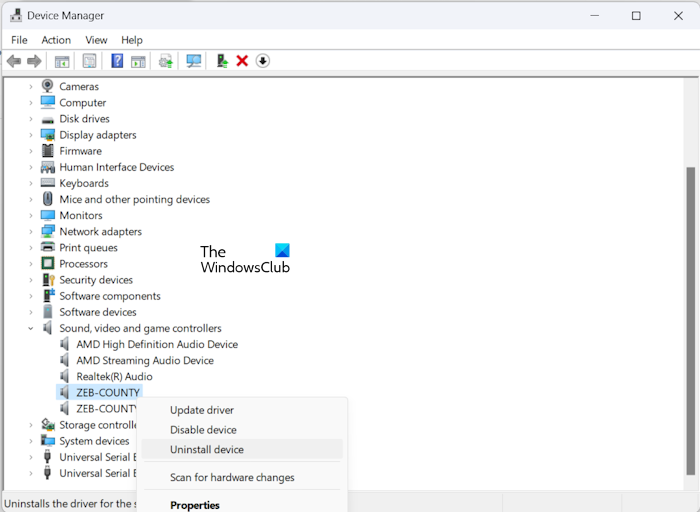
The next fix that you can try is uninstalling and reinstalling the sound driver. The steps to do this are the same as written in the previous fix. But this time, you have to expand the Sound, video and game controllers branch. Now, right-click on the driver of your audio device and select Uninstall device. After doing that, restart your computer.
3] Run the Audio Troubleshooter
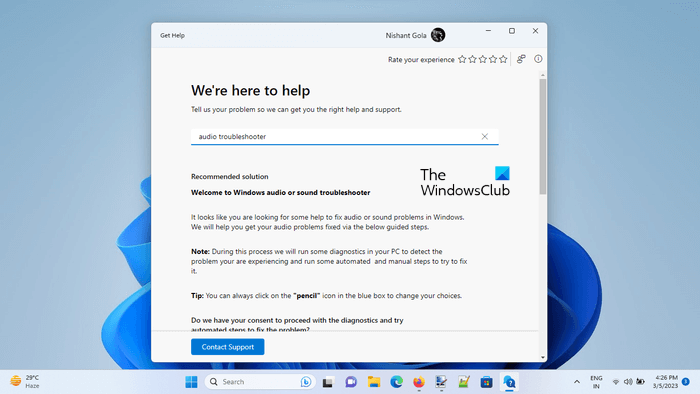
As the name implies, the Audio Troubleshooter is designed to troubleshoot and fix audio-related issues on a Windows computer. You can run the Audio Troubleshooter in the Get Help app on Windows 11.
4] Check the sound settings
You should also check your sound settings. It is possible that the default audio device is not selected due to which you are not getting the audio output from your Bluetooth device. Follow the steps provided below:
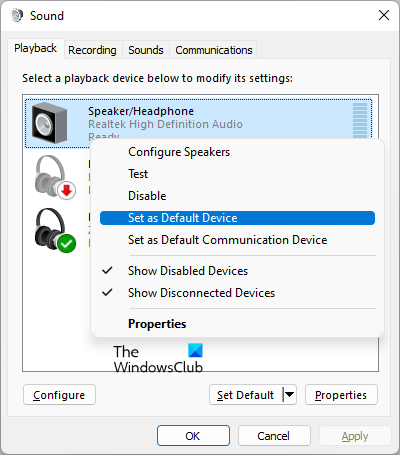
- Open the Control Panel.
- Type Sound in the search bar.
- Select Sound. This will open the Sound properties.
- Under the Playback tab, right-click on your audio device and select Set as default device.
- Click Apply and then click OK.
5] Remove and add your Bluetooth audio device
If the error “The parameter is incorrect” still persists while enabling the Handsfree Telephony feature for your Bluetooth audio device, remove and add your Bluetooth device. Follow the steps provided below:
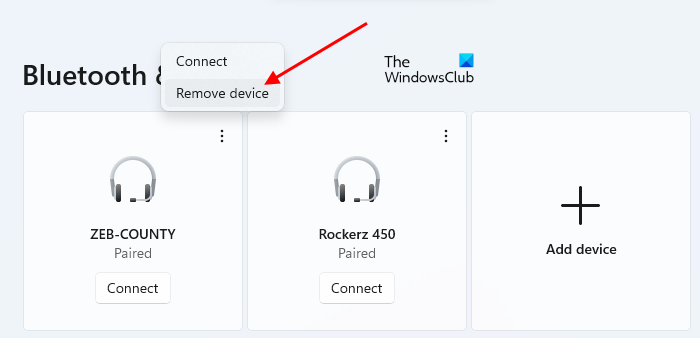
- Open Windows 11 Settings.
- Select Bluetooth & devices from the left side.
- Click on the three dots on your Bluetooth device and select Remove device.
- Restart your computer.
- Add your Bluetooth audio device again.
After adding the Bluetooth audio device, Windows will automatically enable the Handsfree Telephony feature for that device. You can view it by opening your device properties on the Devices and Printers page in the Control Panel.
Now, the issue should be fixed.
Read: No Audio on computer; Sound is missing or not working on Windows.
How do I change the audio device in Windows 11?
You can change the default audio device in Windows 11 via Sound properties. Open the Sound properties window via the Control Panel. Now, you can set any audio device as the default device under the Playback tab.
How do I disable audio input device?
To disable an audio input device, you have to open the Sound properties window via the Control Panel. Now, under the Playback tab, right-click on the audio input device that you want to disable and then select Disable. After that, click Apply and then click OK.
Read next: Stop Windows from changing audio device.
Leave a Reply