Live Captions are a great way to consume content in a foreign language and it’s also great for people who are deaf or are having a hard time hearing anything clearly. However, there are a lot of vulgar and sacrilegious terms thrown around that you might want to block. In this post, we will see how to enable or disable Live Captions Profanity Filter in Windows 11.
How to enable or disable Live Captions Profanity Filter in Windows 11
Microsoft allows users to hide or turn off content that can be a bit uncomfortable in its Live Caption. For that, you need to learn how to enable or disable Live Captions Profanity Filter. You can use one of the two methods mentioned below to do the same.
- Filter Profanity in Live Captions from the Live Captions bar
- Filter Profanity in Live Captions using the Registry Editor
Let us discuss them in detail.
1] Filter Profanity in Live Captions from the Live Captions bar

First, let us see how you can remove profanity from Live Captions’s bar. This is the easiest method, but the changes will be applied only to the current user. So, to turn on the Live Captions Profanity Filter, you must follow the steps mentioned below.
- Hit Win + Ctrl + L to turn on Live Captions.
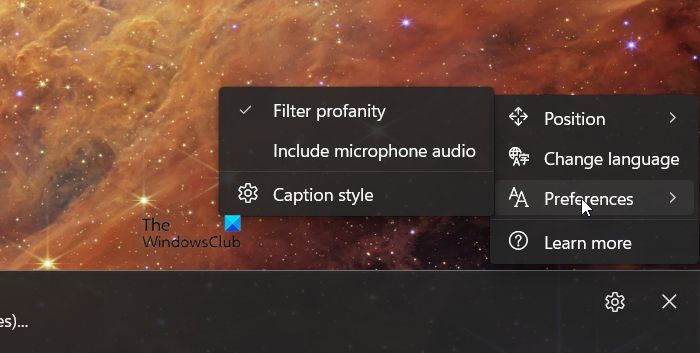
- Now, click on the cog icon to open its settings.
- Go to Preferences and click on the Filter profanity button from the list.
This will turn on the profanity filter in Live Captions.
However, if you want to remove the Profanity filter, all you have to do is open the Live Captions again, go to the cog Settings icon, and then click on Preferences, and untick Filter profanity. This will do the job for you.
2] Filter Profanity in Live Captions using the Registry Editor
If you want to filter out profanity for all the users connected to your domain network, you need to use the Registry Editor. It’s a hireracial database that lets you configure registries. However, since registries are sensitive, we will first take a backup of them.

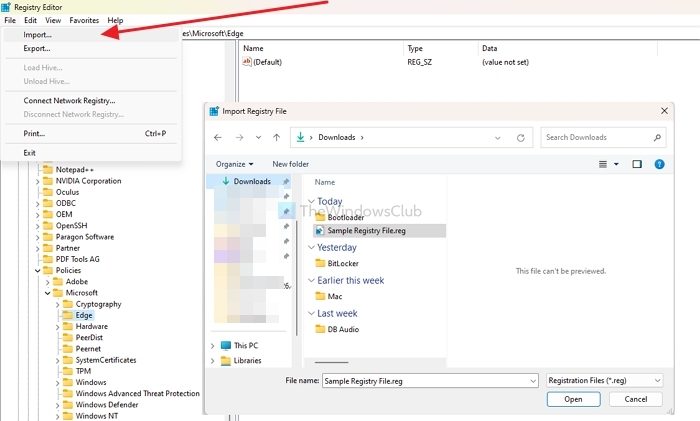
For that, open Registry Editor, click on File > Import, go to the location where you want to store the imported files to, give it a name, and save it.
To enable or disable the Profanity filter, you need to use one of the following scripts.
Enable Profanity Filter
Windows Registry Editor Version 5.00

[HKEY_CURRENT_USER\Software\Microsoft\LiveCaptions\UI] "ProfanityFilterOn"=dword:00000001
Disable Profanity Filter
Windows Registry Editor Version 5.00

[HKEY_CURRENT_USER\Software\Microsoft\LiveCaptions\UI] "ProfanityFilterOn"=dword:00000000
You must copy both scripts separately to two different Notepad files and save them with any name but add a .reg extension. We recommend you save the files to the desktop.

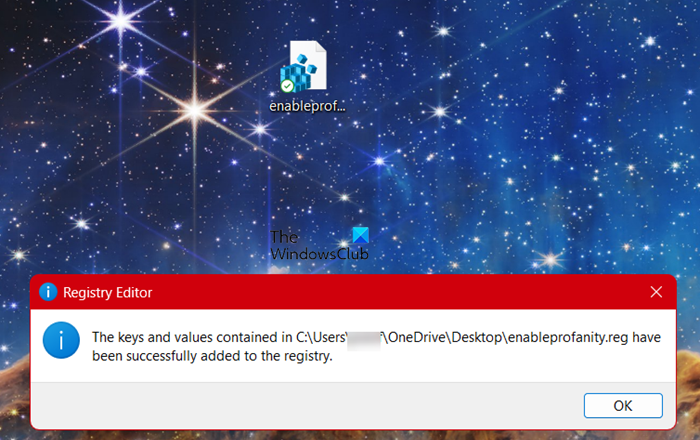
Once done, run the .reg file with administrative privileges. You will be asked to confirm and will then receive a message upon successful execution of the file.
Hopefully, this will do the job for you.
How do I disable live captions in Windows 11?
Live Captions are usually unobtrusive as they are only triggered by a specific shortcut. However, if you want to disable then, go to Settings > Accessibility > Captions, and then turn off the toggle for Live Captions.
Read: How to Enable and Customize Live Captions on Windows 11
How do I filter profanity in Windows voice typing?
To filter profanity in Windows voice typing, you need to trigger Voice typing using Win + Ctrl + S. Once the voice typing bar appears, click on the cog icon, and then select Manage options > Filter profanity.