There can be occasions where you might need to collaborate with guests across documents, tasks, and conversations using Microsoft Teams. A good feature about the service is, it has a master on/off switch for Guest Access. In this post, we’ll explain to you how to enable or disable Microsoft Teams Guest access.
Who is a Guest in Microsoft Teams?
A guest is a person or an individual who isn’t an employee, student, or member of your organization. They also don’t have a school or work account with your organization.
Enable Microsoft Teams Guest Access
In addition to the Master On/Off switch for guest access, Microsoft Teams supports a variety of options to control what guests can do in a team. To enable Microsoft Teams guest access, the master switch, Allow guest access in Teams must be set to On.
- Log in to the Microsoft 365 admin center.
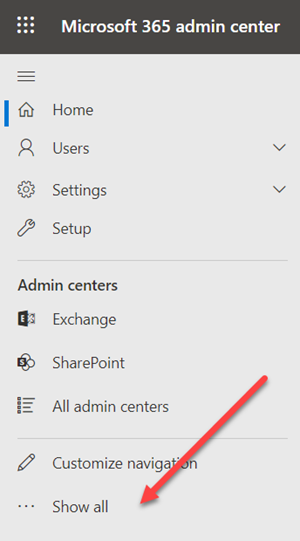
- Choose Show all from the left navigation pane.
- Move to Admin centers, under it select Teams.
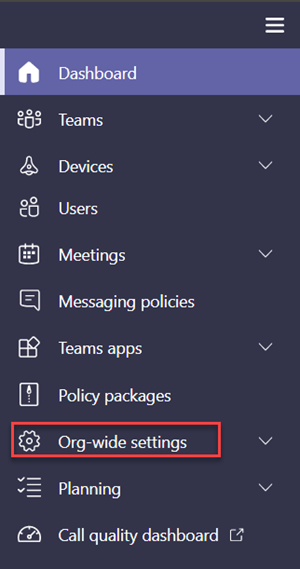
- In the Teams admin center, expand Org-wide settings.
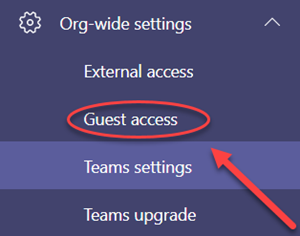
- Click Guest access.
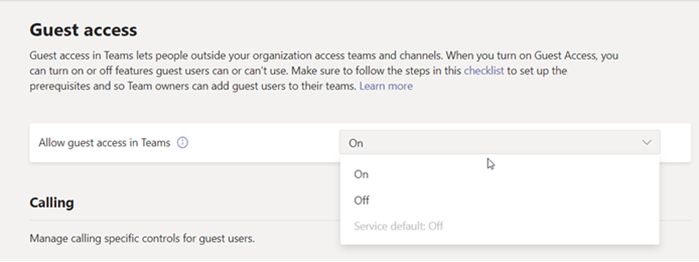
- Ensure that Allow guest access in Teams is set to On.
- Hit the Save button, when done.
If you wish to provide people outside your organization, access to access to documents in Channels, resources, Chats, and applications you can enable the Guest access option. However, the guest experience has limitations by design.
To enable or disable Guest access in Microsoft Teams, log in to the Microsoft 365 admin center.

In the left navigation pane, find and click the Show all option.
Then, move to the Admin Center panel and under it choose the Teams option.

When directed to the Teams admin center, switch to the left navigation pane, expand Org-wide settings.

Click Guest access.

Ensure that Allow guest access in Teams is set to On.
To disable the same, simply slide the toggle to the opposite position.
When done, click the Save button and exit.
That’s all there is to it!
Read next: How to turn off Read Receipts in Microsoft Teams.