In this post, we will show you how to enable or disable Reserved Storage on Windows 11/10 via Windows Registry or the ReservedStorageStat DISM Command in CMD or PowerShell.
Every time a Windows Feature Update rolls out to end consumers, many complain about low storage space, not able to download the updates, slow update experience, and so on. The problem is that many of them don’t have enough storage space available on the computer. Reserved Storage will be present automatically on devices that come with Windows pre-installed or those where it was clean installed. In this guide, we will show you how you can enable or disable Reserved Storage in Windows 11/10.
Enable or Disable Reserved Storage in Windows 11/10
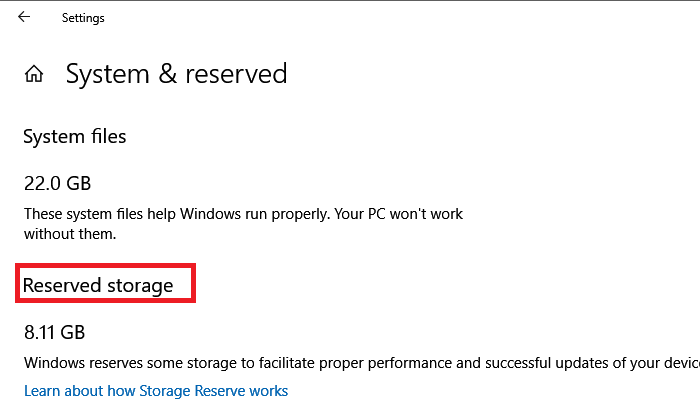
Microsoft wants to make sure none of the updates gets stuck because of low storage space. The Update process should have enough space so it can download, extract, and then apply the update. The size of the Reserved Storage is usually around 7 GB. It gives enough space for the update, temporary files, apps, system caches, and so on. According to Microsoft, the size of the Reserved Storage pace will vary over time & how you use your device.
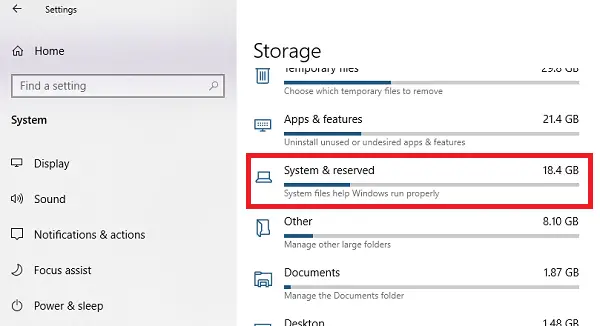
That said, the feature is enabled by default on devices that come pre-installed. To check if you have this feature, follow the steps as below:
- Open Settings > System > Storage
- Click the Show more categories link.
- Click the System & reserved item.
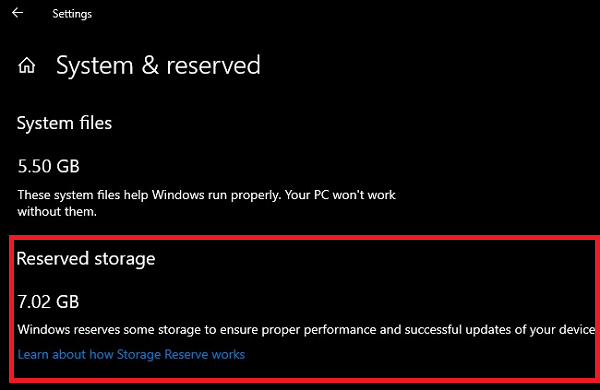
If you do not find Reserved Storage listed, it’s probably because the device has limited space on the hard disk or it is not a fresh or new install if you have this feature, and you don’t want to use it, here is how to disable it. Also, Reserved storage will be enabled automatically on new PCs, and for clean installs. It will not be enabled when updating from a previous version of Windows.
Enable or Disable Reserved Storage using Registry
Here is the thing you should know about Reserved Storage. If you disable it, the chances are that you cannot re-enable it. I tried it on my existing computer, and it did not work.
Before you begin, remember to create a system restore point first.
So, now that you have chosen to disable the Reserved Storage, you need to use the Registry Editor.
Open the Registry Editor by typing regedit in the RUN prompt and hitting the Enter key.
Navigate to:
Computer\HKEY_LOCAL_MACHINE\SOFTWARE\Microsoft\Windows\CurrentVersion\ReserveManager
Double click on the DWORD ShippedWithReserves and set the value to 1.
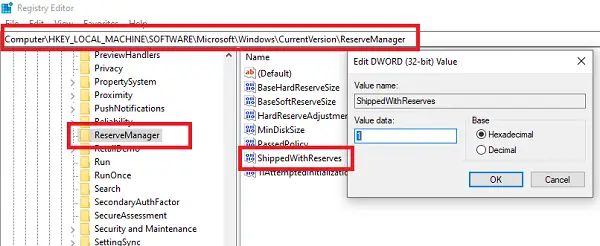
Reboot the computer, and the Storage Storage will not be available anymore.
To reverse the changes, simply undo the changes you made and see.
DISM commands to Disable or Enable Reserved Storage in Windows
Microsoft has made it easy for anyone to find out about Reserved Storage in Windows by adding extra options in the DISM command. This feature’s primary goal is to ensure that Windows PC does not run out of storage space when it is time to download Windows Update. However, it was only enabled by the Windows Setup process either for new installation or when you reset Windows. This post will show how you can use the DISM commands to enable or disable Reserved Storage in Windows 11/10. The best part is that you can now enable or disable it on demand, which means it does not depend on the Windows Setup process.
Now let us see how to use the new ReservedStorageStat parameter in the DISM command line using Command Prompt or PowerShell to manage Reserved Storage in Windows 11/10.
DISM, or Deployment Image Servicing and Management, is a command-line tool for mounting and servicing Windows images and fixing problems in a running operating system. Use the following steps to manage the reserved storage in Windows.
Open Command Prompt or PowerShell with admin permission
To enable Resverd Storage:
DISM.exe /Online /Set-ReservedStorageState /State:Enabled
To disable Reserved Storage:
DISM.exe /Online /Set-ReservedStorageState /State:Disabled
Once done, to check the status of the Reserved Storage feature, you can execute:
DISM.exe /Online /Get-ReservedStorageState
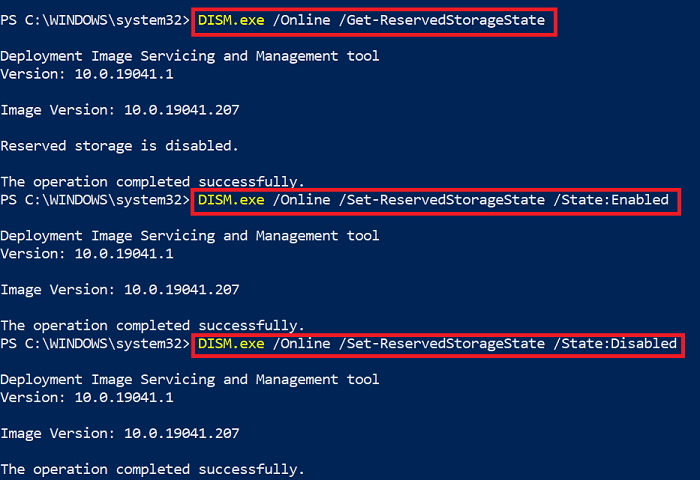
While the changes should apply instantly, you can always restart to check if it was enabled or disabled.
At times you may get a DISM error 87 saying that the option doesn’t exist. In that case, you will have to execute the DISM command with the cleanup-image option and then try again. The error also occurs if there is an ongoing Windows Update downloading.
Lastly, the command works for online Windows Images or on Windows PC but not on offline images. It will also not work if the reserved storage is in use, and will return an error:
This operation is not supported when reserved storage is in use. Please wait for any servicing operations to complete and then try again later.
It is also possible to enable Reserved Storage via Registry and reduce the size if you wish.
If you try to run on any other version, apart from Windows 10 v2004 or later, it will throw an error saying:
Error: 87. The set-reservedstoragestate option is unknown.
It will happen for options Set-ReservedStorageState and Get-ReservedStorageState.
How to reduce Reserved Storage size
If you wish to reduce the space of Reserved Storage, there are two ways as of now:
- Navigate to Settings > Apps > Apps & features > Manage optional features. Uninstall optional features that you are not using.
- Go to Settings > Time & Language > Language. Uninstall languages and their add-ons which you are not using.
Reserved storage is also used by apps and system processes to create temporary files. When the Reserved storage space fills up, Windows will automatically delete the unneeded temporary files.
It is a useful feature, and it’s best not to disable it. However, if you are running low on storage space, you may choose to do so.
Leave a Reply