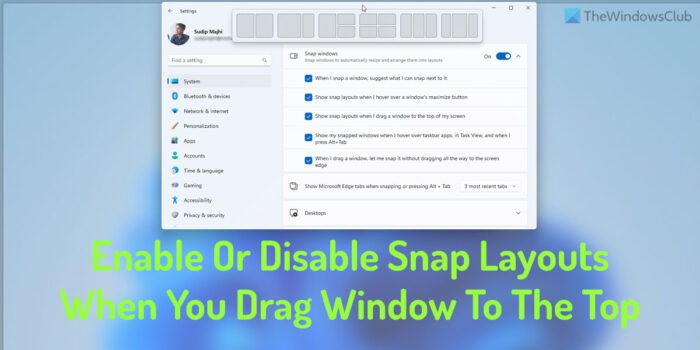
If you want to turn on or turn off Snap Layouts when you drag the window to the top in Windows 11, here is how you can do that. This feature is available in Windows 11 2022 Update Version 22H2 and later. If you have updated your computer to the latest version of Windows 11, you can follow this guide to turn on or off Snap Layouts when you drag the app windows to the top of the screen.

Snap Layouts is one of the handiest features of Windows 11 that allows users to snap a window to a specific part of the screen without dragging. Earlier, this feature was available when you hover your mouse pointer over the minimize/maximize button of any window. However, now you can find the same options or layouts when you click on a window and move it to the top of the screen or monitor.
Like hovering your mouse over the minimize/maximize button, you can find Snap Layouts on the top of the screen automatically. For your information, both panels display the same layouts so that users do not get confused.
However, if you do not want to use Snap Layouts when you drag the window to the top of the screen, you can disable it. Although Microsoft included this feature to help users snap a window quickly and from a second location, the same could create a mess when you have a small screen. That is why you can go through the following guide to disable this functionality in the latest Windows 11.
How to Turn off Snap Layouts in Windows 11 when you drag a window to the top
To enable or disable Snap Layouts when you drag a window to the top in Windows 11, follow these steps:
- Press Win+I to open Windows Settings.
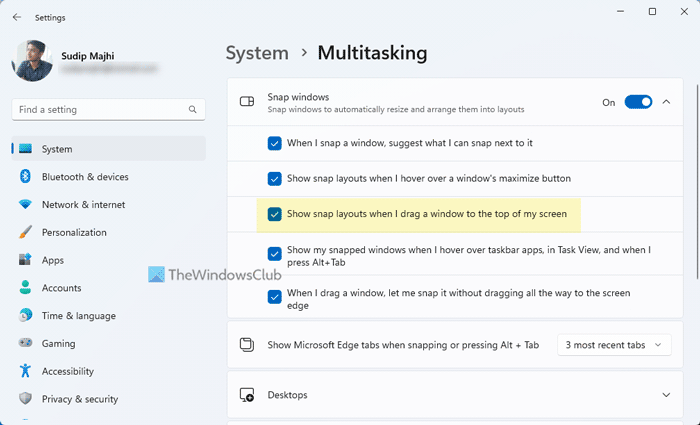
- Go to System > Multitasking.
- Expand the Snap windows section.
- Remove the tick from the Show snap layouts when I drag a window to the top of my screen checkbox to disable.
- Tick this checkbox to enable it.
To get started, you need to open the Windows Settings panel first. Although there are many methods, you can use the keyboard shortcut, Win+I, to open it on your computer.
Next, make sure that you are in the System tab. If so, click on the Multitasking menu on the right-hand side.
Then, expand the Snap windows section. Here you can find an option called Show snap layouts when I drag a window to the top of my screen.

You need to remove the tick from this checkbox to disable the Snap Layouts when you drag a window to the top of the screen. On the other hand, if you want to enable this functionality, you need to tick the corresponding checkbox.
Read: How to use Snap Bar in Windows 11.
How do I enable or disable Snap layouts in Windows 11?
To enable or disable Snap Layouts in Windows 11, when you hover over Maximize button, you need to take the help of the Windows Settings panel. Navigate to System > Multitasking, and urn off the Show snap layouts when I hover over a window’s maximize button box.
How do I completely turn off Snap windows feature?
To completely turn off Snap windows feature in Windows 11, press Win+I to open Windows Settings. Then, go to System > Multitasking. After that, toggle the Snap windows button to enable or disable Snap Layouts. It is also possible to tweak various settings by expanding the Snap windows section.
Leave a Reply