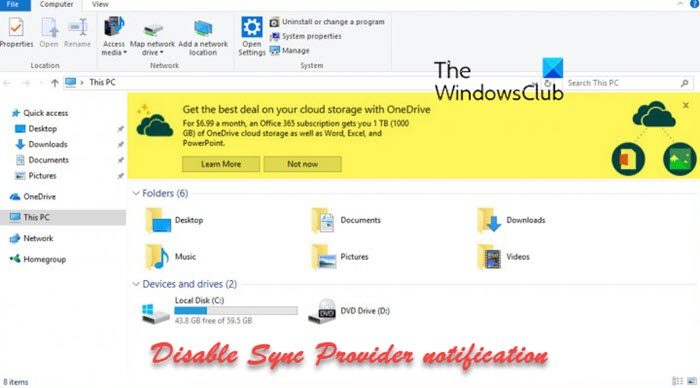
At times, Microsoft displays some notifications in the File Explorer, showing how users can improve their experience by trying new features in Windows 11. However, if you do not want to get such notifications all the time in the File Explorer, you can turn it off. For that, you need to disable the Sync Provider notification in Windows 11/10. There are two ways to turn on or off Sync Provider notification in Windows 11/10 computers – Via File Explorer Options and Registry Editor. You can follow either method as per your requirements.
How to enable or disable Sync Provider notification in Windows 11/10

To enable or disable Sync Provider notification in Windows 11/10, follow these steps:
- Search for folder options in the Taskbar search box.
- Click on the search result.
- Switch to the View tab.
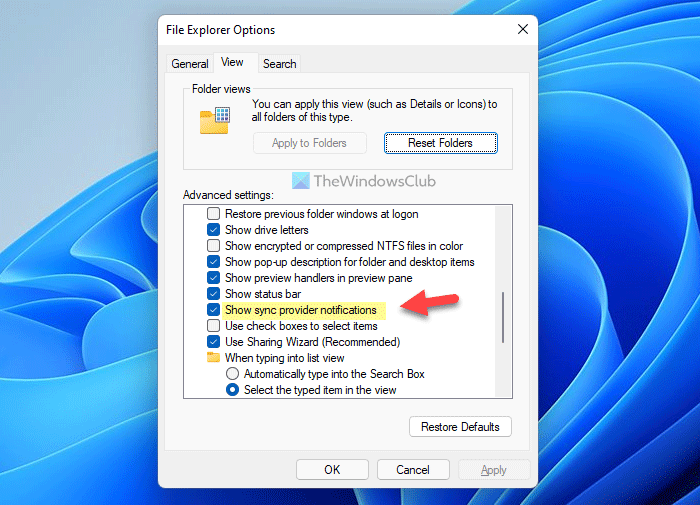
- Find the Show sync provider notifications setting.
- Remove the tick from the checkbox to disable notifications.
- Make a tick in the checkbox to enable notifications.
- Click the OK button.
To learn more about these steps, continue reading.
First, you need to open the File Explorer Options panel. For that, search for folder options in the Taskbar search box and click on the individual search result.
Once the File Explorer Options panel is opened, you can switch to the View tab and find the Show sync provider notifications setting.

Then, remove the tick from the corresponding checkbox and click the OK button to save the change.
However, if you want to display the sync provider notifications in the File Explorer, you can open the same File Explorer Options panel and make a tick in the Show sync provider notifications checkbox. Then, click the OK button to save the change.
How to turn on or off Sync Provider notification in Windows 11/10
To turn on or off Sync Provider notification using Registry in Windows 11/10, follow these steps:
- Press Win+R to open the Run prompt.
- Type regedit and click the OK button.
- Click on the Yes button.
- Navigate to Advanced in HKCU.
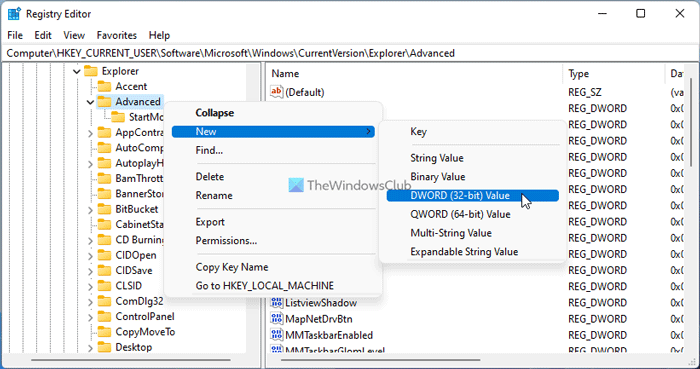
- Right-click on Advanced > New > DWORD (32-bit) Value.
- Name it ShowSyncProviderNotifications.
- Restart your computer.
Let’s delve into these steps in detail.
To get started with this method, you need to open the Registry Editor first. For that, press Win+R to open the Run dialog, type regedit, and click the OK button. If the UAC prompt appears, click on the Yes button.
After opening the Registry Editor, navigate to the following path:
HKEY_CURRENT_USER\Software\Microsoft\Windows\CurrentVersion\Explorer\Advanced
Here you need to create a REG_DWORD value. For that, right-click on the Advanced key, select New > DWORD (32-bit) Value, and name it as ShowSyncProviderNotification.

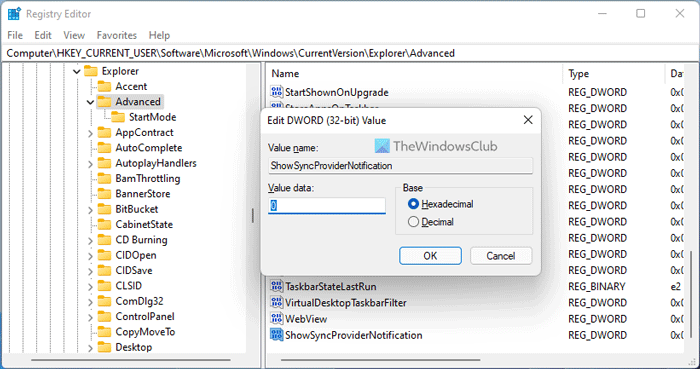
By default, it comes with a Value data of 0. If you want to disable or turn off sync provider notifications in File Explorer, you need to keep that Value data.

However, if you turn on the notifications, you need to double-click on ShowSyncProviderNotification and set the value data as 1.
Finally, you need to click the OK button and restart your computer.
How to show or hide sync provider notifications in File Explorer?
To show or hide the sync provider notifications in File Explorer in Windows 11 or Windows 10, you have two options. However, the File Explorer Options method is probably the easier one. For that, you need to search for folder options and open the search result. Then, go to the View tab and tick the Show sync provider notifications checkbox.
How to stop pop-up notifications in File Explorer in Windows 11?
To stop pop-up notifications in File Explorer in Windows 11, you can follow the above-mentioned Registry Editor method. Navigate to this path: HKEY_CURRENT_USER\Software\Microsoft\Windows\CurrentVersion\Explorer\Advanced and create a REG_DWORD value named ShowSyncProviderNotifications. As you want to stop the notifications, you need to keep the Value data as 0. Then, close all windows and restart your computer.
That’s all! Hope this guide helped.
Leave a Reply