In this post, we will show you how you can enable or disable Taskbar animation in Windows 11/10. So, let’s check out!

Enable or Disable Taskbar Animation in Windows 11/10
To enable and disable animation in the taskbar on your Windows 11 PC, here are the main steps to take.

Open the Windows Search using Win+S and then enter “adjust the appearance and performance” in the search box.
After that, open the Adjust the appearance and performance of Windows item.
Alternatively, you can go to the C:\Windows\System32 folder and run the SystemPropertiesPerformance.exe file.
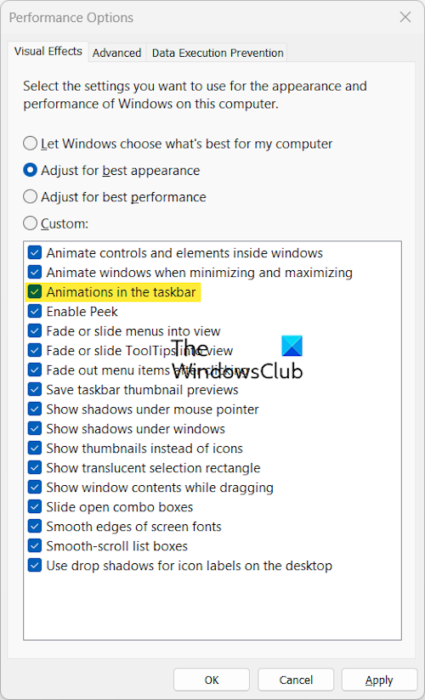
Now, in the Performance Options window, tick or untick the checkbox Animations in the taskbar to enable or disable it, respectively.
Taskbar animation not working in Windows
Some users have reported that taskbar animation is not working correctly on their computer even after enabling the animation settings. If the same is the case with you, here are the methods you can use to fix the issue:
- Disable and then enable animations in the taskbar.
- Use this Registry hack.
1] Disable and then enable animations in the taskbar
The first thing you should do to fix the issue is to disable the animation effect and then re-enable it using the steps discussed earlier in this post.
Related read: How to disable Start Menu animation in Windows?
2] Use this Registry hack
You can try this registry hack. It reportedly worked for some affected users and might help you as well. However, attempt it if the above solution doesn’t work.
First, you need to create a new administrator account on your PC. To do that, open the Settings app using Win+I and navigate to the Accounts > Other Users option. Next, click on the Add account button, add your email address, and follow the prompted instructions to complete the process.
Once the account is added, select the account from the Accounts > Other Users section and click on the Change account type button present next to the Account options. Now, choose Administrator and press the OK button.
When the administrator account is created, you can log out of the current user account and sign into the newly created account.
Next, open the Run command box using Win+R and enter regedit in its Open box to open the Registry Editor.

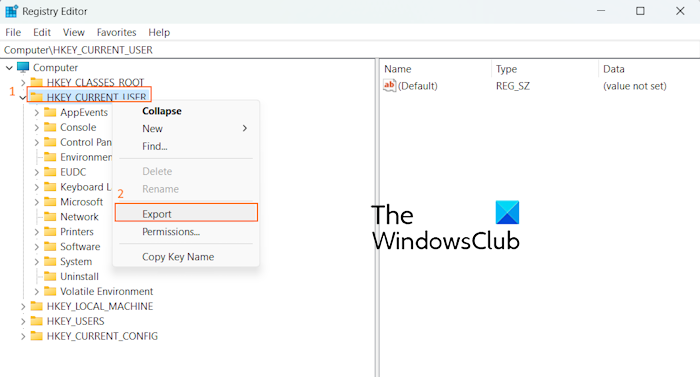
After that, from the left-side pane, right-click on the HKEY_CURRENT_USER key and choose the Export option from the context menu. Select This PC and then choose the C drive > Users folder > Old account’s name > Desktop location to save the above registry key.
Next, sign out of the new account and log into your old account. You will see a newly created registry file with the .reg extension. Double-click on it to open the registry file, and then press the Yes option on the next prompts. If you get an error message, select the OK/Yes button.
Once done, restart your computer and check if the taskbar animation is working properly now.
Once done, you may want to delete the new account:
Read: Fix Auto-Hide Taskbar not working in Windows.
How do I turn on animations in Windows 11?
To enable animations in Windows 11, you can alter the accessibility settings. Press Win+I to launch the Settings app and go to the Accessibility tab. Now, click on the Visual effects option in the right-side pane. After that, enable the toggle associated with the Animation effects option. This will enable the animation effects for controls and elements on your Windows PC.
How do I disable Virtual desktop animation in Windows 11?
To disable or remove the virtual desktop animation feature, you can use the ViVeTool. It is an open-source command-line tool to force enable or disable some hidden features of Windows 11. Using it, you can disable the feature ID 42354458 to remove virtual desktop animation. For that, open the Windows PowerShell as an administrator and type the below command:
ViVeTool.exe /disable /id:42354458
After that, hit the Enter button to execute the above command and get rid of the virtual desktop animation. This has been reported to work for several users.
Now read: Enable or disable Taskbar Thumbnail Preview in Windows.
Leave a Reply