When you install third-party security software, Windows 11/10 will automatically disable the built-in Windows Firewall. In case it does not, you may want to disable this Windows Defender Firewall manually.
Turn On or Off Windows Firewall in Windows 11/10
You can enable or disable the Windows Firewall manually using the following methods:
- Using Windows Security
- Using Control Panel
- Using Command Prompt
- Using PowerShell
1] Using Windows Security
Type Windows Security in the search box and hit Enter to open the Windows Security app. Click on Firewall & Network Protection to open the following panel.
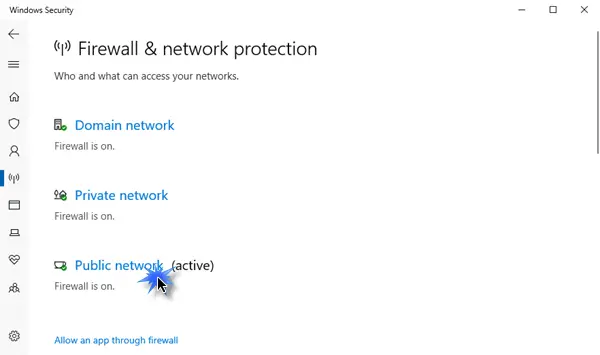
You will see the Firewall status for the following network profiles:
- Domain network
- Private network
- Public network.
It will be On or Off.
You may select to enable or disable it for anyone of the network profiles.
To disable the Firewall completely for all, click on each of the three, one after the other.
When you click on Public network, the following panel will become visible.
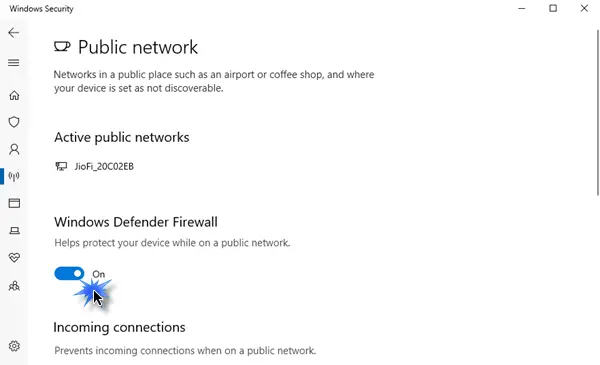
Toggle the Windows Defender Firewall switch to the Off position.
Do the same for Domain network and Private network as well.
You will see the changed status as follows.
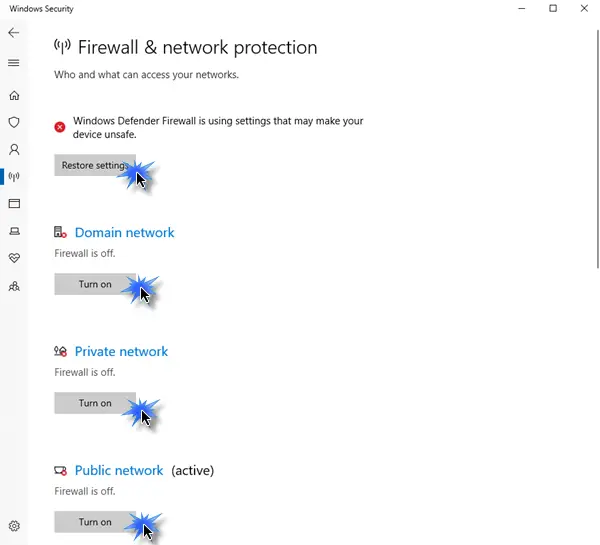
To enable the Firewall, open Windows Security home page and click the Turn on button for Firewall.
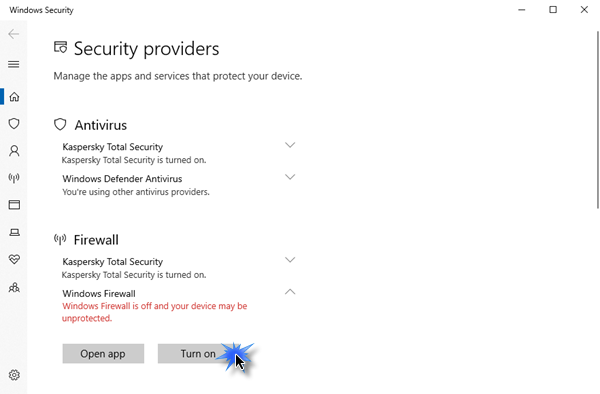
Windows Defender Firewall will get enabled.
2] Using Control Panel
Open Control Panel > Windows Defender Firewall applet and in the left panel, click on Turn Windows Defender Firewall on or off, to open the following panel.
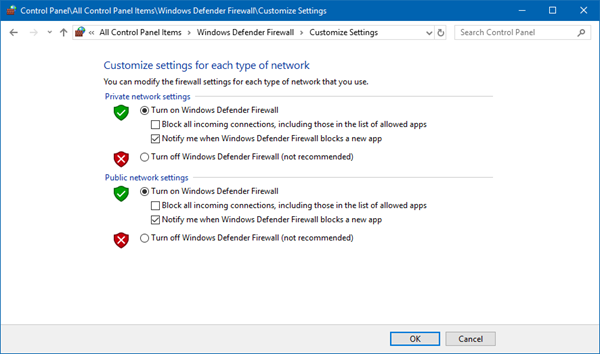
From the WinX Menu, select Control Panel > Windows Firewall.
Here you will see the settings to enable or disable Window Firewall on private as well as public networks.
You have two settings:
- Turn on Windows Firewall
- Turn off Windows Firewall (not recommended)
Under the former, you will see two options:
- Block all incoming connections, including those in the list of allowed apps
- Notify me when Windows Firewall blocks a new app.
Select your preferences and click OK and exit.
While the default Firewall settings are good for most of us, if you need to fine-tune it to meet your requirements, you will have to configure your Windows firewall properly.
Here you can make the necessary changes.
Read: How to Turn On or Off Windows Defender Firewall Notifications in Windows.
3] Using Command Prompt
Open an elevated command prompt and execute the following command to turn on Windows Firewall for all network profiles:
netsh advfirewall set allprofiles state on
To turn it off for all, use:
netsh advfirewall set allprofiles state off
Read: How to open Windows Firewall
4] Using PowerShell
Open an elevated PowerShell prompt and execute the following command to enable Windows Defender Firewall for all network profiles:
Set-NetFirewallProfile -Enabled True
To disable it for all, use:
Set-NetFirewallProfile -Enabled False
I hope this helps!
These links may help you if you face issues starting the Windows Firewall: