Raspberry Pi allows you to install a full-fledged operating system on a small computer. However, a lot of people were unaware that you can enable Remote Desktop Access with xrdp on Raspberry Pi and then access it from your Windows computer. In this post, we are going to learn how to do the same.

What is xrdp?
xrdp is an open-source implementation of Microsoft’s Remote Desktop Protocol (RDP) that enables connections to Linux machines, similar to Windows remote desktop connections. An xrdp setup consists of two main components: the xrdp server on your Raspberry Pi and a Remote Desktop client on your connecting device. Windows users likely have the client installed, while other platforms offer third-party options. By default, xrdp uses TLS (Transport Layer Security) encryption to protect your sessions, securing mouse movements, file transfers, and clipboard contents. While VNC (Virtual Network Computing) is also available on Raspberry Pi OS, I’ve found that RDP performs better. When using xrdp, I experience minimal lag during tasks like web browsing and OS configuration, unlike with VNC.
How to enable Remote Desktop access with XRDP on Raspberry Pi
If you want to enable Remote Desktop Access With xrdp on Raspberry Pi, we need to do the configuration first and then enable it. You can follow the step-by-step guide mentioned below.
- Install xrdp on Raspberry Pi
- Connect to the remote desktop
Let us talk about them in detail.
1] Install xrdp on Raspberry Pi

First of all, you need to boot up your Raspberry Pi and then check if everything is updated. To do so, open Terminal in Raspberry Pi and then run the following commands one by one.
sudo apt update
sudo apt upgrade
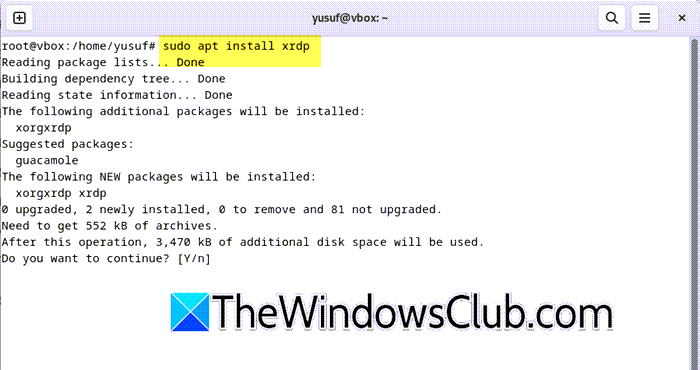
Once we know that Raspberry Pi is updated, we can go ahead and install xrdp using the command mentioned below.
sudo apt install xrdp
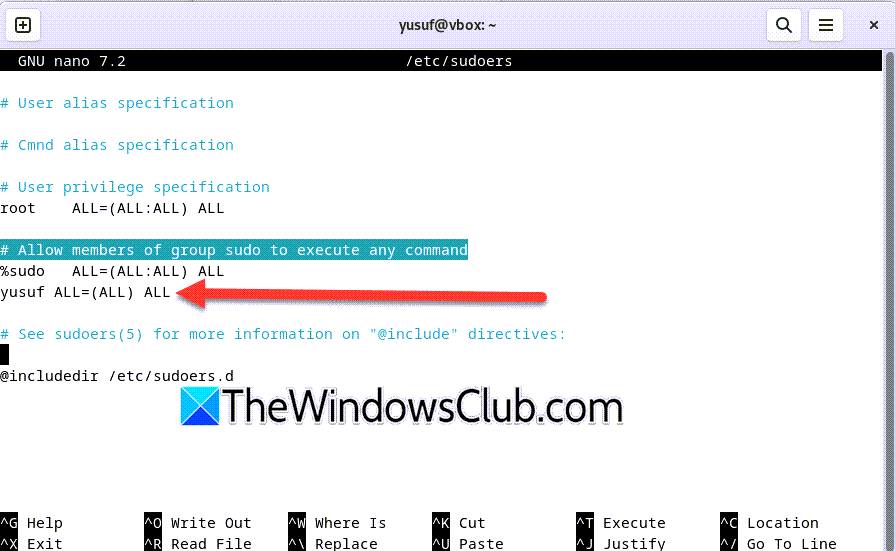
If you are new to Unix, you might get an error that says “Username” is not in sudoers file.

To resolve it, run su root in Terminal and then nano /etc/sudoers. Now, add user_name ALL=(ALL) ALL to the file, right below Allow members of group sudo to execute the command as shown in the attached screenshot.
Now that the XRDP server is installed on your Raspberry Pi, you don’t need to change its settings. The software comes with the best configuration already set up, so it’s ready to use right away. However, you need to create a user account for your remote desktop connection to the Raspberry Pi. The default user account will not work with XRDP. To create this user, use the command in the terminal.
sudo adduser <USERNAME>
Note: Replace <USERNAME> with the username
Now, run hostname -I and take note of the local of Raspberry Pi.
Read: How to Program on Arduino with Raspberry Pi
2] Connect the remote desktop

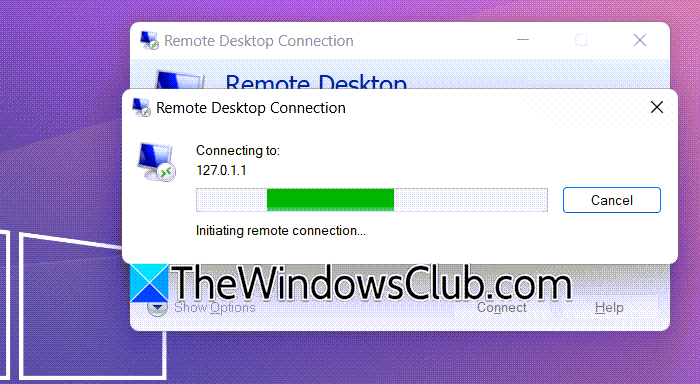
Now that we have configured xrdp in Raspberry Pi, we can connect it to our computer. If you are a Windows user, you have the option to use the Remote Desktop Connection app that’s usually preinstalled. If it’s not there, you can download Microsoft Remote Desktop from the Microsoft Store. You can also use the Windows App on Mac, Android, and iOS to connect to any server that uses the RDP protocol.
To do the same, launch the app, enter the Raspberry Pi’s IP address, and click on Connect. This will find the server and connect to it.
Read: How to create Raspberry Pi Virtual Machine?
How to use xrdp in Raspberry Pi?
In order to use xrdp in Raspberry Pi, you need to first install it on your device. To do so, just run sudo apt install xrdp, then retrieve the IP address that we are going to use in order to connect to the machine. Once you have that, you must connect to the machine using the Remote Desktop tool. To know more, check out the post mentioned earlier.
Also Read:
Leave a Reply