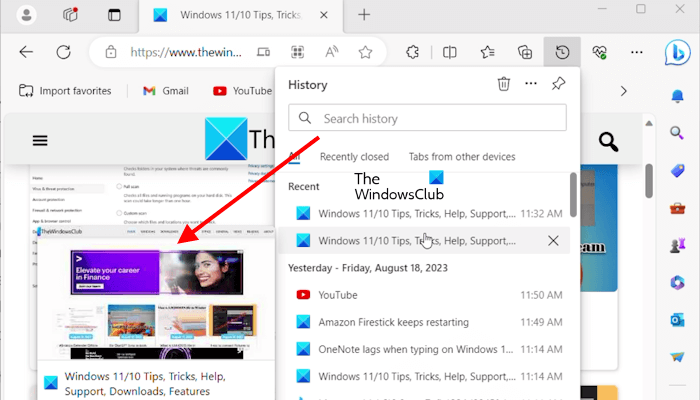
In this article, we will show you how to enable Save screenshots of a site for History in Microsoft Edge. This feature will take screenshots of the sites you visit in Edge and save them so that you can easily revisit the site from history. This new feature in Microsoft Edge seems quite useful for all users because it will show the captured screenshot by hovering over the URLs in History in Edge.

This feature is currently available in the Canary and Dev channels of Microsoft Edge, but will be rolled out to the stable version shortly.
How to enable Save screenshots of site for History in Microsoft Edge
We will show you the following two methods to enable the Save screenshots of site for History feature in Microsoft Edge browser.
- Via Edge Settings
- Via Registry Editor
Let’s see both of these methods in detail.
1] Via Edge Settings
Check the steps mentioned below to enable Save screenshots of site for History Microsoft Edge.

- Open the Microsoft Edge.
- Click the (Settings and More) three-dot on the top of the upper right corner.
- Select the option Privacy, search, and services.
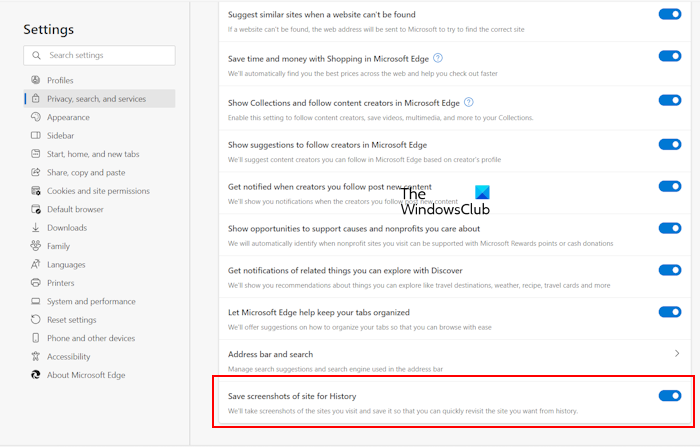
- After selecting Privacy, search, and services. Scroll down and turn on the “Save screenshots of site for History” option.
After performing the above steps, Edge will automatically take screenshots of the websites you visit. Now, whenever you hover your cursor over the URLs in the Edge History, you will see the screenshot of that website in the form of a thumbnail.
Read: How to enable or disable Audio, Video, and Screen Capture in Edge
2] Via Registry Editor
This method includes changes in Windows Registry. Hence, before you proceed, we recommend you back up your Registry and create a System Restore Point. This method is useful if you have a shared computer and you do not want any other person to turn on or off this setting in Edge.
Open the Run command box. Type regedit and click OK. Click Yes in the UAC prompt. This will open the Registry Editor. Modify the keys carefully as any mistake can make your system unstable.
Go to the following path:
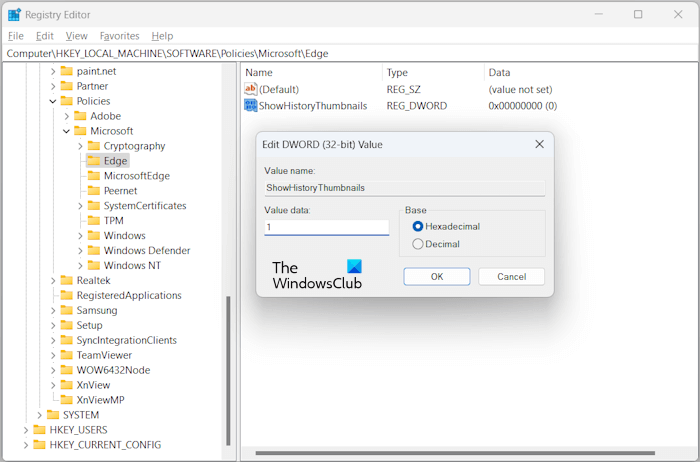
Computer\HKEY_LOCAL_MACHINE\SOFTWARE\Policies\Microsoft\Edge
The easiest way to go to the above path is to copy and paste it into the address bar of the Registry Editor. After that, hit Enter. If the Microsoft key does not contain the Edge subkey, you have to create it manually. To do so, right-click on the Microsoft key and select New > Key. Name this newly created key Edge.

Select the Edge key on the left side. Right-click in the empty space on the right side and select “New > DWORD (32-bit) Value.” Name this newly created value as ShowHistoryThumbnails. Now, double-click on the ShowHistoryThumbnails value and modify its value as directed:
- 0: Disable the Save screenshots of site for History option in Edge.
- 1: Enable the Save screenshots of site for History option in Edge.

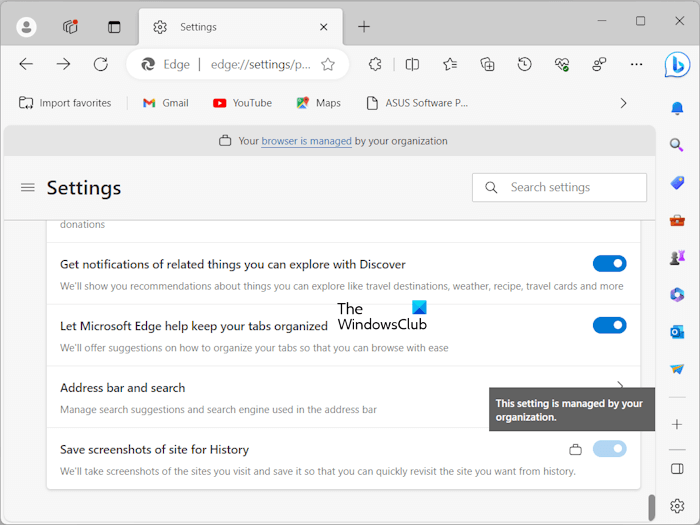
After making the above-said changes in the Registry, restart your computer. You can see in the above screenshot the Enable thumbnails in History Edge option is locked. If you hover your mouse cursor over the lock icon, you will see the following message:
If you want to revert the changes, delete the ShowHistoryThumbnails value in the Registry Editor.
Related: How to disable Web Capture in Microsoft Edge using Registry
How do I save a screenshot in Edge?
You can save a screenshot in Edge. Open the website you want to take a screenshot of, Click the (Settings and More) three-dot on the top of the upper right corner, Select the Web capture, Choose the type of screenshot you want to take, and click the captured button. After capturing the screenshot it will show you options for Draw, Erase, Share, Copy, and Save. Save the screenshot and it will get saved in the Downloads folder by default.
Read: Browser extensions to take a Screenshot in Chrome and Firefox
How do I take a screenshot of an entire web page in Edge?
In Edge, you can easily take a screenshot of an entire web page. To do so, open a web page in Edge, then press the Ctrl + Shift + S keys. The Web Capture tool will open. Now, select the Capture full page option. You can copy or share the captured screenshot.
Related article: Microsoft Edge Browser Tips and Tricks.