In this post, we will show you how to enable the Snipping Tool to show recent Android screenshots on your Windows 11 PC. Microsoft has announced a new feature under the Cumulative Update Preview KB5034848 for Windows 11 that allows users to use the Snipping Tool to view, edit, or share recent screenshots and photos from their Android devices.
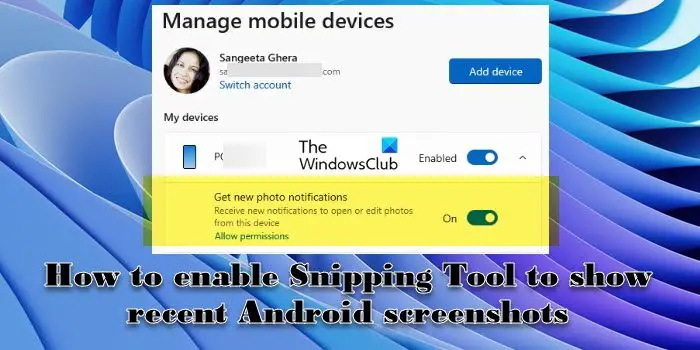
Users can receive instant notifications on their PCs for new photos or screenshots captured on their Android devices and view them directly in the Snipping Tool editor without having to transfer them first to their Windows devices. This new feature brings enhancements to the Remote Capture with Phone Link feature.
How to enable Snipping Tool to show recent Android screenshots
To enable the Snipping Tool to show recent screenshots and photos from your Android device, you need to enable the Get new photo notifications option under the Mobile devices settings. Once you’ve enabled the option, you will start receiving notifications in the lower-right corner of your PC screen for photos or screenshots taken on your Android phone. When you click on a notification, Snipping Tool will automatically fetch the image and make it ready for editing or annotation.
Before you may use this feature, there are a few prerequisites you need to take care of:
- Install the Cumulative Update Preview KB5034848 on your Windows 11 PC. The update is available for Windows 11 versions 22H2 and 23H2 (all editions). It can be installed via Optional Updates or downloaded separately from the Microsoft Update Catalog website using this link.
- Update your Android OS to the latest version available.
- Install and set up Phone Link on your Windows 11 PC. If you’ve already set it up, update the app.
- Install or update the Link to Windows app on your Android mobile device.
Let us now see the whole process in detail.
Click on the Start button icon in your taskbar area and select Settings. Click on Settings & devices in the left panel. Click on the Mobile devices option in the right panel.
On the Mobile device settings page, turn on the toggle next to the Allow this PC to access your mobile devices option.

Once you enable the option, a Manage mobile devices window will appear. You’ll be prompted to sign in using a Microsoft account. Choose an account and continue by confirming your PIN.
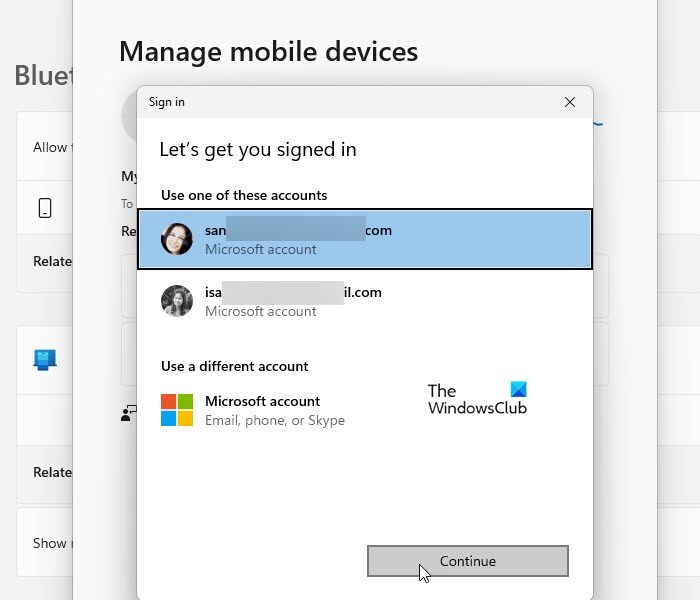
Next, click on the Add device button on the same window.

A QR code will appear in front of you.
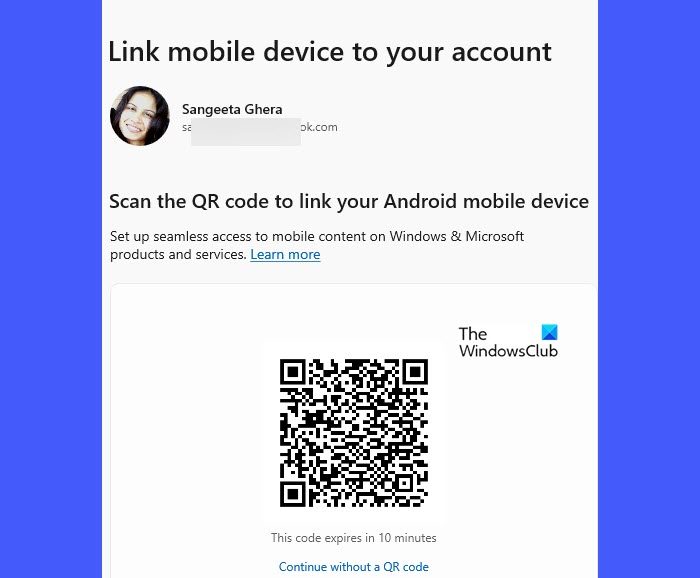
Open the QR Scanner app on your Android phone and scan the code with the help of the app.
You’ll be redirected to the Link to Windows app on your Android phone, and an alphanumeric code will appear on your computer’s screen.
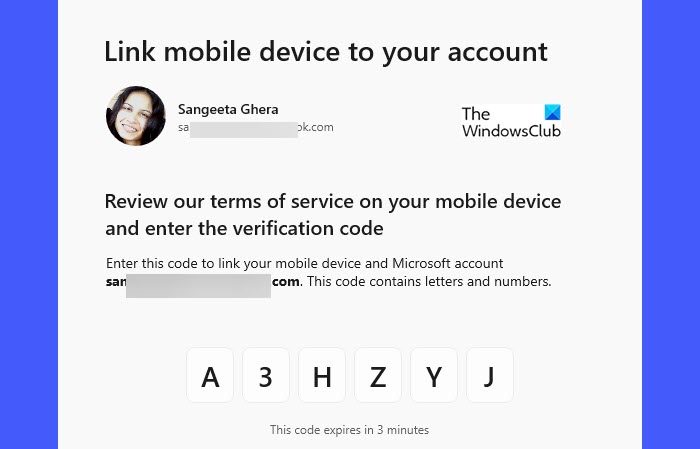
Enter the code in the appropriate field in the Link to Windows app.
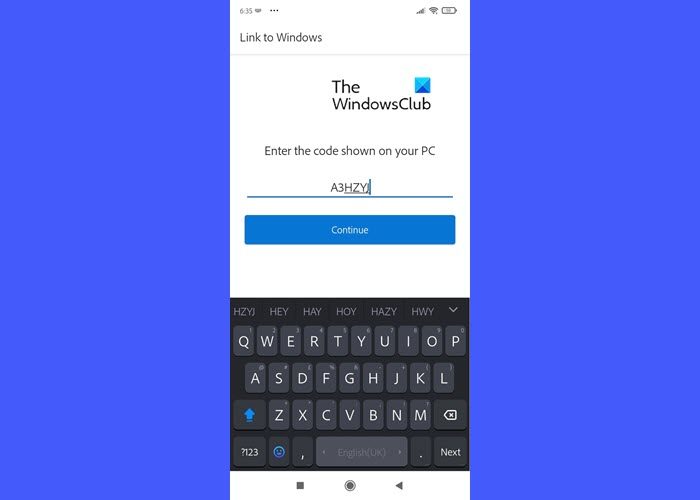
Your phone will connect to your Windows PC through your Microsoft account. Wait while it sets things up and click on Done when the device linking completes.
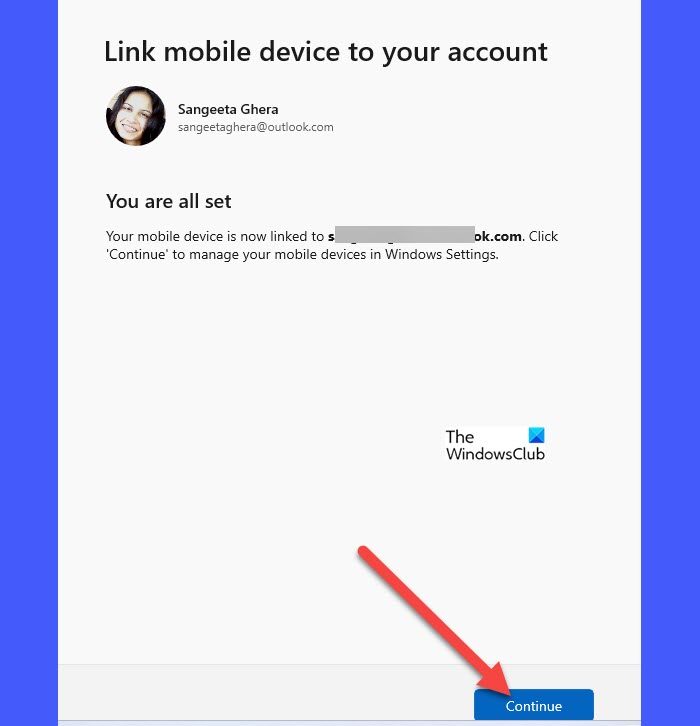
Return to your PC and click on the Continue button on the Link mobile device to your account screen.
You will return to the Manage mobile devices screen, where you’ll see your Android device listed under My devices.
Make sure your device is enabled and the Get new photo notifications option that appears just below your device listing is also enabled.
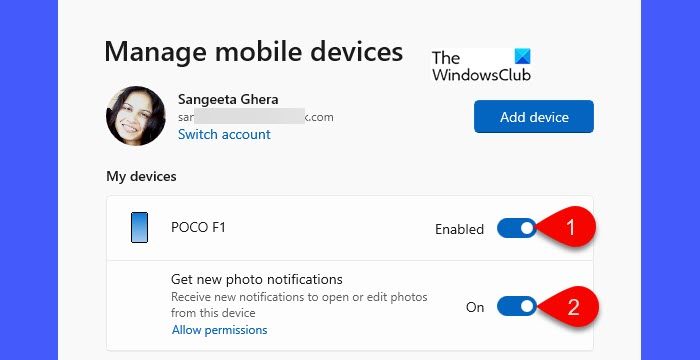
Close the Settings app. You will start receiving photo notifications in your computer’s taskbar area.
Note:
- To get the notifications, you need to allow certain app permissions (for Link to Windows), such as Camera and Storage.
- If you have DND turned on in Windows Action Center, you won’t get any notification popups for mobile screenshots. In that case, you can open the Notifications panel by pressing the Win+N shortcut key and manually see all notifications.
- If you still don’t get photo notifications, close and relaunch the Link to Windows app on our Android mobile device.
Use Snipping Tool to Edit or Share Android Screenshots on Windows 11
Click on a photo notification you receive on your Windows PC.

The Snipping Tool app will open and load the screenshot in its Editor window. You may then use the tools available in the toolbar on top to edit or annotate the screenshot.
For example, you may use the Ballpoint pen to write a comment on the image or the Highlighter to highlight important sections. Snipping Tool also lets you extract text from the image (if any) using actions such as Copy all text and Quick redact.
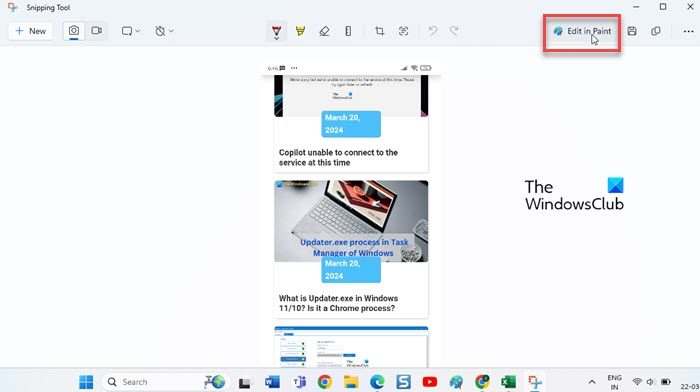
If you want more editing options, click the Edit in Paint button on the right side of the toolbar. This will open the image in the Microsoft Paint app for further editing.
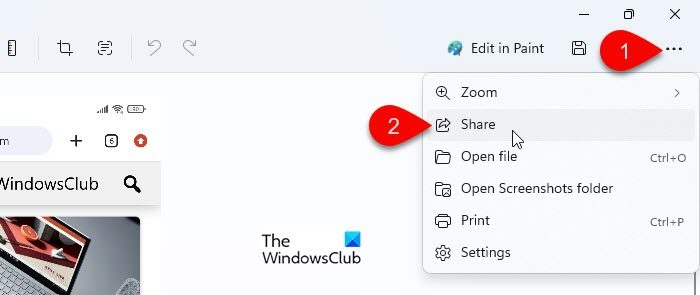
The current screenshot will be copied to your system’s clipboard by default, so you may share it by copy-pasting it in chat apps, file transfer apps, or photo editing apps. Alternatively, you may click the three-dots icon in the top-right corner of the editor window and select Share.
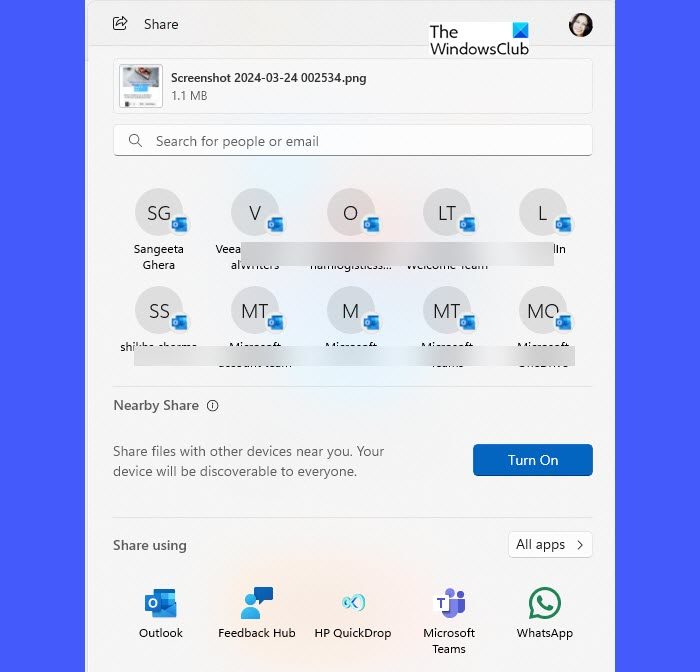
The Share dialogue will suggest your recent Outlook contacts to share the screenshot. You may also use the Nearby Share feature or select other apps such as Microsoft Teams or WhatsApp to share the screenshot.
That’s all about it. I hope you find this useful.
Read: Fix Snipping Tool This app can’t open error.
Where does the Snipping Tool save screenshots?
The Snipping Tool saves screenshots to the clipboard by default. However, if you wish to save the screenshot to a specific directory, you may click the Save button in the top-right corner of the editor window. It will then prompt you to select the location where you want to save the screenshot. It suggests the Pictures folder in your user profile directory, but you can choose any other location on your computer to save the screenshot.
Why is Snipping Tool not working?
The Snipping Tool may not be working on your Windows 11/10 PC due to various reasons. If the Snipping Tool feature is disabled in the OS settings, it won’t work. If essential system files related to the Snipping Tool are corrupted or missing, it can prevent the tool from working. Sometimes recently installed third-party apps can interfere with the Snipping Tool and prevent it from working.
Read Next: How to disable the Phone Link app linking feature on Windows PC.
Leave a Reply