Windows Subsystem for Linux (WSL) is a compatibility layer for running Linux binary executables natively on Windows 11/10 client machines, and Windows Server 2019 and newer machines. With the release of WSL 2, important changes were introduced such as a real Linux kernel, through a subset of Hyper-V features. In this post, we walk you through the steps on how to enable Systemd in WSL.

What is Systemd?
Systemd is a suite of basic building blocks for a Linux system. It provides a system and service manager that runs as PID 1 and starts the rest of the system. Systemd is installed by default in several well-known distributions, including Ubuntu, Debian, and others. With this change, WSL will be even more comparable to running your preferred Linux distributions on bare metal machines and will allow the usage of applications that require systemd support. A few examples of Linux applications that depend on systemd are snap, microk8s, and systemctl.
According to Microsoft:
Supporting systemd required changes to the WSL architecture. As systemd requires PID 1, the WSL init process started within the Linux distribution becomes a child process of the systemd. Because the WSL init process is responsible for providing the infrastructure for communication between the Linux and Windows components, changing this hierarchy required rethinking some of the assumptions made with the WSL init process. Additional modifications had to be made to ensure a clean shutdown (as that shutdown is controlled by systemd now) and to have compatibility with WSLg, It is also important to note that with these change, systemd services will NOT keep your WSL instance alive.
Given that this changes how WSL behaves when booting up, we wanted to be careful about applying this to user’s already existing WSL distros. So currently you need to opt-in to enable systemd for a specific WSL distro, and we will monitor feedback and investigate making this behavior by default in the future.
Read: How to access Windows Subsystem for Linux files on Windows
How to enable Systemd in Windows Subsystem for Linux (WSL)
Up until now as of the time of writing this post, the Windows Subsystem for Linux (WSL) community has been building its ways to implement systemd. But, coming on the heels of a partnership with Canonical, Microsoft has now officially implemented systemd in WSL. With the systemd support available in WSL, you can now run systemd inside of your WSL distros, empowering you to do more with your Linux workflows on your Windows machine.
To get systemd on your machine, you will need to do the following:
Ensure you are running WSL version 0.67.6 and above
If have enabled WSL through PowerShell and have not downloaded it from the Microsoft Store on your device, you won’t have systemd initially. Only users running the Insider build of Windows 11, or those using WSL as downloaded from the Microsoft Store will have it. If you’re using Ubuntu Preview on WSL, systemd is being added automatically. So, to check if you have the supported version of WSL, simply open Windows Terminal, and in the PowerShell console, run the following command:
wsl –version
From the output, if the WSL version is 0.67.6 or earlier, you can head over to the Microsoft Store and download WSL. Alternatively, PC users especially if you’re not a Windows Insider, can download the latest release from the WSL GitHub repo. In the future, all users will get systemd support added. To check for any updates to WSL, run the command below In PowerShell:
wsl –update
Read: Fix Windows Subsystem for Linux Errors, Problems, and Issues
Set the systemd flag set in your WSL distro settings

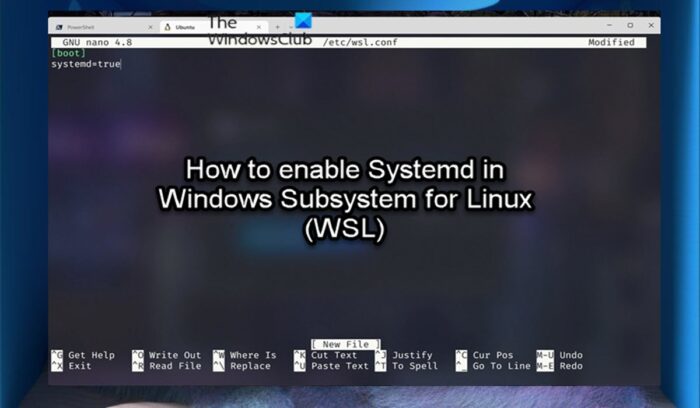
Once you have verified you are running the supported version of WSL required for systemd, you will need to edit the wsl.conf file (a configuration file found in any WSL Linux distribution and allows you to configure on a per-distro basis, rather than modifying the general WSL settings) to ensure systemd starts up on boot. To perform this task, do the following:
- Run your editor with sudo privileges and then add the following lines:
[boot]
systemd=true
- Once done, save the file and then exit.
- Now, you can close your WSL distro Windows and run the following command in PowerShell to restart your WSL instances.
wsl.exe --shutdown
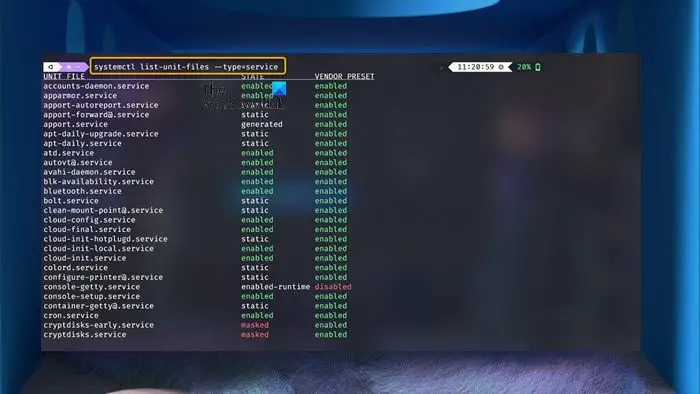
- Upon launch, you should have systemd running. To check and show your services’ status, run the command below:
systemctl list-unit-files --type=service
Read: How to set Linux Distribution version to WSL1 or WSL2 in Windows
That’s how you can enable Systemd in Windows Subsystem for Linux (WSL)!
How do I boot to systemd as init?
To boot under systemd, select the boot menu entry that you created for the purpose. If you haven’t created the boot menu entry, just select the entry for your patched kernel, edit the kernel command line directly in grub and add the following line: init=/lib/systemd/systemd.