Java is a computer programming language that is found on desktops to servers to mobile devices and also smart cards. The Java application runs on most of the systems including Linux, Mac, and Windows. There are several uses where Java is being applied like playing online games and viewing 3D images. Additionally, they also play a role in e-business solutions for corporate computing, and so on. Java is a popular program in the IT sector where they use a Java-based server solution that is deployed on servers. Moreover, the Java that is deployed on servers is relatively safer as compared to using Java on desktop systems. Java may also be required to open a website or run a program.
While it’s not recommended to use Java on your personal computer due to the security threat, in some unavoidable circumstances one may have to install Java to run a program or a webpage – and in such cases, one needs to take some precautions. It’s worth mentioning that in unavoidable situations like the one mentioned here, you should install Java from the official website only. It is also necessary that you keep the Java programs updated as it’s easy for intruders and hackers to compile the Java code that can infect most of the computers while surfing online.
Most of the user’s face trouble using Java on a Windows system, even after successfully installing them on the Windows system. If you have downloaded and installed Java but still not able to use it, then it’s possible that your browser has not enabled Java. This problem usually occurs if the user is already using another application that requires Java. In this case, the application vendors don’t want to change the browser settings, and a user has to manually enable the latest installed version of Java in the Java Control Panel. It is also a good practice to enable and use the latest version of Java to avail of the latest security patches and enhancements.
How to check Java version in Windows 11/10:
- Click the Start button
- Scroll through the applications and programs listed until you see the Java folder
- Click on the Java folder
- Open About Java to see the Java version.
In this article, we discuss how to install Java and manually enable the latest installed version of Java in the Java Control Panel
Manually enable the latest Java version on Windows 11/10
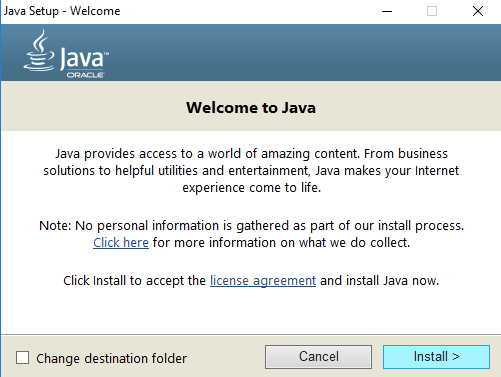
Downloading Java is easy, and users may require administrative privileges for Windows download and installation. There are two ways to install Java. Users can choose either to get Java through an online download or offline download from the official website – java.com.
Once the process starts, you may choose either Run or Save option for the download file from the File Download dialog box. Click Run to run the installer OR Click Save to save the file for later installation.
Choose the folder location and save the file to a known location on your computer. To start the installation process, Double-click on the saved file to run and install Java.

Using Java Control Panel in Windows 11/10
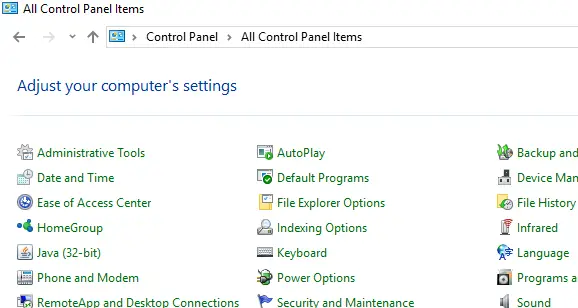
Go to Start and open Control Panel.
In the Control Panel, click on Java icon to open the Java Control Panel.

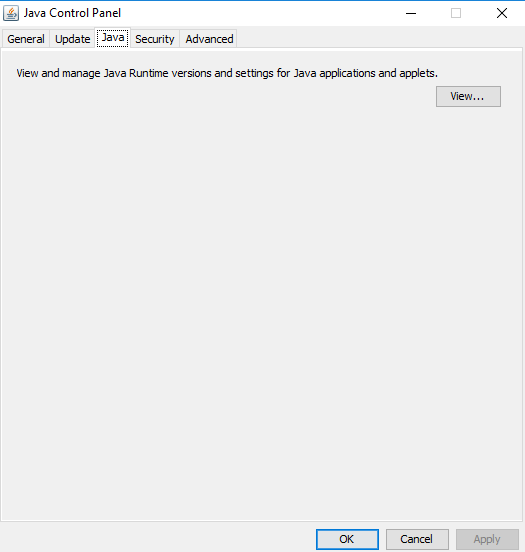
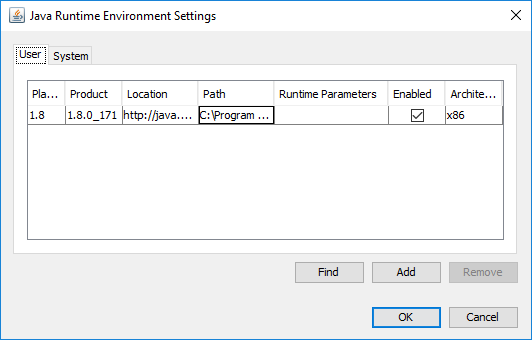
Now to enable the latest installed version of Java, open the Java tab. To open Java Runtime Environment settings click on View button.

Check the Enabled option to permit the latest Java Runtime version.

Click on OK button to apply the setting changes. Click OK in Java Control Panel to confirm the changes.
Now run the Java program embedded in the web browser (applet) to verify if the latest version of Java is installed in your computer.
That’s all.