GeForce Experience is a boon for people who like gaming on graphic cards made by NVIDIA. But some users have been reporting error code 0x0001 while trying to open the NVIDIA GeForce Experience utility. The whole er ror reads as-
Something went wrong, Try rebooting your PC and then launch GeForce Experience, ERROR CODE: 0x0001.
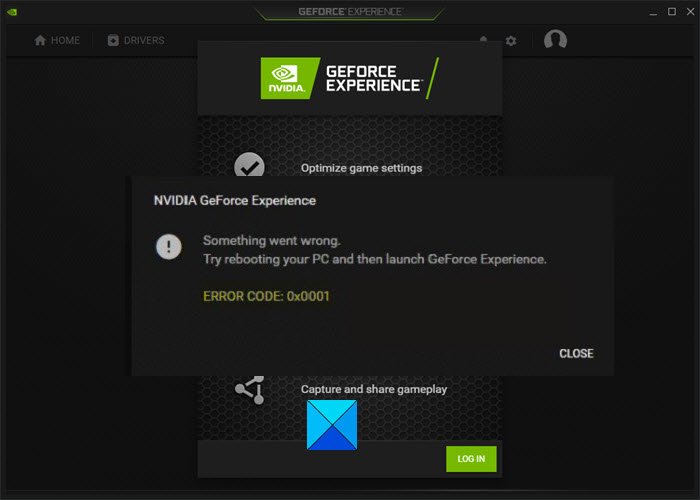
This kills the overall experience of graphics card users because NVIDIA GeForce Experience does not even start at this point, making it and its useful features unusable. But if you encounter this error, too, we will discuss some potential fixes to get rid of it.
Error code 0x0001 for NVIDIA GeForce Experience
We will examine the following fixes to fix error 0x0001 for NVIDIA GeForce Experience on Windows 11/10. But before you begin, reboot your PC and then launch GeForce Experience to see if it works. Go through the entire list first and decide which suggestions you want to try.
- Check the NVIDIA Display Driver Services.
- Update your NVIDIA Display Drivers or migrate to the BETA release.
- Clean Install, and Reinstall the Drivers.
- Relaunch GeForce Experience
- Check NVIDIA Telemetry Container Settings
- Reinstall GeForce Experience
- Update Windows and check for Optional Updates
- Install the latest version
- Use Local account for services
- Create a local user account.
If you create a System Restore point usually, you can undo any modifications on your computer by performing System Restore. In case you do not have a habit of creating a System Restore point, I suggest you start doing so because it is a powerful feature that will let you fix your computer in some scenarios.
1] Check the NVIDIA Display Driver Services
You will have to open Windows Services Manager. Start by hitting the WINKEY + R button combination to launch the Run utility. Then type in, services.msc and then hit Enter. It will now launch the Services window and will populate a list of services.
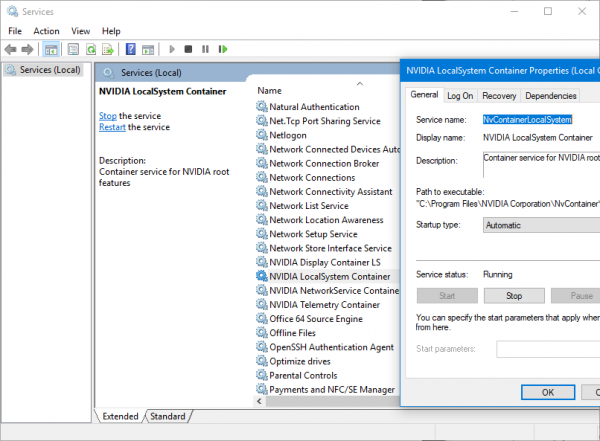
Now, look out for the following Services, and ensure that their Startup types are as follows:
- NVIDIA Display Container LS – Automatic
- NVIDIA NetworkService Container – Manual
- NVIDIA LocalSystem Container – Automatic
- NVIDIA LocalSystem Container – Automatic
- NVIDIA GeForce Experience Service – Automatic (Delayed Start)
- NVIDIA Geforce Experience Backend Service – Automatic (Delayed Start)
- NVIDIA Telemetry Container service – Automatic
Double-click on it to open its Properties box. If the service is not running already, select Start to start running them else, first select Stop and then select Start to restart them.
You may also restart NVIDIA Services and see if that helps.
- Open Run prompt using Win + R
- Type services.msc, and press the Enter key
- Locate services that start with NVIDIA
- Right-click on them, and choose to restart.
Check if this fixes your issue.
2] Update your NVIDIA Display Drivers or migrate to the BETA release
One of the main things that you should be doing is updating your NVIDIA Display Drivers. For that, you need to head to their latest Display Driver Download Website to download the NVIDIA driver.
From the drop-down menus, you need to select the exact model of your Graphics Card. Then upon hitting the Search button, you should be able to see the latest release of the driver for your graphics card. Accept the terms of use and then download the driver. Finally, run the downloaded file to install your latest drivers.
Reboot your computer for the changes to take effect.
But in case you want to try out the beta release, you can find it here. Before moving forward, you must be aware that beta software is buggy and unstable, causing several different bugs, but at the same time, it will contain some fixes for some bugs in the stable release.
Related: Fix NVIDIA Container high Disk, GPU, Memory usage.
3] Uninstall and Reinstall NVIDIA Drivers
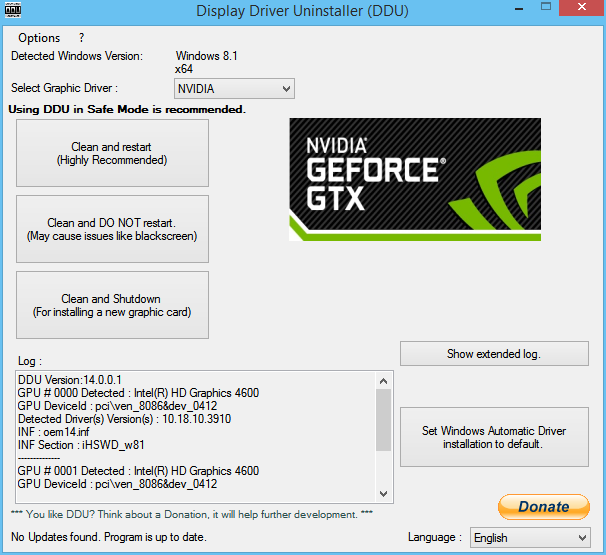
You can use Display Driver Uninstaller to uninstall your NVIDIA Display Driver. After that, you can download & install the latest version of the NVIDIA Graphics Drivers.
4] Relaunch GeForce Experience
GeForce Experience from NVidia Corporation is software, and like any other, it can have software issues. Sometimes closing the application and starting it again can help you resolve the problem.
5] Check NVIDIA Telemetry Container Settings
The software houses a Telemetry container that can collect data from graphics card drivers to improve it further. You may try reducing the amount of data collected as part of the telemetry in the current version.
6] Reinstall GeForce Experience
If nothing else works, you can choose to reinstall the software. First, you need to go to the applications list and uninstall it. You can also take a look at the Program Files folder, which houses the uninstaller. Then go to the Nvidia website, and download the latest stable version of the software. Then install it on the computer by following the screen instructions. Open the software, and check if the issue is resolved.
You can also enable it in the startup settings, so it launches and keeps the experience ready. If it doesn’t work, you can also think of clean installation of the software by using third-party software that can remove traces of the file from the computer and remove it. At times corrupted files may be left behind.
7] Update Windows and check for Optional Updates
At times Windows Updates cause problems. As part of the update, optional updates are also released, which can be installed if you are facing a problem with that particular software or device driver.
Go to Windows 10 Settings > Update and Security and click on the link of Optional Updates. Check there is any update available for NVIDIA Driver Services. Install it. Make sure to restart and then check on the software.
8] Install the latest version of GeForce Experience
Starting with the easiest, it is always a good idea to check if there is an update or download the newest version of the software and install it. If the issue is because of an outdated version, then it should help you fix it. Ensure to restart the service.
9] Use Local Account for NVIDIA Services
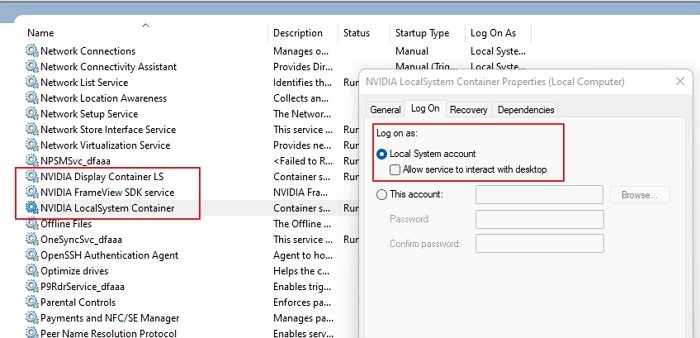
Among all the NVIDIA services, there is an NVIDIA LocalSystem Container. Services such as these need to be run through the Local System Account, so there is no permission issue, and it’s secure. However, if it is set to run with your account, then it can be a problem.
- Use Win + S to open search, type servcies.msc, and click to launch when it appears.
- Locate the NVIDIA Services and double-click on NVIDIA LocalSystem Container
- Select Local System Account under the Log On tab instead of any other account, including yours
- Click Apply and then on the OK button to close.
Launch the GeForce Experience to check if the issue persists. If yes, then repeat the same steps for all the NVIDIA services, and check again.
10] Create Local Account
The last in the list is creating another local admin account and test with it. You will need to do this if nothing else works, and it’s better than reinstalling Windows. Follow the linked guide to creating one.
Once done, log in to the account, and install the latest version of NVIDIA GeForce Experience and a few games if possible. Launch the software, and check if you see any issue. To verify further, play some games, and use them for some time. If all goes smoothly, your user account may have some problems.
The way out is to migrate everything to the new local account either using software or manually, whatever works for you. Once done, you can choose to remove the old account for backup for some time and then remove it with due time.
What is a Local System Account in Windows?
It is a predefined local account used by the service control manager. It has extensive privileges on the local computer and acts as the computer on the network. That said, it is best not to use this account unless you have a direct option available to use it. Only if you have a clear idea of what you are doing, use this anywhere else on the PC.
What is GeForce Experience?
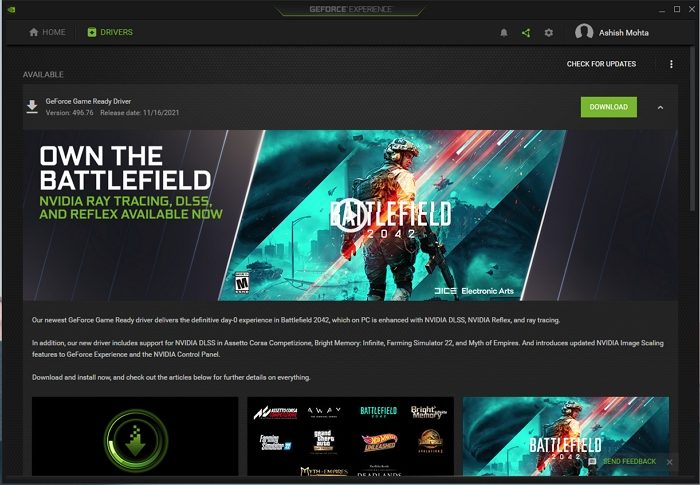
At the core, it is a Driver Updater software, but NVIDIA has evolved it to deliver customization specific to the game and delivers regular updates. You get access to optical settings to use directly. NVIDIA calls these experiences Game Ready Driver, which offers enhancements such as DLSS, Reflex, and Ray tracing. The application not only offers driver updates to NVIDIA GPU but also custom driver settings to enhance game performance. The games are automatically detected, and you get to see a quick comparison between the Current and Optimal settings.