If you’re encountering Mail app error 0x80048802 which prevents you from forwarding or sending emails from your Windows 10 computer, then this post is intended for you. In this post, we will provide the most appropriate solutions you can try to help you remediate this issue.
Windows 10 Mail app error 0x80048802
If you’re faced with this Mail app error 0x80048802, you can try our recommended solutions below in no particular order and see if that helps to resolve the issue.
- Run Windows Store Apps Troubleshooter
- Update Mail and Calendar app on the Microsoft Windows Store
- Reset or Uninstall and Reinstall the Mail & Calendar app
- Enable proxy connection.
Let’s take a look at the description of the process involved concerning each of the listed solutions.
1] Run Windows Store Apps Troubleshooter
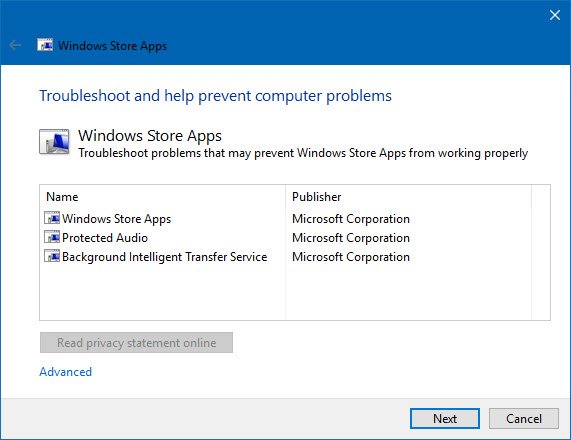
This solution requires you to run the inbuilt Windows Store App Troubleshooter and see if the issue will be resolved.
2] Update Mail and Calendar app on the Microsoft Store
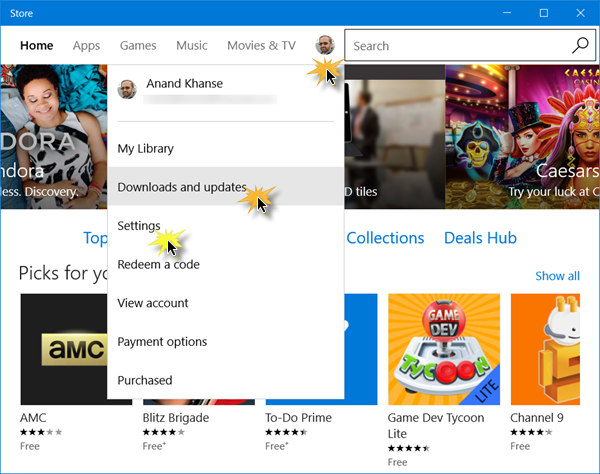
This solution entails that you update the Mail and Calendar app on the Windows Store. Here’s how:
- Launch Windows Store and click on your Profile on the top right of Windows Store
- Select Download and Updates
- Click Check for updates to see if any update available for Mail & Calendar app.
If the issue persists, try the next solution.
3] Reset or Uninstall and Reinstall the Mail & Calendar app
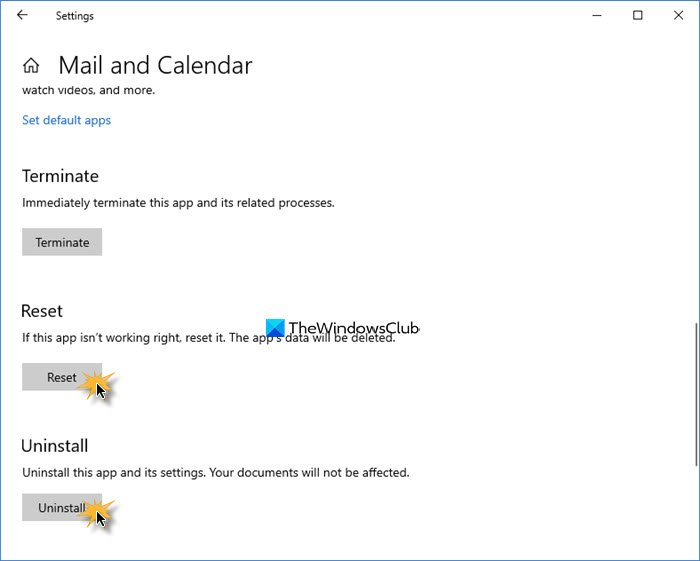
Open Settings > Apps. Locate the Mail & Calendar app and press the Advanced options link.
Reset the app and see if it helps.
If not, Uninstall it and then go to the Microsoft Store and download and install it.
Note: When you open the Store to install the Mail & Calendar app, if it says the product is already installed, then reset the Microsoft Store. Now check if it allows you to install again. If the problem persists, try to restart your PC, post complete shutdown, and then check the issue is resolved. If not, continue with the next solution.
4] Enable proxy connection
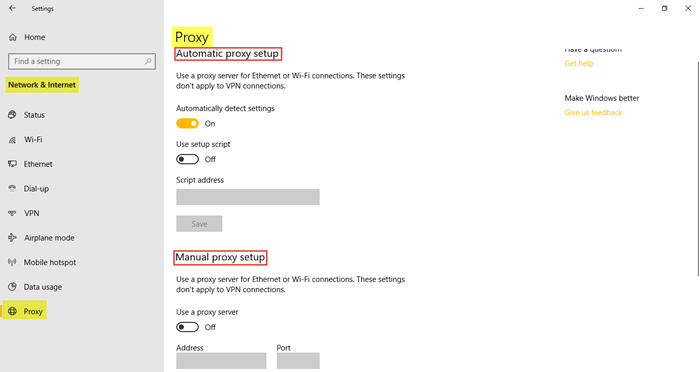
Do the following:
- Go to Settings and click on Network and Internet
- Click on Proxy and ensure that Automatically detect connection is turned ON and the rest are OFF.
Additionally, do this:
Along with this, follow the steps below:
- Press Windows + R keys to invoke the Run dialog.
- In the Run dialog box, type inetcpl.cpl and hit Enter to open Network Connections.
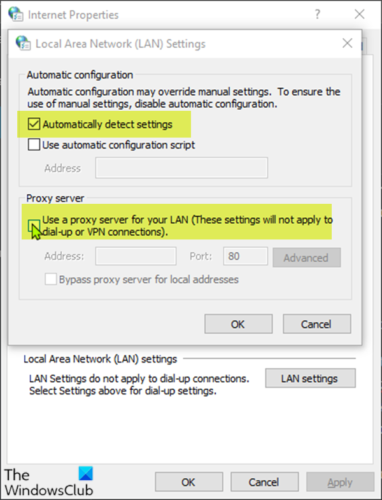
- From the Internet Options dialog box, go to the Connections tab and click on LAN Setting.
- Uncheck the Use a proxy server for your LAN (These settings will not apply to dial-up or VPN connections) checkbox.
- Check Automatically detect settings and apply changes.
Now check if the issue is resolved or not.
Leave a Reply