After you update a Hyper V-enabled Windows 11 or Windows 10 computer, when the PC restarts you may get the boot/startup error code 0xc0210000 with the description BitLocker key required to unlock the volume wasn’t loaded correctly. This post provides the most suitable solutions to resolve this issue on your system.
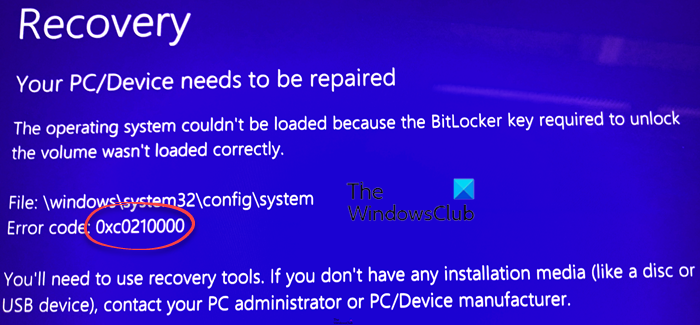
When you encounter this issue, you will receive the following error message;
Error 0xc0210000, The operating system couldn’t be loaded because BitLocker key required to unlock the volume wasn’t loaded correctly.
In some cases, you may receive the following error message with the same error code;
A required file couldn’t be accessed because your BitLocker key wasn’t loaded correctly.
Error 0xc0210000, BitLocker key required to unlock the volume wasn’t loaded correctly
If you have encountered the error code 0xc0210000 with the description BitLocker key required to unlock the volume wasn’t loaded correctly on your Windows 11/10 device, you can try our recommended solutions below in no particular order to fix the error on your system.
- Initial checklist
- Perform System Restore or Uninstall Update
- Disable or Suspend BitLocker
- Disable Hyper-V
- Disable Virtualization Based Security
Let’s take a look at the description of the process involved concerning each of the listed solutions.
1] Initial checklist
Before you proceed with the solutions below, if you can’t log in to your system, try the following suggestions and see if you can successfully boot into your device/
- Hard Reboot/Power cycle your device. You can unplug all the peripheral devices except keyboard and mouse, then try a hard reboot of your system and see if the action resolves this issue. You may have to enter your BitLocker keys in case you have started on a specific drive.
- Perform Automatic Startup Repair. Given your Windows 11/10 device is unable to boot or start-up, you can try Automatic Repair to diagnose and scan system files, Registry settings, configuration settings and more to fix the problem automatically for you.
2] Perform System Restore or Uninstall update
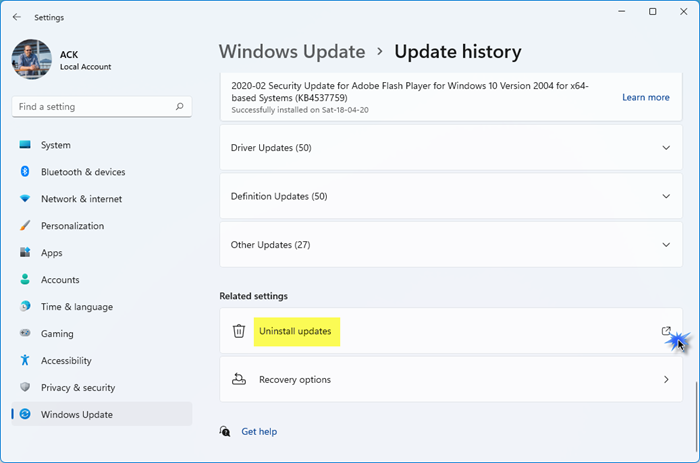
As you’re unable to boot successfully to the desktop when the Error 0xc0210000, BitLocker key required to unlock the volume wasn’t loaded correctly occurs on your Windows 11/10 device after an update, this solution requires you to try booting into Safe Mode, and then perform System Restore or uninstall the update that you just applied on your system.
2] Disable or Suspend BitLocker
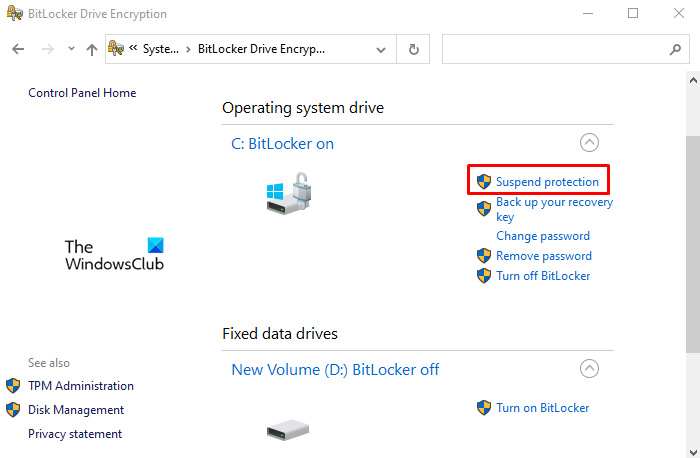
Since your device is already in this boot error state, you can successfully start Windows after suspending BitLocker from the Windows Recovery Environment (WinRE). To perform this task, do the following:
- Retrieve your 48-digit BitLocker Recovery Key.
- On the Recovery screen, press Enter.
- When you are prompted, input the recovery key.
- If your device starts in the (WinRE) and prompts you for the recovery password again, select Skip the drive.
- Next, select Advanced options > Troubleshoot > Advanced options > Command Prompt.
- In the Command Prompt window, run the following command:
manage-bde -status c:
- If the status is returned as locked, run the following command to unlock it using your 48 digit numerical recovery password separated by a hypen in 6 digit group:
manage-bde -unlock c: -rp <your 48-digit recovery password>
- Once the drive is unlocked, you can now run the following command to suspend protection:
manage-bde -protectors -disable c:
- Once the command executes, exit and reboot.
The computer should now successfully boot Windows. Once there, you can resume BitLocker protection via the BitLocker Control Panel.
Keep in mind that unless you suspend BitLocker before you start the device, this issue may reoccur. So, to temporarily suspend BitLocker just before you restart the device, open an elevated Command Prompt window and run the following command:
Manage-bde -protectors -disable c: -rc 1
The command above will suspend BitLocker for one restart of the device. The -rc 1 option works only inside the operating system and does not work in the recovery environment.
3] Disable Hyper-V
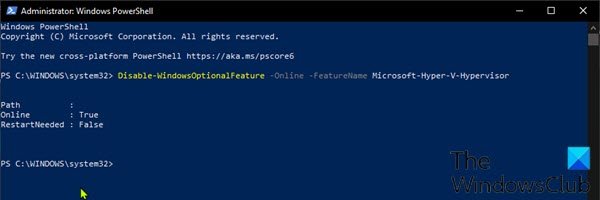
Another viable solution to this issue requires you disable Hyper-V before applying any system updates or TPM or UEFI firmware updates on your Windows 11/10 computer.
4] Disable Virtualization Based Security
TPM 1.2 does not support Secure Launch. So, this solution requires you to do either of the following:
- Remove any device that uses TPM 1.2 from any group that is subject to Group Policy Objects (GPOs) that enforce Secure Launch.
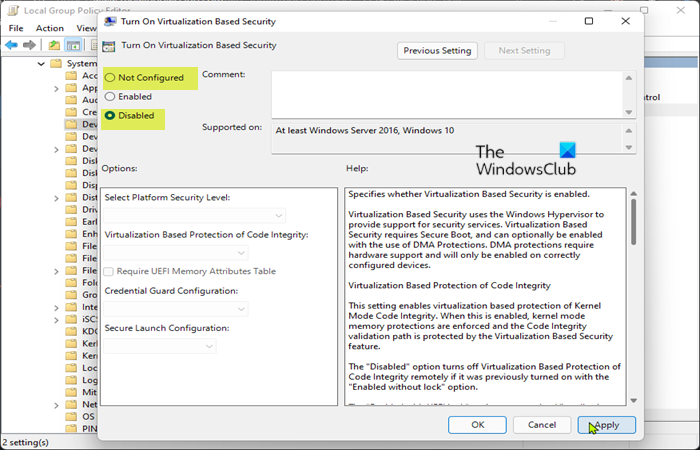
- Edit the Turn On Virtualization Based Security GPO to set Secure Launch Configuration to Disabled.
To disable Virtualization Based Security on your Windows 11/10 device via Group Policy Editor, do the following:
- Press Windows key + R to invoke the Run dialog.
- In the Run dialog box type gpedit.msc and hit Enter to open Group Policy Editor.
- Now, use the left pane to navigate to the path below:
Computer Configuration > Administrative Templates > System > Device Guard
- At the location, on the right pane, double-click on Turn On Virtualization Based Security to edit its properties.
- In the open policy window, set the radio button to Disabled or Not Configured.
- Click Apply > OK to save the changes.
- Exit Local Group Policy Editor.
Hope this post helps you!
Related post:
- Your PC needs to be repaired, Error 0x0000098
- Error Code 0xc000000d, Your PC needs to be repaired on Windows
What do I do if I don’t have a BitLocker recovery key?
If you are unable to locate a required BitLocker recovery key and are unable to revert a configuration change that might have caused it to be required, you’ll need to reset your device using one of the Windows recovery options.
Why does my laptop keep asking for a BitLocker key?
BitLocker monitors the system for changes to the boot configuration. When BitLocker sees a new device in the boot list or an attached external storage device, it prompts you for the key for security reasons. This is normal behavior.
Related reads:
- Recovery Error code 0xc000000e, Your PC needs to be repaired
- Your PC Device needs to be repaired, Error Code: 0xc0000221.