This article lists the possible solutions to fix the error code 0xc1420121, We couldn’t install this feature update you may see on Windows 11 or Windows 10. One cause of this error is system file corruption. Some users have also stated that they started experiencing this error on their system after installing the Macrium Reflect software.

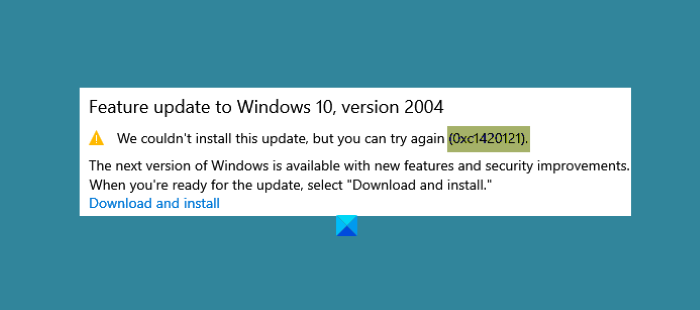
We couldn’t install this update, but you can try again (0xc1420121)
Error code 0xc1420121, Couldn’t install this Windows Feature Update
If you are experiencing the same error, the following troubleshooting methods may help you:
- Run the Windows Update Troubleshooter.
- Follow standard resolution process for fixing Windows Upgrade errors
- Update Windows using Media Creation Tool.
- Tweak registry settings.
- Check Windows Update Log files
1] Run the Windows Update Troubleshooter
Windows Update Troubleshooter is developed by Microsoft Corporation. Running this troubleshooter is helpful in case you receive an error while downloading or installing the Windows update.

Follow the below-listed steps to run this tool:
- Open the Settings app and click on Update & Security.
- Now, click Troubleshoot on the left pane.
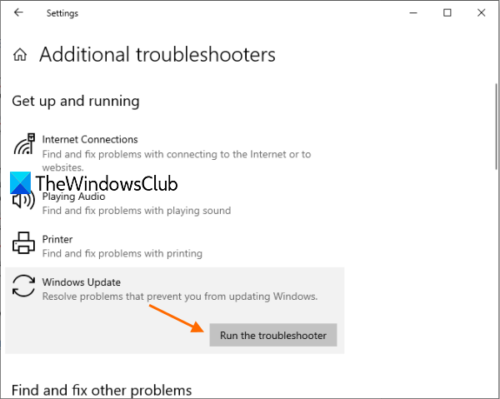
- After that, you will see the Additional Troubleshooters link on the right pane. Click on it.
- Click Windows Update and then click on the Run the Troubleshooter button.
When the troubleshooting process gets completed, check if you are able to install Windows 11/10 feature update.
2] Follow standard resolution process for fixing Windows Upgrade errors
The standard resolution process for fixing Windows Upgrade errors include:
- Verify at least 16 GB of free space is available
- Disconnect all external hardware
- Disable or uninstall non-Microsoft antivirus and nonessential software
- Free up disk space
- Update firmware and drivers.
Finally, run the Windows Upgrade process. If this fails, read on for some more ideas.
3] Update Windows using Media Creation Tool
If the above method did not solve your problem, you can try installing Windows Update by using the Media Creation Tool.
You can download this tool from Microsoft’s official website. After downloading this tool, run it and select Upgrade This PC Now.
4] Tweak registry settings
According to the feedback of some users, they started facing this error after installing the Macrium Reflect software on their system. In some cases, Macrium Reflect software changes the registry settings due to which the user gets Windows 10 update fail error code 0xc1420121.

If you also have installed the Macrium Reflect software, you should check the following registry setting and change it if required:
Launch the Registry Editor by typing regedit in the Run dialog box. After launching the Registry Editor, copy the following path and paste it into the Registry Editor address bar. Press Enter when you are done.
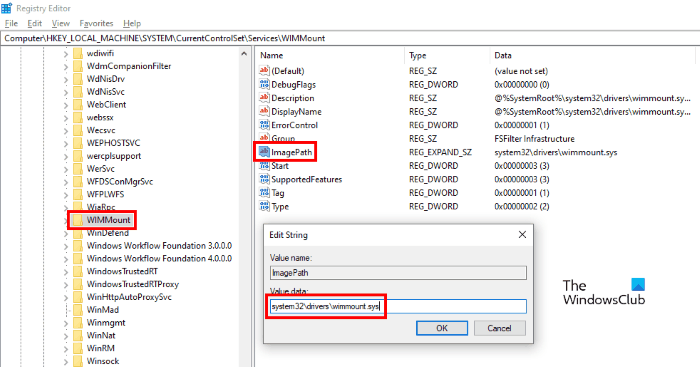
HKEY_LOCAL_MACHINE\SYSTEM\CurrentControlSet\Services\WIMMount
Now, on the right pane, you will find a String, named as ImagePath.
Double-click on it and check whether its Value Data box shows the following Value or not.
system32\drivers\wimmount.sys
If you find the ImagePath string Value other than what we have listed here, change it. After that, click OK to save the settings and restart your computer.
This should fix the error.
5] Check Windows Update Log files
When Microsoft rolls an update for Windows 11/10, the upgrade process creates tons of log files in every step. These log files are useful for analysis if there is any Upgrade problem. While it may not find it easy to analyze, it’s a gold mine for IT admins. This post will show you where to find Windows Update or Upgrade Log files.
Related posts: