If when you run an .msi package to install a program or application on your Windows 11 or Windows 10 computer and you get an error prompt with the message Error 1935 An error occurred during the installation of assembly component, then this post is intended to help you with the most suitable solutions you can easily apply to fix the error on your system.
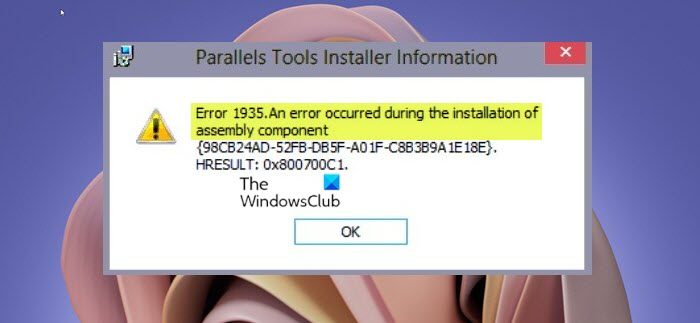
When this error occurs, you’ll receive the following similar error message and code;
Error 1935.An error occurred during the installation of assembly component
{98CB24AD-52FB-DB5F-A01F-C8B3B9A1E18E}.
HRESULT: 0x800700C1.
Note that the component and HRESULT values may be different.
Error 1935 An error occurred during the installation of assembly component
If you are getting the prompt displaying Error 1935 An error occurred during the installation of assembly component during a program installation on your Windows 11/10 PC, you can try our recommended solutions below in no particular order to resolve the issue on your PC.
- Restart PC
- Run Program Install and Uninstall Troubleshooter
- Run the MSI Installer in Compatibility Mode
- Make sure Windows Installer Service is running
- Repair/Reinstall/Update .NET Framework
- Install or Update Visual C++ Redistributable
- Clean Boot system and run Installer
- Run SFC and DISM scan
- Delete AppModel registry subkey (applies to Microsoft Office)
Let’s take a look at the description of the process involved concerning each of the listed solutions.
Before you proceed, check your system architecture and then make sure you’re running the 32-bit or 64-bit version of the MSI installer as the case may be. In addition, check for updates and install any available bits on your Windows 11/10 device and see if the error reappears when you run the .msi installer. On the other hand, if the error started after a recent Windows update, you can perform System Restore or uninstall the update – but if you prefer not to do neither, you can then go ahead with the solutions below.
1] Restart PC
If you get the error message Error 1935 An error occurred during the installation of assembly component when you install any program or software on your Windows 11/10 device, restart the computer and try to run setup again as a quick first step. If the error still appears after restarting the computer, you can try these other methods described in this post to fix the problem.
2] Run Program Install and Uninstall Troubleshooter
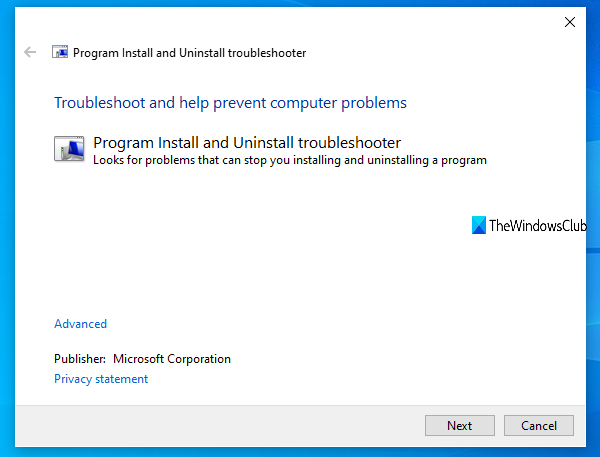
The Program Install and Uninstall troubleshooter fixes corrupted registry keys and is designed to help PC users automatically repair issues when blocked from installing or removing programs on Windows 11/10 system. This solution requires you to run Program Install and Uninstall Troubleshooter from Microsoft and see if the issue in hand is resolved. Otherwise, try the next solution.
3] Run the MSI Installer in Compatibility Mode
In some cases, especially with older applications, these programs need to work in Windows compatibility mode. This solution requires you to run the MSI Installer in Compatibility Mode to see if error in highlight is trigger due to a compatibility problem.
4] Make sure Windows Installer service is running
The MSI file format used by Windows Installer (MSI) is used specifically for installation – this differs from the EXE file format sometimes used to run installers, which are simple executable files that can be programmed to run any number of tasks.
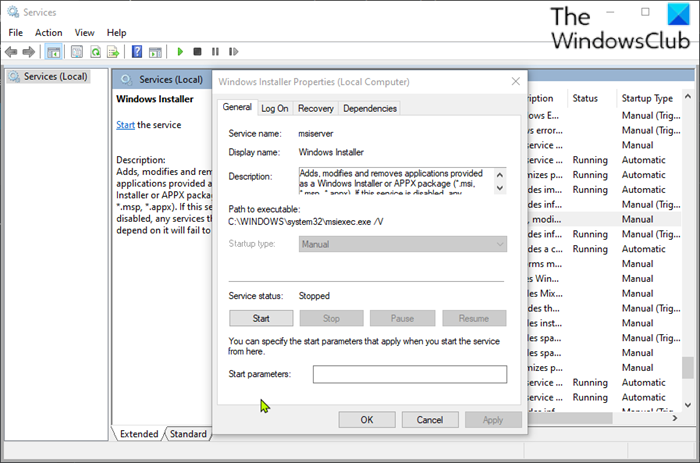
The error in view can occur if the Windows modules installer isn’t running on the system. Since it handles installing system modules from applications, without it running, there’s a chance that essential components aren’t installed. So, to rule out this possibility as a potential culprit, you need to ensure that the Windows Installer Service is enabled. However, if the service is running but the issue persists, you can unregister and re-register Windows Installer Service. Here’s how:
- Press Windows key + R to invoke the Run dialog.
- In the Run dialog box, type cmd and then press CTRL + SHIFT + ENTER to open Command Prompt in admin mode.
- In the command prompt window, type the command below and hit Enter to temporarily unregister the Windows Installer service:
msiexec /unreg
- Once the command is processed successfully and you get the success message, input the following command and hit Enter to register the Windows Installer once again:
msiexec /regserver
Once the second command executes, restart your computer once again, and run thwe MSI installer once more and see if the error reoccurs. If so, try the next solution.
5] Repair/Reinstall/Update .NET Framework
The issue in view could be due corrupted .NET Framework installation on your system. In this case, to fix the error, you can repair .NET Framework. If repair didn’t work, you can use the .NET Framework Setup Cleanup tool to completely remove selected versions of the .NET Framework from your computer. Afterwards, you can download the latest version of .NET Framework and install on your Windows 11/10 PC.
6] Install or Update Visual C++ Redistributable
Games and other applications that feature 3D graphics require additional components like drivers and Microsoft Visual C++. This solution requires you to make sure the latest version of Visual C++ Redistributable Package is installed on your system before you run the MSI installer for the program you’re trying to install on your device.
If both the latest version of Visual C++ Redistributable and .NET Framework are installed on your system but the error isn’t fixed, you can try the next solution.
7] Clean Boot system and run Installer
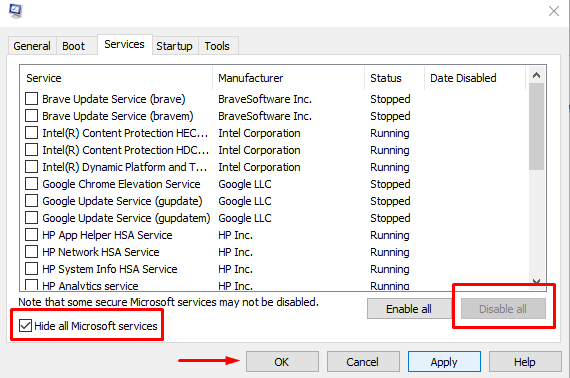
Performing a Clean Boot can remove any conflicts that occur during your software installation – this means starting your Windows 11/10 computer with minimum required drivers and programs. This solution requires you to clean boot your system and run the program installer in that system state and see if the error prompt reappears.
8] Run SFC and DISM scan
This solution requires you run SFC scan and see if that helps – and depending on the outcome of the scan, you may need to run DISM scan as well. If you prefer, you can run the SFC and DISM scan in tandem by following the instructions in the post “The system detected an overrun of a stack-based buffer in this application“.
9] Delete AppModel registry subkey (applies to Microsoft Office)
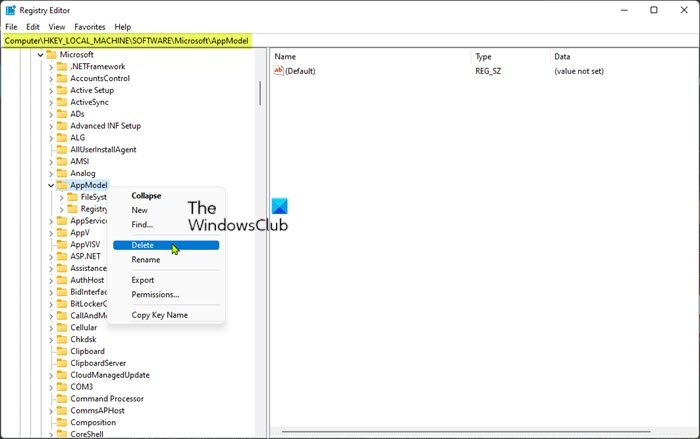
This solution specifically applies to the error during Microsoft Office installation. Deleting the AppModel registry subkey should allow you to successfully install Office on your Windows 11/10 device.
To delete AppModel registry subkey, do the following:
Since this is a registry operation, it is recommended that you back up the registry or create a system restore point as necessary precautionary measures. Once done, you can proceed as follows:
- Press Windows key + R to invoke the Run dialog.
- In the Run dialog box, type regedit and hit Enter to open Registry Editor.
- Navigate or jump to the registry key path below:
HKEY_LOCAL_MACHINE\SOFTWARE\Microsoft\AppModel
- At the location, on the left pane, right-click the AppModel subkey.
- Select Delete from the context menu to delete the registry key.
- Exit Registry Editor.
- Restart PC.
That’s it! Hope this post helps you.
Related post: InstallShield Error code 1722 while installing MSI program
How do I resolve error 1935 in QuickBooks?
To fix QuickBooks Error Code 1935, follow these steps:
- Firstly, Reboot your system.
- Start the installation once again.
- Disable your antivirus software (if any).
- Start again with the installation of QuickBooks.
- Enable your antivirus program after the installation is complete.
Related: Error 1935 when you try to install Office or other Programs
How do I fix error 1935?
Generally, to fix error 1935 on Windows 11/10, try any of the following suggestions:
- Install Windows updates.
- Install or update the latest Microsoft Visual C++ redistributable.
- Run the installer in compatibility mode.
- Enable the Windows modules installer service.
- Check the Windows Registry.
Happy computing!
Leave a Reply