When trying to attach a data disk to a Hyper-V VM, we encountered an error even though the disk initially worked perfectly. This error seems to be triggered by the virtual disk and not the virtual machine, however, in this post, we will investigate in detail what you can do if you encounter an error applying Hard Drive changes in Hyper-V.
Error applying Hard Drive changes
Failed to add resources
Cannot add filename. The disk is already connected to the virtual machine
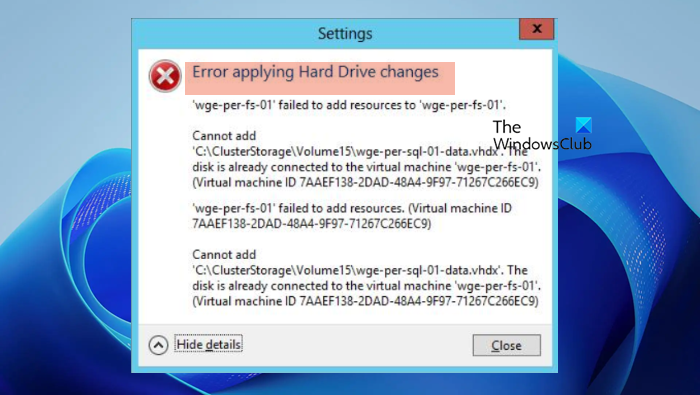
Fix Error applying Hard Drive changes in Hyper-V
If you encounter an error while applying changes to the Hard Drive in Hyper-V, make sure you have the necessary permissions to modify the VM’s hard drive. Ensure that you are logged in with administrative privileges. Additionally, it is crucial to ascertain that there is enough free space on the host machine’s hard drive where the VM files are stored. If the disk is at capacity, you can change the location of the hard drive to some other volume.
If you have all the required permissions and enough space but are encountering this issue, you need to follow the suggestions mentioned below.
- Check if any other VM is using the same disk
- Configure SCSI Controller or IDE Controller settings
- Reinstall the hard drive or CD/DVD
- Download a fresh hard drive from the source and attach it
Let us talk about them in detail.
1] Check if any other VM is using the same disk
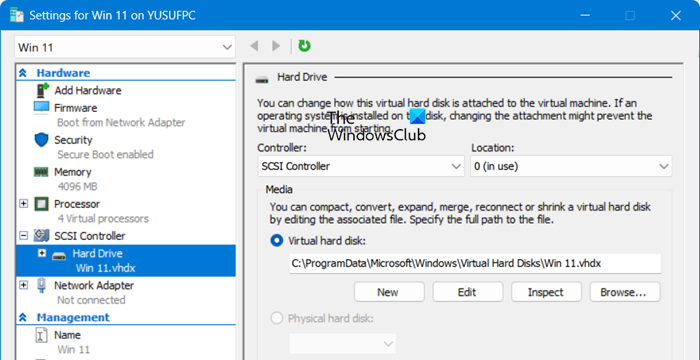
You must ensure that no machine other than the designated one uses the same disk. If another virtual machine uses the same disk, you will have to remove it or use a different disk for your new VM. To do the same, right-click on the virtual machine you want to investigate and select Settings. Go to the Hard Disk and find the location of the drive along with its name.
2] Configure SCSI Controller or IDE Controller settings
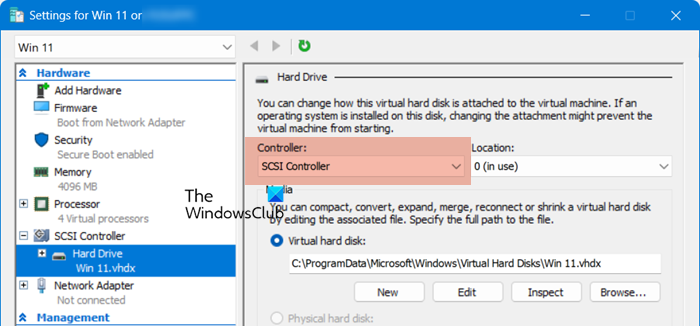
Virtual SCSI controllers allow the VM to access SCSI disks. Each SCSI controller can support up to 64 devices. The SCSI path is not emulated, making it the preferred controller for any disk other than the OS disk. Since we are facing an issue mounting the hard drive, we will configure the settings and select the correct controller. To do the same, follow the steps mentioned below.
- Open Hyper-V Manager.
- Right-click on the virtual machine and select Settings.
- Now, go to the SCSI Controller option, expand it, and select Hard Disk.
- Go to Controller and select a different from the drop-down menu.
Finally, try connecting to your virtual hard drive to your machine and see if the issue is resolved.
3] Reinstall the hard drive or CD/DVD
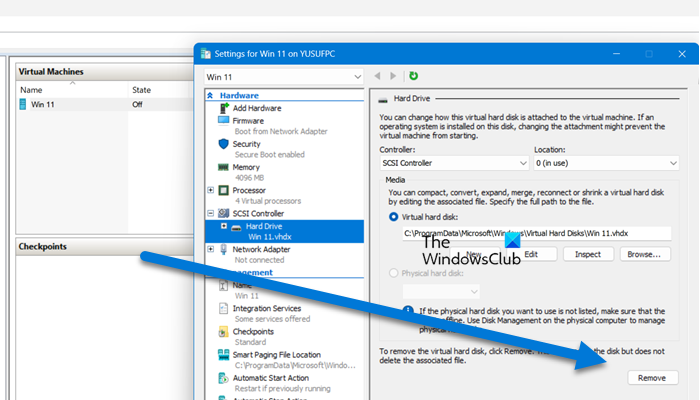
Next up, we are required to remove the same hard drive or CD/DVD and then attach it again. Sometimes, the issue can be triggered by a glitch that can be easily resolved by reinstalling the drive. To do the same, follow the steps mentioned below.
- Open Hyper-V Manager.
- Right-click on the virtual machine you want to configure and select Settings.
- Now, go to Hard Drive (or DVD Drive) and click on the Remove button to detach the drive.
- Once the drive is removed, again go to VM Settings > Hard Drive.
- Click on Browse and add the hard drive.
Hopefully, this will do the job for you.
4] Download a fresh hard drive from the source and attach it
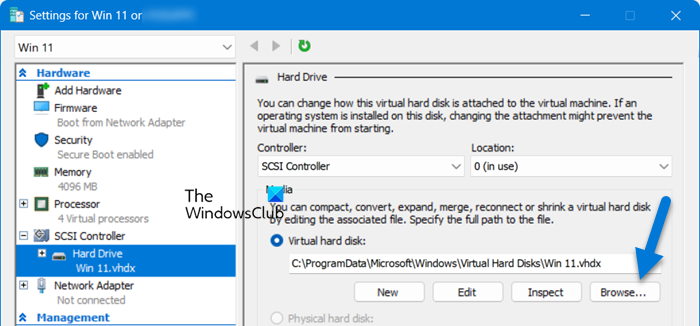
If your organization has provided you with a hard that you have to download and attach, there is a possibility that some issues occurred during the downloading process. In that case, we recommend you delete or rename the existing copy of the drive and attach it to your computer. So, go to the source portal and download the drive. Once done, we need to attach it to the system. For that, you can follow the steps mentioned below.
- Right-click on the virtual machine you want to attach the drive to and select Settings.
- Now, go to SCSI Controller or IDE Controller, and click on Hard Drive.
- From the Virtual hard disk section, click on Browse, navigate to the folder where your hard drive is located, and select it.
- Once the virtual hard drive is attached, boot the virtual computer and check if the issue is resolved.
We hope that you can resolve the issue using the solutions mentioned in this post.
Read: How to enable Hyper-V on Windows 365 Cloud PC?
How do I change the Hard Drive in Hyper-V?
To change the hard drive of a virtual machine in Hyper-V, you need to configure the virtual machine’s settings. So, open Hyper-V Manager, right-click on the virtual machine, select Settings, go to Hard Disk, click Browse, and select the Hard Drive.
Read: How to install macOS in Hyper-V on Windows
How to use external Hard Drive in Hyper-V?
To add an external hard drive in Hyper-V, you need to make it offline. So, open the “Disk Management” utility by searching it out of the Start Menu. Then, right-click on the external hard drive and select Offline. You can then add the hard drive to a virtual machine by using the steps mentioned earlier.
Also Read: External Hard Drive not showing up or detected in Windows.
Leave a Reply