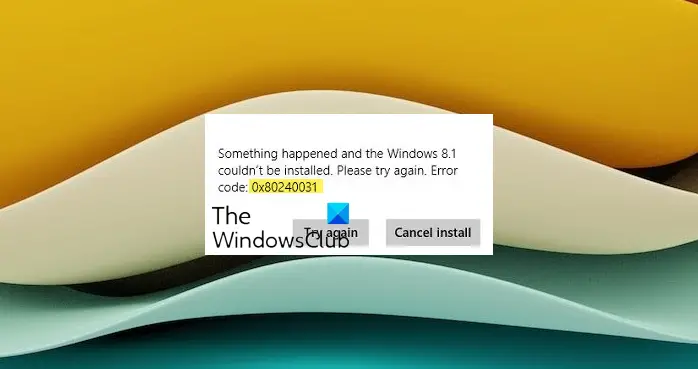
In this post, we will show you how to fix Something happened and the Windows couldn’t be installed. Please try again. Error code 0x80240031 while upgrading to the latest version of Windows. For some, this has turned out to be an exercise in frustration, with some users getting an error code 0x80240031. There appears to be no universal quick fix available for the error code as of now.

Windows couldn’t be installed, Error code 0x80240031
The error code plaguing many Windows (seems evident from the numbers seeking support via Microsoft’s support forum) users are at best, annoying because, the error pops up when the Windows update download reaches up to 50%.
The two buttons – ‘Try Again’ and ‘Cancel’ offered, seem of little or no use.
Why does the error code pop up?
Although it is difficult to determine the exact cause of the problem, experts suggest the code shows up commonly due to corrupted or damaged registry files, malware or spyware infection, old or outdated Windows driver, file system corruption and most importantly ‘Unfinished installation of Windows / improper maintenance cause.
This can lead to events such as the program failing to run, system freezing, system start up the problem, and system shut down problems. Follow these steps and see if it works.
1] Install the latest Updates and Drivers
Make sure that you have the latest drivers installed for your Windows machine. Also, I would suggest you install all the available Windows Updates, including the optional updates for drivers.
2] Uninstall or Disable Antivirus
If the above solution fails, uninstall Antivirus software and then try to upgrade to Windows 8.1. See if it helps.
3] Use the SFC /SCANNOW
To run the system file checker,
- Press the Windows button + X on your keyboard; a mini-dialogue box will appear
- Choose Command Prompt (Admin). You must run the command prompt in Administrator level
- On the command prompt type sfc /scannow and hit Enter.
- If everything goes okay and no errors are found, restart your computer and try updating again
- If errors were found, try to fix it using DISM.
- On the same command prompt window type Dism /Online /Cleanup-Image /RestoreHealth. Details on this here.
- After the repair is complete, restart your computer and try to update now.
4] Try Automatic Repair
- Go to ‘Search’. There, select “Settings” found on the right side and type Advanced Startup Options and hit enter.

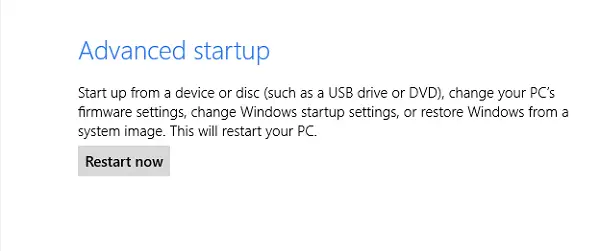
- The action will open the PC Settings in General category. Scroll down and look for “Advanced Startup” and click Restart Now.
- Next, choose ‘Troubleshoot’ > Advanced options and finally hit Automatic Repair.
5] Reset Your PC
Follow the above steps until you land on the Settings in General category. Scroll down and look for “Reset your PC without Affecting your Files” and click Get Started when you are ready. Follow the instructions!
I hope something helps!
NONE of these have helped. I have literally counted how many times I’ve tried to complete the download of 8.1
I have every single driver/update installed. NO anti virus software, or malware, adware, etc program on my brand new (5 days old laptop). There is NO excuse for such a horrible problem. Microsoft just continues to release new software after new software with ZERO desire to make just ONE Operating System that actually works problem free. What a huge disappointment. You name it (scan now, clear the store cache, etc..) I’ve tried to complete the download and NOTHING works. I have tried refreshing my pc also I have completely restored my laptop to the exact, day I took it out of the box condition from 5 days ago, reinstalled every download, update etc and yet STILL I have now got to the 50% mark, twenty three times and it fails. YES 23 times later and it STILL fails. Every day I attempt the “update” to 8.1 you name it 7 am, 8 pm, 3:45 am, anytime of day or night……its ALWAYS a failure with the good ole “Something happened and the Windows 8.1 could not be installed. Please try again. Error code 0×80240031”
**I’d love for ANYONE to post a fix that’s guaranteed to work, because despite more than twenty five thousand complaints of THIS exact error being displayed at the 50% mark, Microsoft has no fix or “experts” who can provide a fix.
I ran across your posting and another and found Antivirus could certainly be the main reason preventing the update process. thankx to the online resources they help Us getting out of this frustration and annoying Microsoft Stuff :/!! I turned off my AVG security program 2014 and then again started updating to Windows 8.1. Worked Great (y) :D
i’m up to 53% so seems i won’t have that problem…thank god because at 3.8 gig for the dowlnoad i surely don’t want to have to do it more than one time
I really don’t understand why all the fuss about 8.1 I’ve upgraded and had i known what i now know i would have simply kept 8.0
Perhaps something here may help you: https://www.thewindowsclub.com/your-windows-8-1-install-couldnt-be-completed
Guys, The below link helped me to update from win 8 to win 8.1. Hope this may help you.
http://au.ibtimes.com/articles/545049/20140326/windows-8-1-update-issues-fix.htm#.UzVg6PQW1jI
Hi guys, I met this problem took me 10 hours to try. Finally simply fix, use cable for your internet connection, no WIFI. smooth as silk. 100% cure.
^^ Thanks for updating us with the solution, may be helpful to others :)
This link fix my same issue : http://www.microsoftsupportchat.com/blog/post/error-code-0x80240031-0/
Hey i have faced the same problem but i resolved the problem with the help of this link.
http://goo.gl/WdbW1W
For Windows8 Tech Support
contact on 1-800-935-0537
http://www.computertechsupport.us/
For me this solution worked
Just Go windows key + R
type : wsreset.exe
it will reset your cache
got it from http://thebestlaptops.net/how-to-fix-windows-8-1-update-error-code-0x80240031-laptop/ in comments section
i think you just have an edition of windows 8 that doesnt support updating, then you try to activate your windows using a software..
NONE of these have helped. I tried so many times in so many ways but i didn’t find any solution even microsoft support. only solution for this is just try upgrade using any wireless networks(not Through LAN)
I think exactly like you…
i have this error in windows 10 and i only get the retry option