If you want to check the ping status of your current internet connection, Whois details of a domain or IP, analyze website header, etc., you can use this free software called eToolz. This portable software includes several network-related functionalities so that users can perform various tasks from the same window. Let’s take a look at this tool and the features it offers.
eToolz All-in-one networking software
eToolz comes with various tools to perform different network-related jobs. Some of the essential features are mentioned below-
- DNS: You can check the DNS (Domain Name System) records of a domain or IP address. It shows Name Server, MX records, TXT, etc.
- Ping: If you can’t open a website or your internet connection has some issues, you can check the ping status.
- MultiPing: If you have an IP range (e.g., 10.10.10.10 – 10.10.10.50) and you want to check the ping status of each IP address, you can use the MultiPing functionality. This is better and less time-consuming than checking one IP at a time.
- Trace: It shows the tracing route.
- Whois: If you want to check the registration details of a domain name or IP address, this option will let you do that.
- Mail-Check: It helps you check if an email ID is valid or not by revealing the assigned MX records and more.
- Header Analyzer: This option will assist you in parsing and showing the header of an email message.
- HTTP-Header: If you want to check the HTTP status code of a website, you can use this option.
- Time: This simple option shows the time of various NTP servers. You can set that as your system time, as well.
- Flush DNS cache. You can flush the DNS cache.
Since it is a portable software, it doesn’t require any installation. Download the tool to your computer, unzip the file, and double-click on the executable file to open eToolz.
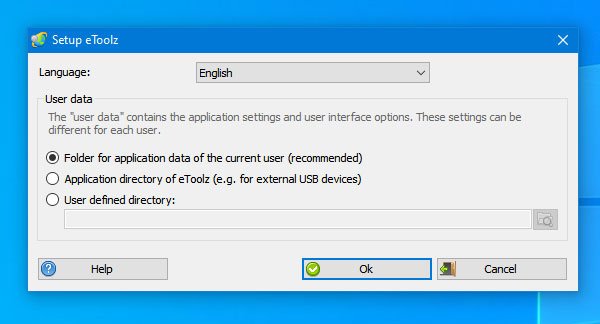
From here, you need to choose the first option that says Folder for application data of the current user and click the OK button. After that, the following window will appear-
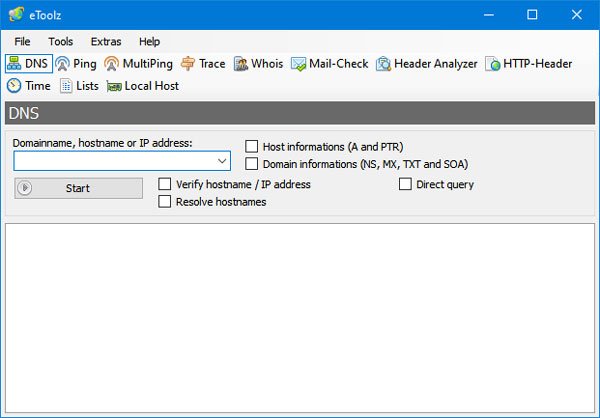
Now you can switch between tabs to use different tools.
1] DNS:
To use the DNS tab, you need to enter a domain name, hostname, or IP address so that it can fetch the data and show you the background information. You can select either Host informations (A and PTR) or Domain informations (NS, MX, TXT and SOA). After filling up the empty box, click the Start button.
You should find all the DNS records of that IP or domain name right on your screen.
2] Ping/MultiPing:
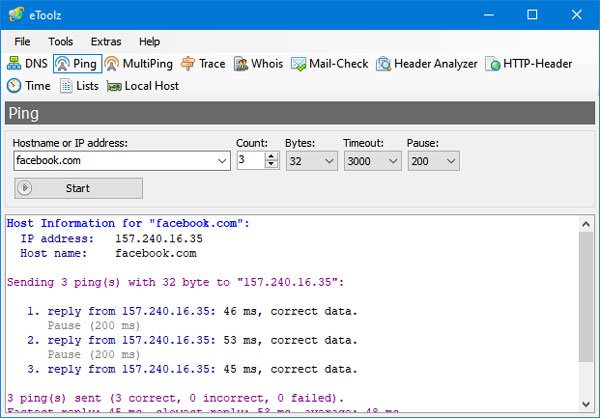
This does the same job, but the MultiPing option is not available for the domain names. If you want to check whether a website is live, you can visit the Ping tab, enter the website name, and click the Start button. If you get the ‘correct’ reply, the website is up and running.
If you want to check the ping status of a range of IP, you need to enter that range in the MultiPing tab and click the Start button.
3] Whois:
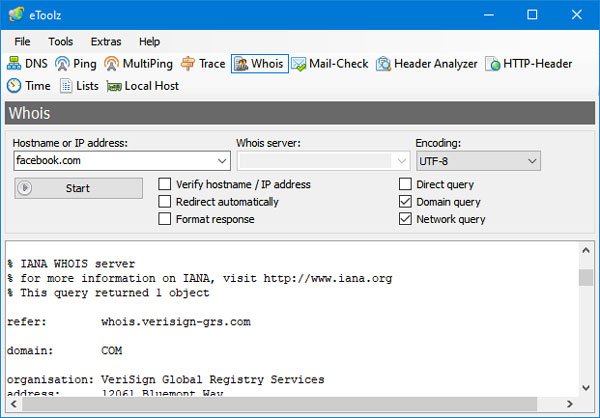
If you want to check the contact information or all the other registration retails of a domain name or IP address, you can switch to the Whois tab and enter the domain name or IP address. After clicking the Start button, it will show all the information on your screen.
For your information, you may not get anything correctly if the owner is using the ‘Privacy Protection’ facility provided by the domain registrar.
4] Mail-Check:
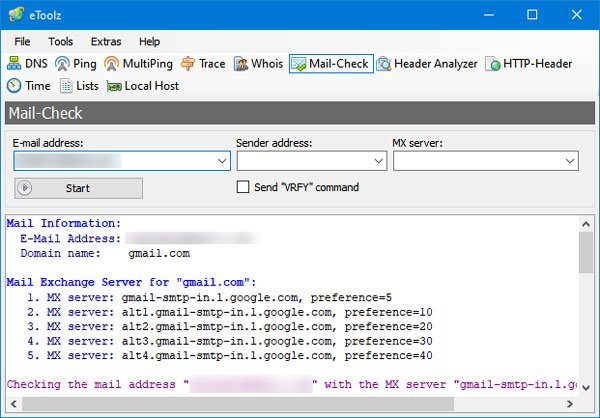
In this tab, you need to enter an email address that you want to verify. As a result, you can find the assigned MX records, IP address, etc. If this tool does not display anything, it indicates the invalidity of that email address.
5] HTTP-Header:
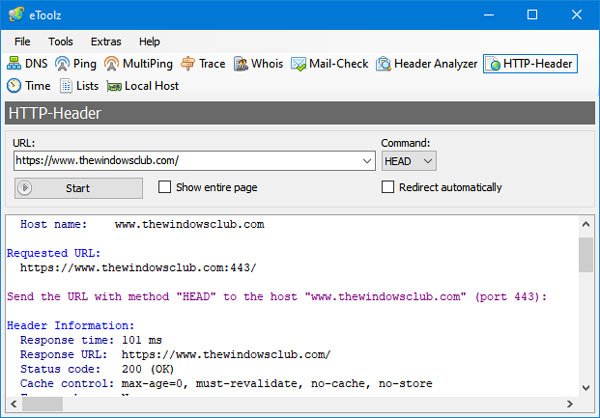
This functionality helps you check the current HTTP status code and message so that you can see if your website is functioning correctly or not. You need to enter the full URL of your website and click the Start button. If you are using HTTPS, you need to include that as well. Otherwise, it may show 301 (Moved Permanently) as the Status Code.
6] Time:
As mentioned earlier, the Time tab helps you check the time of various NTP servers and allows you to set the time accordingly. For that, visit the Time tab, and select a server that you want. After clicking the Start button, it will show you the server time. Following that, you can click the Set System Time button to set that server time as the default time of your computer.
7] How to flush DNS cache on Windows?
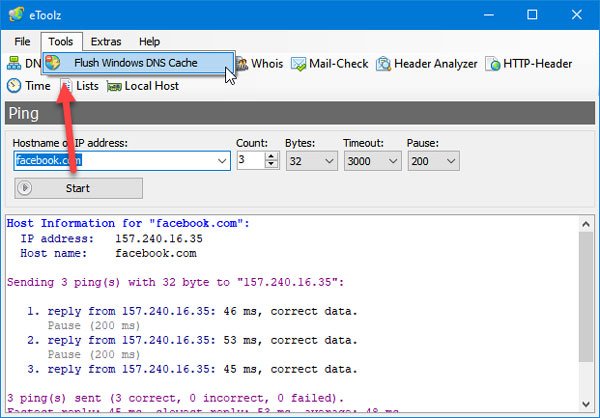
If you have made some changes related to the internet and networking and you want to flush the DNS cache, you can go to Tools > Flush Windows DNS Cache. It will perform the job automatically.
If you like, you can download this free software from the official download page.