When creating videos for the web on YouTube or other platforms, it’s important to note that you need all the best tools you can get your hands on. Now, chances are you’re a person who is unable to afford the premium tools, so with that in mind, we’re going to talk about Express Animate.
This tool is for animators who want to add some flare to their videos. With it, users can create object animations, special effects, video transitions, and much more. From our days of using this Windows 10 software, we’ve come to several conclusions, and we’re going to talk about them today.
How to use Express Animate video editor

Once you’ve downloaded the tool, go on ahead and begin the installation. You’ll see a window that asks if you want to install optional software. You can do this if you want, but we’re not going to talk about those tools today.
After skipping or choosing to install the tools, Express Animate will complete the installation. The program will automatically open the editing tool which is where you’ll be doing most of your work.
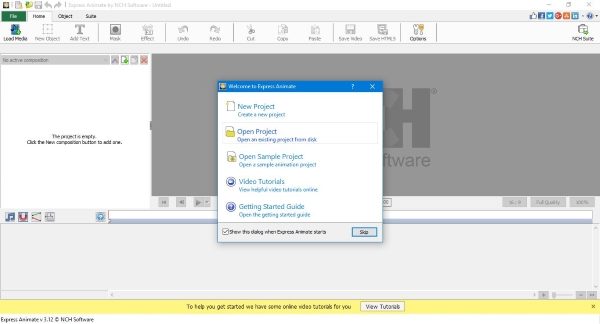
Here you can choose to create a new project, open an existing project, or open a sample project.
Editing videos

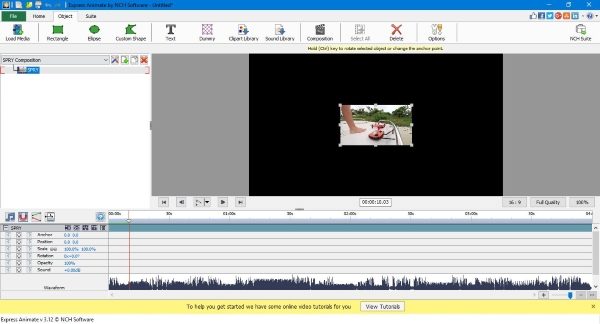
If you’ve used other video editing programs before, then you should have little problems getting around the user interface of Express Animate. It’s not flashy, but it is functional, and that’s more important than a pretty face.
To edit a video, click on Local Media, navigate to your video folder, and import your preferred file into the program. Once added, the video will automatically show up in the timeline, and from there, users can trim or add other objects to the video.
For example, click on the option that says Object at the top, and select any object you’ll like to be a central part of your video. You can also add text, clip-art, sound, and much more. Now, folks won’t come across a ton of features, but what is on offer here is good enough for the amateur.
For more options, click on Home and choose the FX Effect feature where you can install several special effects into your video.
To add an effect, right-click on the video in the timeline, then select Add a new animation key. This should highlight the FX Effects button, and from there, you can use it to add whatever effects you want.
Produce your video

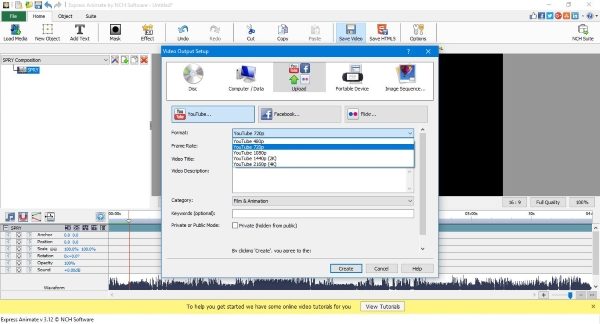
After editing your video, it’s now time to produce it and upload it to the internet. What you need to do, is click on Home, then select Save Video. Here, you’ll have five options to choose from, and they are as follows:
- Disc
- Computer / Data
- Upload
- Portable Device
- Image Sequence
If you’re a YouTuber, click on Upload, then decide the resolution of the video and then upload to YouTube directly from Express Animate. If you want, you can even upload your videos to Facebook or Flickr.
The only downside we came across here, is the fact that it takes longer to render than some other video editors, but the upload time is all based on the speed of your internet connection.
Overall, this is a good enough tool that works as it should. Not a lot of features, but if you only want to do basic video editing, then Express Animate is more than good enough for your needs. Download Express Animate right now via the official website right here.
Read next: Best Free 2D & 3D Animation Software for Windows.