When you enable Extended Security Updates (ESU) for Windows Server, your organization will receive several years of updates beyond the actual support cycle of the Server. This not only saves cost but also gives more time to migrate to a newer version of Windows Server. In this post, we will see how to get and deliver ESU for Windows Server.
Get Extended Security Updates (ESU) for Windows Server

ESUs are automatically provided to Azure Arc-enabled servers and non-Azure servers connected to Azure Arc. ESUs can be enrolled at scale using Azure Policy or the Azure portal with no upfront charge. Monthly billing occurs via the Azure subscription, and product keys don’t need to be activated.
Starting in September 2023, you can conveniently activate Windows Server 2012 and 2012 R2 ESUs through Azure Arc. You can seamlessly connect your Windows Server 2012 and 2012 R2 servers to Azure Arc, and discover the benefits of connecting hybrid machines with Azure Arc-enabled servers. On Windows Server 2012 and 2012R2 Arc-enabled servers, you can follow the steps below to prepare your device.
- Go to login.microsoft.com and sign into Azure Portal.
- Search for Servers – Azure Arc and open the matching entries.
- You can then add your server machine to Azure Arc.
If you can’t connect to Azure Arc to apply ESUs, access the MAK or Microsoft Activation Key from the Windows Admin Center.
- First of all, go to your Microsoft 365 Admin Center and sign in.
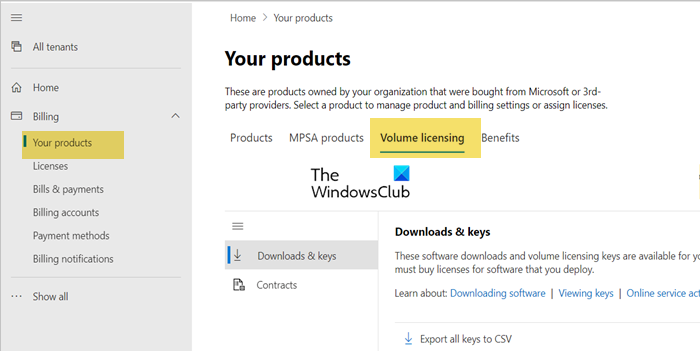
- Now, navigate to Your products > Volume licensing > View contracts.
- To view your product keys, select the agreement number associated with your ESU purchase, click on the three dots next to it (More Actions icon), and then choose View product keys. This page will display all the product keys linked to your agreement.
- After accessing the MAK Key, you can install it on new servers.
Now that we have learned how to get ESU, let’s see how to deliver it. To deliver ESU, follow the following guides.
Manage and create an Azure License

First, we are going to provision the ESU license from Azure Arc for the outdated Windows Server and then link it to multiple Arc-enabled servers. You can follow the steps given below to do the same.
- First of all, go to Azure Portal.
- Navigate to Azure Arc page.
- Now, go to the Extended Security Updates tab to see all the eligible resources.
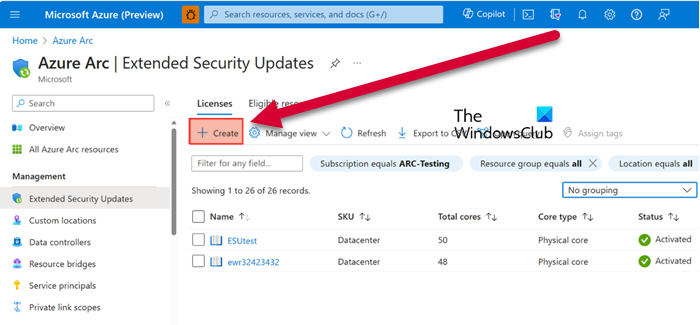
- To create a new license, click the Create button and populate all the fields with the required information.
- Then go through it and click on the Create button again to add it to the list, you will see a new license added there.
That is how you create a license.
Read: Add Group Policy Management Console in Windows Server
Link your resources to the newly created license

Now that we have created the license, we must link our resources. These resources will leverage the protocols mentioned in the license and will get Extended Security Updates after the expiration of their support cycle. To do so, follow the steps mentioned below.
- In Azure Portal, go to the Extended Support Updates tab.
- Now, click on the Eligible Resources tab.
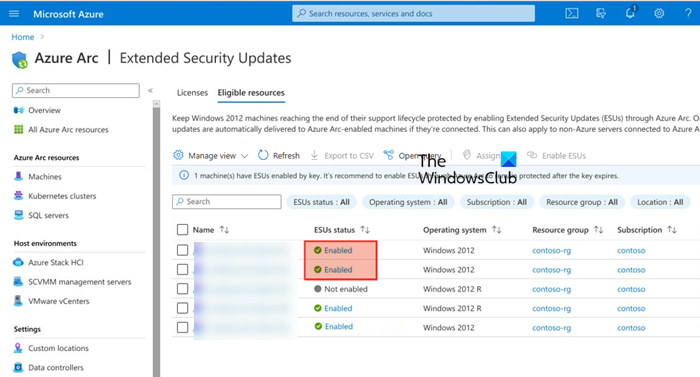
- Here are all Arc-enabled machines running Windows Server 2012 and 2012 R2 that are eligible for extended support.
- You can select one or more resources from the list by ticking their respective checkboxes.
- Then, click on Enable ESUs.
- The Enable Extended Security Updates page displays the count of machines chosen for ESU activation and the available WS2012 licenses to apply. Choose a license to associate with the selected machine(s), then click on Enable.
Once done, you can review the status of the machines. Their ESU status will say “Enabled”.
Certain instances may qualify your server for Extended Security Updates (ESUs) patches at no extra cost. They are Development/Test (Visual Studio) and Disaster Recovery (DR instances entitled from Software Assurance or subscription only). Both scenarios require the customer to already utilize Windows Server 2012/R2 ESUs activated by Azure Arc on billable, production machines.
That’s how you can enroll for Extended Security Updates and deliver them to all eligible resources.
Read: How to connect Windows Server to Azure?
What is the difference between Extended Security Update and Extended Support?
Extended Support and Extended Security Updates (ESU) are two different phases in the lifecycle of Microsoft products. In Extended Support, you will get the Mainstream support, which includes security updates and paid support; however, it won’t have new features or changes. On the other hand, Extended Security Updates (ESU) offers you important security updates beyond a product’s lifecycle.
Read: How to remove Roles and Features in Windows Server?
How to check if ESU is activated?
A server or Microsoft 365 admin can check the ESU status from the Azure Admin Center. They need to go to the Azure Admin portal and navigate to Extended Security Updates > Eligible resources. Here you can see all the resources for which the ESU is activated.
Also Read: Best Windows Server Tutorial and Tips.
Leave a Reply